A Random User
Guest
- Messages
- 3,554
- Reaction score
- 4,269


Guy Guidry and Myself doing demos at the Bonsai Society of Florida annual convention.
His tree was a Flowering Apricot. Mine a Juniper Procumbens Nana.
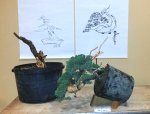
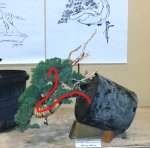
You can see by the 3rd picture that I loaded, that this tree's trunk was really comprised of just one big hook. For orientation... this photo would be from the back. What I wanted to do with the tree was to try and bring this bend that was there naturally, really in tight. To try and minimalize the size of the tree and compact it. In my opinion, Junipers can almost never be to compact. The more compact the tree ends up being, the more powerful the image.
The only problem was that right where I wanted to do the bend, there was an old wound to the tree, where someone had removed a rather large branch, and had cut it flush with the trunk. This was on the outside of the trunk, thus the outside of the bend... right where the trunk would want to normally break, even with a trunk in the best condition. Who knows why someone wanted to cut this flush, and more than likely it probably had not been done in stages, but all in one go.
So, not knowing how far within the trunk, or along the trunk, this area had died back I felt it best to use my trunk splitters and introduce a split into the pith or hardwood of the tree's trunk. The split wasn't to big, about an inch to 2 inches long, running vertical. I decided that this would be the best option, for a couple of reasons... first, if the trunk was to break, it would be limited to the outside of the split, and would not carry through to the inside. Secondly, it not only reduces the tension within the branch, but makes the bend a lot easier.
The area where I was to bend was then wrapped with raffia, which obviously included the area of the split that was created. No need for cut putty or paste, the raffia will keep the wound from drying out to fast. No wire was attached, seeing that the area was by now pretty flexible. I attached a guy wire and the branch was bent.
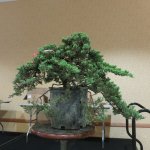
Once the bend was done it was then time to figure out a planting angle, a direction for the rest of the tree and foliage. I, as well as the audience settled on the angle that is apparent in the last photo. The far end of the trunk was jinned, and bent towards the sky. The apex was brought forward using guy wires as well and the other major branches were positioned. I did not get a chance really to even begin to fine wire. Did a bit just to demonstrate how it was done. And how to establish a pad and clean the underside. Someone suggested it would look good in a cascade pot... so I drew a picture with one. I not to sure if I would prefer it in one, but there you go. I think that with the fine wiring done, it will turn out to be a pretty nice tree. Has a pretty nice shape already. Sorry, that the final photograph is not more straight on, I somehow deleted the photo I took and this is from a friend. Thanks!
Last edited:


