markyscott

Imperial Masterpiece
Messages
6,122
Reaction score
21,420
Location
Delaplane VA
USDA Zone
6B
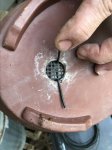
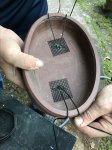
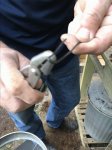
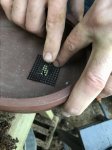
Press the two downward facing ends through the screen on the drainage hole. The clip should be oriented so that it doesn't interfere with the anchor wire (more on that in a minute).
IMG_7738.JPG

Pressing down on the two loop with your fingers, bend the bitter ends up on the bottom of the pot to hold the screen firmly in place.
IMG_7740.JPG

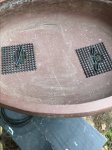
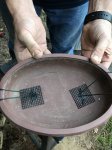
Repeat over the other drainage hole and cut off the excess wire.
IMG_7744.JPG
IMG_7745.JPG

See how the clips are oriented? That's because the anchor wire will enter tight against the interior of the drainage hole
 

markyscott

Imperial Masterpiece
Messages
6,122
Reaction score
21,420
Location
Delaplane VA
USDA Zone
6B
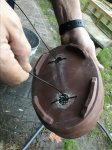
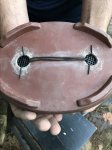
So for the anchor wire, cut it to length. The length of the wire should be about the inner diameter of the pot. Pre-bend the wire so that the bends are right at the inner edge of the drainage holes.
IMG_7727.JPG

One at a time, feed the wires through the drainage screen and lock them off.
IMG_7746.JPG
IMG_7747.JPG
IMG_7748.JPG

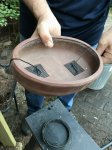
The wire should be tight across the bottom of the pot.
IMG_7750.JPG
IMG_7749.JPG
 

markyscott

Imperial Masterpiece
Messages
6,122
Reaction score
21,420
Location
Delaplane VA
USDA Zone
6B
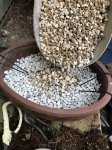
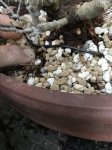
Now, add the drainage layer. If it's a shallow pot, skip it. If it's really deep, definitely use it.
IMG_7752.JPG

Then your substrate
IMG_7753.JPG
 

markyscott

Imperial Masterpiece
Messages
6,122
Reaction score
21,420
Location
Delaplane VA
USDA Zone
6B
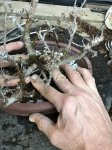
Leave a little mound of soil in the middle of the pot and position the tree in there. Settle it in by pressing downward on the nebari and firmly rotating it back and forth a bit while applying downward pressure on the rootball.
IMG_7754.JPG

Placement should be centered front-to-back and slightly off center side-to-side. There should be a bit more room on the side with the key branch on a single tree or the key trunk on a clump like this. Check it carefully by stepping back a few feet from the tree and checking the position. Make sure also that the height of the nebari is good. If it's too low, add a bit more soil. If it's too high, remove a bit.
IMG_7755.JPG IMG_7756.JPG
 

markyscott

Imperial Masterpiece
Messages
6,122
Reaction score
21,420
Location
Delaplane VA
USDA Zone
6B
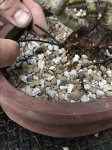
Once you're happy with the position, add a bit more soil. Just a little bit - we're trying to protect the roots, not fill up the pot yet. Once the soil is added, chopstick it in to the roots. Always keep a good grasp on the nebari when you're working in the pot.

IMG_7758.JPG
IMG_7759.JPG
 

markyscott

Imperial Masterpiece
Messages
6,122
Reaction score
21,420
Location
Delaplane VA
USDA Zone
6B
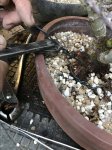
So the next part is a bit tricky to explain. What we're going to do is make a wire loop around the nebari. The wire needs to sit on thick roots or a thick part of the nebari to anchor it down. If I have a good rootball, sometimes I'll wedge a chopstick in to give the wire something to grab onto. The last piece of wire is the most important. When you tighten that down, you'll tighten the whole system. It's good to get in the habit of doing everything the same way. I always work my way clockwise around the rootball and I always try and place the last wire on the side opposite to the lean of the tree, or over the top of a large root, or in the back of the tree. So start by taking the first section of wire across the rootball or the nebari. Twist it together with the next wire. Where you twist it is important as you want to position the second wire so that it crosses the roots where the can provide a firm anchor.IMG_7762.JPG

Tighten a bit with your pliers.
IMG_7763.JPG

Working your way clockwise around the nebari, take one of the ends and twist it with the next wire in sequence, and then the third wire as well.
IMG_7764.JPG IMG_7765.JPG
 

markyscott

Imperial Masterpiece
Messages
6,122
Reaction score
21,420
Location
Delaplane VA
USDA Zone
6B
In the end, you'll have one extra wire without anything to attach it to. Cut off the all the excess wire, but save one long piece.
IMG_7766.JPG

Make a hook on one end.
IMG_7767.JPG

And feed the hook under the first wire you laid down.
IMG_7772.JPG

Twist it tight
IMG_7773.JPG

Then make your most important tie. Twist the wire you just attached to the last wire in the sequence. This is going to tighten down the entire works - it's very important. Pull, but as you twist relax the tension. Don't pull and twist at the same time - you risk breaking the wire if you do.
IMG_7773.JPG
 

markyscott

Imperial Masterpiece
Messages
6,122
Reaction score
21,420
Location
Delaplane VA
USDA Zone
6B
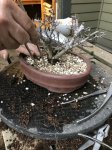
OK - home stretch. Add more soil and chopstick it in.
IMG_7779.JPG
IMG_7782.JPG

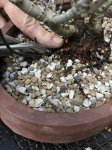
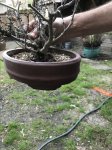
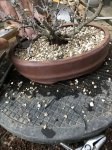
Holding the nebari with one hand, gently strike the side of the pot with the other to settle the soil in. Then, with the broom, brush away the excess soil. the soil surface should be flat and about 1/4" to 1/2" below the top of the pot.
IMG_7784.JPG

Tamp down the soil surface with the trowel. Press down firmly on the soil along the edge of the pot.
IMG_7787.JPG IMG_7788.JPG
 

markyscott

Imperial Masterpiece
Messages
6,122
Reaction score
21,420
Location
Delaplane VA
USDA Zone
6B
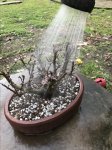
Next, water the plant thoroughly. Water until it runs out clean from the drainage holes.
IMG_7793.JPG

The first water that comes out will be very dusty. So let it run for a while. After a couple of hours, go and water it again - you'll see more dust come out. After that, we're done. Put it on the bench.
IMG_7795.JPG

As the weather warms up, I put some finer-grained soil on top and when it get's really hot I use some sphagnum moss as well.

NEXT!
 

Adair M

Pinus Envy
Messages
14,402
Reaction score
34,885
Location
NEGeorgia
USDA Zone
7a
Very good, Scott!

But...

The technique you described for wiring the tree in is used on 4 hole pots, not two holers. For a two hole pot, just run the wires from each side, and twist in the middle. Do one side a little, then the other. Go back and forth so each side has equal tension.

I do like the "cage" method you described when I have a 4 hole pot.

(Hint: this might be on Boon's test...)
 

markyscott

Imperial Masterpiece
Messages
6,122
Reaction score
21,420
Location
Delaplane VA
USDA Zone
6B
Very good, Scott!

But...

The technique you described for wiring the tree in is used on 4 hole pots, not two holers. For a two hole pot, just run the wires from each side, and twist in the middle. Do one side a little, then the other. Go back and forth so each side has equal tension.

I do like the "cage" method you described when I have a 4 hole pot.

(Hint: this might be on Boon's test...)

Dang - that's right. Hope he doesn't make me start over again.
 

Adair M

Pinus Envy
Messages
14,402
Reaction score
34,885
Location
NEGeorgia
USDA Zone
7a
Really very nice you should upload this to the guides. Many thanks to the photographer.
I think Scott does a great job with his tutorial posts!

Hey Scott! How about one dedicated to just how to properly wire rootballs to the pot, using all the different kinds of pots? One holed pots, two holed pots, threes, and fours.
 

0soyoung

Imperial Masterpiece
Messages
7,500
Reaction score
12,870
Location
Anacortes, WA (AHS heat zone 1)
USDA Zone
8b
I think Scott does a great job with his tutorial posts!
I agree.

Maybe @markyscott could further explain why he does a few of the things he does, like:
  • What is the point of the 'drainage layer' and why 'especially with a deep pot'?
    • Doesn't a 'drainage layer' just elevate the position of the saturation zone in the primary substrate? Why no just leave this zone at the bottom of the pot by not using a 'drainage layer'?
  • What is the point of the chop sticking a maple?
    • We want a flat 'plate' of roots (even if we aren't after pancake nebari, right?), so why not just place them on a bed of substrate and simply cover them with more. Subsequently poking the substrate around just stirs/messes things up.
  • What is the point of patting with a little trowel?
    • My substrate and yours are non-compacting.
 

Adair M

Pinus Envy
Messages
14,402
Reaction score
34,885
Location
NEGeorgia
USDA Zone
7a
I agree.

Maybe @markyscott could further explain why he does a few of the things he does, like:
  • What is the point of the 'drainage layer' and why 'especially with a deep pot'?
    • Doesn't a 'drainage layer' just elevate the position of the saturation zone in the primary substrate? Why no just leave this zone at the bottom of the pot by not using a 'drainage layer'?
  • What is the point of the chop sticking a maple?
    • We want a flat 'plate' of roots (even if we aren't after pancake nebari, right?), so why not just place them on a bed of substrate and simply cover them with more. Subsequently poking the substrate around just stirs/messes things up.
  • What is the point of patting with a little trowel?
    • My substrate and yours are non-compacting.
Oso, I'm going to let Scott address the drainage layer issue, he's the geologist!

Chopsticking: the idea is to make sure the soil is in contact with the feeder roots. Very little chopsticking is required. In fact, most people do way too much of it! Scott didn't go into much detail here on this repotting, since it's small and relatively compact.

When we prepare the rootball, we want to tease out about 1/2 inch of fine roots on the sides. The bottom of the rootball should be flat and smooth. Having the sides "fuzzy" with little roots means they will be surrounded by the new substrate. The chop sticking is just to make sure it's in contact, and there's no large air pockets. When you "stick", if it's hard, don't push. But if the chopstick goes in really easy, it's likely to have hit an air pocket. So, insert chopstick, and wiggle it a bit. Meanwhile, with your other hand, you should be gently "backfilling" the hole where the chopstick found the pocket. Subsequent jabs of the stick should be shallower and shallower as you backfill the soil into the hole.

There's no reason to chopstick places where there are no roots. All we're trying to do is fill the voids.

Patting with the trowel: again, it's to get the soil to settle evenly, and make a nice flat surface. Some pots have a bit of inside lip, and this helps to fill in that area.

One VERY important technique that Scott mentioned, but did not illustrate with a photo is "tapping" the pot. After the chopsticking, and backfilling is done, hold the pot securely, and lightly tap the pot with the meat part of your fist. On all four sides. The soil will settle in. You may have to add more soil! Again, the idea is to fill all the voids. Afterwards, then smooth and level with the broom and compact with the trowel.
 
Top Bottom