A Random User
Guest
- Messages
- 3,554
- Reaction score
- 4,269
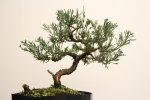
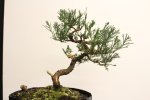
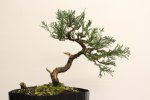
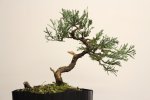
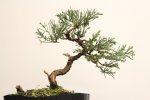
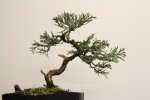
Was busy clearing out some weeds in quite a few pots and had my camera close by, so I thought I would snap a couple of updated pics of this tree to show the trees progression so far. It has been less than 3 months since this tree was originally worked.
Normally with junipers I have to say that I would not usually remove as much foliage as I did originally with this one... But seeing that the material was very healthy, and the design of the tree being determined by the size of the trunk, called for a tighter more compact tree. I felt it would be good to cut back pretty hard on it and really open it up and begin to force a lot of new growth back further in.
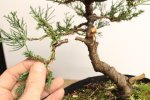
Originally I wire and laid everything flat to help assist in allowing more light... and in the following picture you will see that all new growth since originally styled, is now growing up. As well the tree is beginning to put on a lot more adult foliage in the process, which can be seen better in the second close up picture.

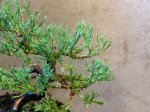
The tree will be allowed to grow till next year about this time. At that point, I will grow through and more than likely do another hard cut, but not a severe as the first time, and I will cut back to all healthy growing new foliage as close in as possible, to try and tighten the design again. With the goal being, that where ever I can, I will cut back to a nice clump of new adult foliage in tighter towards the trunk.
Tree is still in nursery soil, it increases growth and response time at this stage... and will probably not be switched to more of a bonsai type soil until, I really begin to zero in and want to define the tree. So, earliest... end of next year, depending on how the tree develops.
Lastly, during times of just waiting for foliage to grow out... I have often found it to be an awesome time to begin work, or even continue work on sharis...
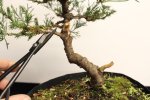
So, tonight after removing some weeds, I quickly decided to begin to introduce one. In the following picture, you will see that the tree already had some sort of dead spot right in the front at the base of the trunk... so I knew this area was already dead, so I just began to continued it up from here... over time, I will add to it little by little, so as to stress the tree.

Normally with junipers I have to say that I would not usually remove as much foliage as I did originally with this one... But seeing that the material was very healthy, and the design of the tree being determined by the size of the trunk, called for a tighter more compact tree. I felt it would be good to cut back pretty hard on it and really open it up and begin to force a lot of new growth back further in.
Originally I wire and laid everything flat to help assist in allowing more light... and in the following picture you will see that all new growth since originally styled, is now growing up. As well the tree is beginning to put on a lot more adult foliage in the process, which can be seen better in the second close up picture.


The tree will be allowed to grow till next year about this time. At that point, I will grow through and more than likely do another hard cut, but not a severe as the first time, and I will cut back to all healthy growing new foliage as close in as possible, to try and tighten the design again. With the goal being, that where ever I can, I will cut back to a nice clump of new adult foliage in tighter towards the trunk.
Tree is still in nursery soil, it increases growth and response time at this stage... and will probably not be switched to more of a bonsai type soil until, I really begin to zero in and want to define the tree. So, earliest... end of next year, depending on how the tree develops.
Lastly, during times of just waiting for foliage to grow out... I have often found it to be an awesome time to begin work, or even continue work on sharis...
So, tonight after removing some weeds, I quickly decided to begin to introduce one. In the following picture, you will see that the tree already had some sort of dead spot right in the front at the base of the trunk... so I knew this area was already dead, so I just began to continued it up from here... over time, I will add to it little by little, so as to stress the tree.


