rnlabarnes 6yr JBP Contest Thread Entry

BonsaiNaga13

Chumono
Messages
534
Reaction score
432
Location
St. Louis, Missouri
USDA Zone
6b
@BonsaiNaga13 dude, I put my huangshan's in the fridge tonight. I put 50 in there and I'm going to sow 25 - 30 tomorrow straight out of the packet to see what germination rate I get without stratification. Ill still have about 50 seeds left so Ill just throw those in the fridge if the second batch doesn't work well.
Just made a huangshan thread. Feel free to add yours https://www.bonsainut.com/threads/huangshan-
 

RobertB

Chumono
Messages
736
Reaction score
708
Location
Fairhope AL
USDA Zone
8
So I have been noticing over the past few months that my soil percolation has been pretty awful in my JBP seedling pots. I believe this is mostly due to me dumping piles of organic fertilizer on top of the soil combined with the heavy, torrential rain we receive.

I would say that almost half of the cuttings started out in individual pots have needles starting to yellow and even turn a redish / brownish hue on top. Not sure if some of this could be because of the colder weather we have had lately but it was enough to get my attention.

I took some photos and plan to upload within the next few days.

Upon investigation, the upper portion of the soil, above where the cutting rooted (one thing i will note later is i think i planted the cuttings to deep), had completely clogged from organic fertilizer turning the upper soil into concrete, literally. So I decided to go ahead and repot one of the seedlings showing the color issues and one that was still green, just to do a test (I have a ton of these things). Both were handled very carefully. I didn't bare root, only scraped the soil away about the basil flare, lightly loosened and potted up in a larger pot. I tried to remove as much of the cutting propagation medium as possible without disturbing the roots (i did cut like two small crossing roots on each). I figured hell since i have to bring these in for any freezes anyway i might as well early repot a few. It would almost make since in this situation, if roots still grow at temps over 40F that repotting now could help growth next year. We will see. I only did that on two, one healthy and one not so much.

Well, after that i started dreaming that night about all the upcoming rain. Sometimes here in the winter it rains all the time followed by cold cool whether (not cold for you northern guys). I was dreaming that all my pines would start showing bad color and severely set them back next year unless i did something to them all.

So starting the day before thanksgiving and during thanksgiving and even yesterday, i took each pine and did the following:
- pulled all dead / brown needles off
- scrape / excavate out all "concrete" soil above the basil flare of the cutting
- gentely removed as much of the propagation medium without disturbing the roots much
- replace with a 2 part pearlite, 2 part Optisorb, 1/2 part bark mix on top (this is all i had on hand)

I think this will be ok as i stopped working on each one when i got to the roots. I definitely planted my cuttings pretty deep. In a typical 3-4inch tall container, the roots only had about 1-2in depth to grow in. Most of the seedling cuttings had buds covered in the concrete soil that i left exposed when i replaced with the new soil.

A couple things to consider for lessons learned (I need to gather up all my lessons learned from year one and make a separate post. Hopefully i remember to do so).

- cuttings root super easily if placed in the shade for about 6 weeks before moving to sun (i had cuttings that i through out into the side yard under a tree that didnt even get hormone that rooted on top of the ground, in shade though)
- Use a smaller amount of propagation mix to root cuttings. I was worried that the mix would leach out and mix into the surrounding soil over the coarse of the year so I used about a fairly large slug of rooting medium (sand). If i was to do this again, I would only make a small slug, maybe 1/2 diameter by 1" deep, then place the cutting 1/2" down. When i was working on these, the slug was still in its place and in perfect structure so my theory was wrong.
- do not dump / pile fertilizer on soil surface. Maintain the soil by using tea bags or something to hold the fertilizer in place and prevent from entering into the soil.
- Here is a big one, DO NOT USE an automatic watering system on your pine seedlings (IT KEEPS THEM TO WET).
- watch out for caterpillars, they eat pines, even though some of my victims have recovered and are starting to grow pretty cool naturally.
 

RobertB

Chumono
Messages
736
Reaction score
708
Location
Fairhope AL
USDA Zone
8
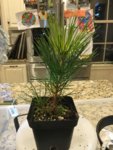
Here is the first pine I repotted.

Tree before any work. Notice the yellow needles on top.
IMG_3809.jpg

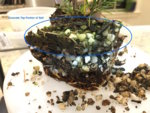
Here is a pic after pulling out of pot and knocking some of the sludge / concrete away.

IMG_3814.jpg

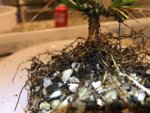
Ready to go into next pot. Might have been a little more aggressive with the roots than previously mentioned. I did only cut like two crossing roots and tried to leave most in there place.

IMG_3817.jpg

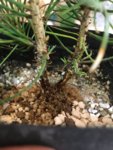
Here it is all potted up, brown needles removed and tied in. Ready for Im hoping two years of growth.

IMG_3819.jpg
 

JoshuaRN

Yamadori
Messages
65
Reaction score
70
Location
New York
USDA Zone
5
Ordered my 1oz Pinus thunbergii seeds from Schumacher Co on 12-NOV. I am going to get my two small boys to start a couple also to play. They are 4 and 6.

Very excited. Will probably start a little later around March or so when the weather warms a little as I do not have a greenhouse. Maybe I can purchase a small one just for this. We will see and I will post when Ive started, everything that's been done and photos. Looking forward to.
Consider just building a small a frame , or sunbox. All you need is some cedar planks , and a storm window or 2 depending on design.
 

RobertB

Chumono
Messages
736
Reaction score
708
Location
Fairhope AL
USDA Zone
8
Here is the other tree that seemed pretty healthy with green needles. Just wanted to try a repot with what i thought was a healthy tree to give me some kind of comparison even though this is hardly a study.

IMG_3826.jpg

Closeup of the roots.
IMG_3828.jpg

Here are two more pics of the concrete barrier clogging the soil. This is a sample where the top loose layer has been carefully removed showing the solid mat of concrete type soil.
IMG_3835.jpg

Here is is out of the pot. You can clearly see the difference.
IMG_3838.jpg

Also, check out this twin trunk that i started from two cuttings. Looking good. This is one that i simply refreshed the top layer of soil, removing the concrete.
IMG_3843.jpg
 

RobertB

Chumono
Messages
736
Reaction score
708
Location
Fairhope AL
USDA Zone
8
I should also mention that there was no roots growing into the concrete on any of the 50 ish plants I worked on. All the roots started just underneath the concrete.
 

RobertB

Chumono
Messages
736
Reaction score
708
Location
Fairhope AL
USDA Zone
8
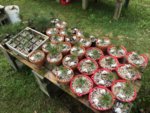
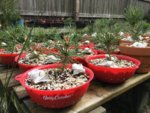
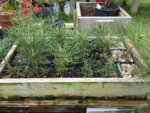
I've repotted a lot of the pines this spring. I will post some more details when I can. Here are some recent shots of my pine area.
IMG_4088.JPG

A close up of one of them.

IMG_4091.JPG

IMG_4092.JPG

And lastly, I think these are from my second batch. I was going to leave these this year and repot next year to compare results.

IMG_4094.JPG
 

RobertB

Chumono
Messages
736
Reaction score
708
Location
Fairhope AL
USDA Zone
8
All the ones that we reported this year had some pretty good root work done. I will follow up with more details, but basically anything growing down that was coarse was removed. I did have to reduce the overall rootball some just to get under the trunk.
 

River's Edge

Masterpiece
Messages
4,745
Reaction score
12,756
Location
Vancouver Island, British Columbia
USDA Zone
8b
All the ones that we reported this year had some pretty good root work done. I will follow up with more details, but basically anything growing down that was coarse was removed. I did have to reduce the overall rootball some just to get under the trunk.
Nice progress, appreciate your notations. Couple of comments from my perspective and experience.

1. The drainage issue addressed in the fall is also likely due to variation in particle size. The pictures seem to portray that. If you received professional training on pines your teacher would insist on removing 1/2 inch to 1 inch of the top layer as part of the regular fall maintenance work on pines ( SOJI ). This is an excellent practice to follow and makes a tremendous difference in the continuing health of your pines.

2. Automatic watering systems can be used if programmed and adjusted for soil mix and climate. Takes a while to get it dialed in for a specific setup. You are correct in that they should not be used in many situations, particularily if they are not monitored frequently and adjustable. Tricky, yes, but not so much that they cannot be used successfully, i have done it for years.

3. I would encourage you to work on the roots each year for the first four years before allowing them to grow freely for a longer period of time. This is based on the explosive growth you can expect in these early years and how much easier it is to correct and prevent major faults at this stage. Your documentation and pictures show very promising directions. You will be surprised by the extent of growth which will increase exponentially over the next few years, even with regular root work. I did not let my JBP go longer than a year between root work until they entered the fifth growing season and at that point the smaller trunks were 1 1/2 inch diameter up to 2 inch in diameter. JBP under the right conditions and care are extremely vigorous.

Looking forward to the continued progress reports and hope these comments are received as intended. Additional thoughts to consider moving forward.
Best in Bonsai
 

RobertB

Chumono
Messages
736
Reaction score
708
Location
Fairhope AL
USDA Zone
8
Frank, I appreciate everything that you have helped me with!

Regarding the soil, everything this year is a mixture of coarse sand (builders sand), pearlite and Optisorb (DE), mostly because i didnt have the time this year to order other soil mixes, this stuff is locally obtained. I did notice this year that some of the plants i repotted (not pines) last year with Optisob, the Optisorb could now be crushed in your fingers. I am a little concerned about this for the future. I basically had to bare root everything this year, just to work the roots (hard to see coarse roots under the trunk if i didnt). I am a little concerned about the optisorb being in the center of the rootball, directly underneath the trunk, once the rootball is more established.

I agree on the watering. not sure what im going to do this yr yet. probably hand water the pines and only use auto when im away which isnt much.

Good notes about the roots. Are you saying you pretty much bare root them for the first 5 years? The roots, overall looked great. I did also cut off any weird growth or crossing, in addition to the coarse downward growth. I am out of energy to repot any more this year. I wanted to start some exposed root pines and some of them i kind of started with some weird root growth i had on a couple. I dont really care for the tall exposed roots, but a little, i like.
 

RobertB

Chumono
Messages
736
Reaction score
708
Location
Fairhope AL
USDA Zone
8
Here is a pic of one of the pines tied in. You can see that I basically had to bare root and flattened the football, by spreading out.

IMG_4006.JPG
 

RobertB

Chumono
Messages
736
Reaction score
708
Location
Fairhope AL
USDA Zone
8
one more thing.

regarding the particle size, i tend to pay more attention to that early in repotting season. I tried to repot these in soil from 1/8" to 1/4". There isnt to much within thats larger than 1/4".

Also, thats good to hear about the removing the top 1/2" to 1". I had to do it on these as i had no percolation within the small plastic pots.
 

River's Edge

Masterpiece
Messages
4,745
Reaction score
12,756
Location
Vancouver Island, British Columbia
USDA Zone
8b
one more thing.

regarding the particle size, i tend to pay more attention to that early in repotting season. I tried to repot these in soil from 1/8" to 1/4". There isnt to much within thats larger than 1/4".

Also, thats good to hear about the removing the top 1/2" to 1". I had to do it on these as i had no percolation within the small plastic pots.
Now that they are growing well i would up the particle size to between 3//16 and 1/4 inch if possible going forward.
As far as working the roots going forward i am referring primarily to improving the surface nebari through application of proper technique in repotting each time that it is done.
Start by getting in the habit of using your chopstick to comb out the top roots carefully from the trunk out to the outer circumference. This straightens and removes crossing roots, also puts them in a position to better judge their length for reduction. if you do this each time you repot the result will become very noticeable. It does get much quicker and easier to do as the tree progresses.
Next be sure to cover the surface roots after repotting, they grow faster underground.
Now by this i do not mean to neglect reducing downward growing roots, thick roots and circling roots just deal less with the botttom and center than the top level. The trees have been started with free draining soil and you are controlling the compaction by cleaning the surface and working the surface nebari before re-covering.
Hope that clarifies things a bit.
It is good to remember that working with pine roots is quite different then normal routines with deciduous tree's.
 

RobertB

Chumono
Messages
736
Reaction score
708
Location
Fairhope AL
USDA Zone
8
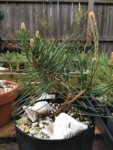
Here is a pic of my largest pine. This has always been the largest. It was wired in the late fall and is starting to grow strong. This is one of the few that i only trimmed the tap root on initially from my first batch as i was initially worried that most of my seedling cuttings would die (and basically all made it, even the ones i didnt plant in through in the flower beds).

It does have some root issues that i will either need to be later addressed or use in the design. As of this year, when i looked at the nebari i felt i could use in the design.

Also, i just applied my second set of ferts. Feb - 2 teabags per container, 17MAR - 1 additional teabag. In two weeks, i will add another. I think this pine has 4 (not shown in photot) as it didnt get repotted. I repotted the others all throughout the winter and just protected from cold (we had no freezes this yr!!).

November before wiring.

pine 3.jpg

Ugly roots (now that i see this again, i will probably try and remove next year).

pine root 4.jpg

Wired up and current.

pine 2.jpg
 

River's Edge

Masterpiece
Messages
4,745
Reaction score
12,756
Location
Vancouver Island, British Columbia
USDA Zone
8b
Here is a pic of my largest pine. This has always been the largest. It was wired in the late fall and is starting to grow strong. This is one of the few that i only trimmed the tap root on initially from my first batch as i was initially worried that most of my seedling cuttings would die (and basically all made it, even the ones i didnt plant in through in the flower beds).

It does have some root issues that i will either need to be later addressed or use in the design. As of this year, when i looked at the nebari i felt i could use in the design.

Also, i just applied my second set of ferts. Feb - 2 teabags per container, 17MAR - 1 additional teabag. In two weeks, i will add another. I think this pine has 4 (not shown in photot) as it didnt get repotted. I repotted the others all throughout the winter and just protected from cold (we had no freezes this yr!!).

November before wiring.

View attachment 232884

Ugly roots (now that i see this again, i will probably try and remove next year).

View attachment 232885

Wired up and current.

View attachment 232886
Nicely done. Moving forward with shorter wider containers will naturally help with root ball shape and fewer directly downward growing roots. Approximately 6 inch or less in depth to about 4 inches will assist with that. just need to be more attentive with watering in shallower and wider containers. Be cautious about delaying too long in dealing with surface roots that are too large or out of sinc with the other roots. if you are nervous about removing in one step you can always reduce the root to slow it down while others progress more rapidly.
A favorite shape for me is typically referred to as an Azalea pot or Bulb Pan. They are available in various sizes typically wider than deep. Think the shape of a typical margarine tub. if using terra cotta some of them are better for areas of cooler temperatures and i have had better luck with the Deroma brand manufactured in Italy. Fewer issues with cracking in the winter.
 
Top Bottom