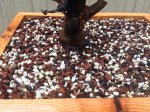
2 years of development

evmibo

Shohin
Messages
474
Reaction score
134
Location
Fort Myers, FL
USDA Zone
10a
Two years ago I drove up to a non bonsai nursery in Arcadia that typically only deals in large volumes. After some emails they didn't mind having me visit to pick out a couple trees. I ended up with 2 American Elms and a Bald Cypress, at $3 each! All 3 trees were about 6 feet initially. Chopped all 3 and started to pick and choose branches.

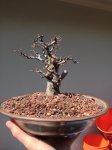
This American Elm has for the most part done everything I was hoping for, and after recently wiring it I think it's starting to really come together. I'm all ears to any critiques. This will be my 5th growth season in the hobby, so for me it's nice to see some of my trees starting to fill in.

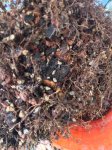
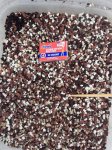
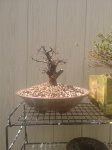
First photo is the tree this past October. All others are from the wire and repot day.
Unfortunately I cannot find the pictures of the tree the day I got it, but just imagine a straight 6' tree taken down to a small stump ;)

photo (12).JPG photo 1 (4).JPG photo 4.JPG photo 2 (5).JPG photo 1 (5).JPG photo 1 (6).JPG
 
Last edited:

edprocoat

Masterpiece
Messages
3,423
Reaction score
378
Location
Ohio/Florida
USDA Zone
6
I like the tree, your wiring though .... :)
I wonder how long those scars will take to fill in on the places where you removed , I assume, sacrifice branches from ? Or will you be carving those arreas?

ed
 

evmibo

Shohin
Messages
474
Reaction score
134
Location
Fort Myers, FL
USDA Zone
10a
Thanks.
Damn, I took a look at BVF's wiring page and have really made it a priority to improve my wiring. I'm wiring many trees lately so I suppose that's a good thing, but I realize repetition only matters if proper technique is used. I thought I did an alright job on wiring here, anything you can see that is crappy? Or just the whole thing ;)? I'm signed up for a local wiring class in July at Wigert's. I used almost exclusively 1.0mm since I only needed minor adjustments on the small stuff, did I use too much?!

I'm also trying to follow 1/2 branch diameter sized wire (for what I'll be bending), 45 - 60 degree, and what BVF mentioned on his blog regarding following the flow (for lack of a better term) - if you go under the first branch, go under the next, etc.

I'm not sure about sacrifice heal times, I'm guessing 2-4 years? Fresh cuts (like the one on the bottom right) is sealed with wood glue, and will be carved at a later date. I'm picking up some wood hardener asap for the older cuts, although elm seems to harden off pretty well even in my moist climate.
 

M. Frary

Bonsai Godzilla
Messages
14,307
Reaction score
22,120
Location
Mio Michigan
USDA Zone
4
Ah hell, the wiring isn't that bad. I've seen and done worse. It gets better with time. A couple places where you used multiple wires could be better.
I own a few of these and they seem to heal cuts well. If you clean these up they should heal over.
What is the big stub from the bottom branch for?
 

Eric Group

Masterpiece
Messages
4,554
Reaction score
4,855
Location
Columbia, SC
I don't think the wiring is all that bad... Clearly not a professional job, but better than you see from many people. It seems no matter who it is, if you post a close up of a tree that was wired, SOMEBODY will talk smack about what a poor job was done on it. It is hard to wire a tree and make it look good with the wire on... The end result you are going for is moving branches into place.. If you accomplished that you did OK. People generally seem to critique a wiring job with show standards in mind.. But I am not showing my trees, and probably wouldn't want to do it with a bunch of wire still on them... I doubt you are showing this one any time soon either? No? Good... So if the branches are where you we ant them, the wire is doing it's job.

The large cuts are a little rough. Honestly.. The look like they were broken off or something chewed them off- LOL I don't mean it to sound so bad honestly.. Just wondering what you used to cut them? You keeping stubs or planning to cut them down flush with to he trunk?
 

evmibo

Shohin
Messages
474
Reaction score
134
Location
Fort Myers, FL
USDA Zone
10a
Ah hell, the wiring isn't that bad. I've seen and done worse. It gets better with time. A couple places where you used multiple wires could be better.
I own a few of these and they seem to heal cuts well. If you clean these up they should heal over.
What is the big stub from the bottom branch for?
Thanks for the input. It really helps hearing from others.

I've uploaded a picture with "1" & "2" labeling two different branches. "1" was a sacrifice branch that was cut back to a nub after 1 growth season, and similarly "2" was cut back right before these pictures were taken (essentially a year behind "1"). I assume you're talking about #2? That was a sacrifice branch that was cut right before wiring and repotting. It was used for one growth season to thicken the base, and create a lower, thicker branch to give the feeling of good proportions. In the wild, lower branches usually have more time to develop so I feel in bonsai (in this design) they need to be thicker than branches above them.

I'm not sure if you can see them, but "2" has two good (hopefully) buds. I would like to develop taper in "1" and "2" in the years to come, which will take time.

I don't think the wiring is all that bad... Clearly not a professional job, but better than you see from many people. It seems no matter who it is, if you post a close up of a tree that was wired, SOMEBODY will talk smack about what a poor job was done on it. It is hard to wire a tree and make it look good with the wire on... The end result you are going for is moving branches into place.. If you accomplished that you did OK. People generally seem to critique a wiring job with show standards in mind.. But I am not showing my trees, and probably wouldn't want to do it with a bunch of wire still on them... I doubt you are showing this one any time soon either? No? Good... So if the branches are where you we ant them, the wire is doing it's job.

The large cuts are a little rough. Honestly.. The look like they were broken off or something chewed them off- LOL I don't mean it to sound so bad honestly.. Just wondering what you used to cut them? You keeping stubs or planning to cut them down flush with to he trunk?

Again, thanks for the input. My train of thought here is to develop the stubs that I've labeled as 1 and 2 into well tapered branches. It's tough to see, but I've used a dremel on #1's cut site to help speed up healing and acquire better taper, I plan on doing the same to #2 down the road after the buds have matured.

Or, were you talking about different areas? I used a concave to cut off the lower branches, and used a fine toothed saw for the initial chop.

elm12.png
 

sorce

Nonsense Rascal
Messages
32,912
Reaction score
45,593
Location
Berwyn, Il
USDA Zone
6.2
Lovus Ulmus.

Half diameter seems a little big to be chugging around all that delicate foilage.

Try copper. And even bad wiring is wiring! You'll get better!

At least you're doing something !

With the cannonballs to make heavy chops!

Repost it in spring!

Sorce
 

Eric Group

Masterpiece
Messages
4,554
Reaction score
4,855
Location
Columbia, SC
Thanks for the input. It really helps hearing from others.

I've uploaded a picture with "1" & "2" labeling two different branches. "1" was a sacrifice branch that was cut back to a nub after 1 growth season, and similarly "2" was cut back right before these pictures were taken (essentially a year behind "1"). I assume you're talking about #2? That was a sacrifice branch that was cut right before wiring and repotting. It was used for one growth season to thicken the base, and create a lower, thicker branch to give the feeling of good proportions. In the wild, lower branches usually have more time to develop so I feel in bonsai (in this design) they need to be thicker than branches above them.

I'm not sure if you can see them, but "2" has two good (hopefully) buds. I would like to develop taper in "1" and "2" in the years to come, which will take time.


Again, thanks for the input. My train of thought here is to develop the stubs that I've labeled as 1 and 2 into well tapered branches. It's tough to see, but I've used a dremel on #1's cut site to help speed up healing and acquire better taper, I plan on doing the same to #2 down the road after the buds have matured.

Or, were you talking about different areas? I used a concave to cut off the lower branches, and used a fine toothed saw for the initial chop.

View attachment 68095
Yes, those are the branches I was talking about... Just saying the cuts looked a little rough on the ends. I think they heal over better if you concave the cut site inwards a bit but make it as smooth as possible... Sort of depends on what you are going for. If you want some thick callousing to develop to widen the trunk in a specific area, you might not do it that way, but I assume for those branches and for the chop site at the top you want a smooth transition correct? It may just be the pic, but the wood looks a little rough at those sites, you might want to smooth it out a bit.

Not a bad start overall though. You have a good start to some branches at the top. I would probably not encourage you to use those wide stubs at the bottom, they will seem out of place both in size and direction. If you get some lower buds to break on the tree, consider replacing them at some point in the future.. Up to you of course!
 

Adair M

Pinus Envy
Messages
14,402
Reaction score
34,885
Location
NEGeorgia
USDA Zone
7a
Get a different pot. I don't want to seem I'm insulting you, but you have chosen perhaps the worst possible shape of pot for this tree.

You've potted this tree too high. Like its on s little hill. A properly potted tree will have level soil.

Elms, in particular, look best in shallow trays. I can understand if you aren't ready to go shallow yet, but you should be traing the roots to go OUT, not down. Having a deep pot is encouraging your roots to go down, not out.

So, get an oval or rectangle that is not as deep as this pot, but wider to encourage wider growing roots.

When potted properly, when you look across the pot with your eye at rim level, you will not see any soil, only nebari.
 

evmibo

Shohin
Messages
474
Reaction score
134
Location
Fort Myers, FL
USDA Zone
10a
Lovus Ulmus.
Half diameter seems a little big to be chugging around all that delicate foilage.
Try copper. And even bad wiring is wiring! You'll get better!
At least you're doing something !
With the cannonballs to make heavy chops!
Repost it in spring!
Sorce

This is 1.0mm - is wire available any smaller? ;)
is the wiring bad because of the amount I used, the angle, D all of the above?

Yes, those are the branches I was talking about... Just saying the cuts looked a little rough on the ends. I think they heal over better if you concave the cut site inwards a bit but make it as smooth as possible... Sort of depends on what you are going for. If you want some thick callousing to develop to widen the trunk in a specific area, you might not do it that way, but I assume for those branches and for the chop site at the top you want a smooth transition correct? It may just be the pic, but the wood looks a little rough at those sites, you might want to smooth it out a bit.

Not a bad start overall though. You have a good start to some branches at the top. I would probably not encourage you to use those wide stubs at the bottom, they will seem out of place both in size and direction. If you get some lower buds to break on the tree, consider replacing them at some point in the future.. Up to you of course!

I used a concave cutter on branch #2, the cut is facing away from the camera. I will monitor it's healing this growth season. Branch #1's cut site (which was cut 1 year ago) was carved back to create a concave, but will probably refine it now that you've got me thinking about it. Thanks for the heads up on the branches, do you not believe the thicker branch bases give opportunity for the beginning of good taper development? Or is it best to start taper development from smaller branches? I've always thought branches lower on the tree should be thicker (in most cases) from a proportion stand point. But maybe that's off.
Get a different pot. I don't want to seem I'm insulting you, but you have chosen perhaps the worst possible shape of pot for this tree.
You've potted this tree too high. Like its on s little hill. A properly potted tree will have level soil.
Elms, in particular, look best in shallow trays. I can understand if you aren't ready to go shallow yet, but you should be traing the roots to go OUT, not down. Having a deep pot is encouraging your roots to go down, not out.
So, get an oval or rectangle that is not as deep as this pot, but wider to encourage wider growing roots.
When potted properly, when you look across the pot with your eye at rim level, you will not see any soil, only nebari.

I suppose this will have to wait until next year/next repot? I'm limited on bonsai pots but have some cedar that I could construct a rectangular pot from.

I don't want to sound like I'm making excuses but a slightly deeper pot gives me some peace of mind during the really hot days in July, August, and September - perhaps I could keep the same depth pot just not have the mound.

edit: again, I really appreciate all of the input.
 

Adair M

Pinus Envy
Messages
14,402
Reaction score
34,885
Location
NEGeorgia
USDA Zone
7a
Every beginner thinks they can justify a too deep pot!

And every one thinks a deep pot holds water better than a shallow one. They don't. Want proof?

Go get a kitchen sponge. Soak it. Set it flat on the counter top. Let it sit a while.

What happens? The water is held in place by the sponge, right?

Now stand the sponge up on its end. Let it sit a while.

What happens? You have a little puddle of water surrounding the sponge! And the top is drying out!
 

Adair M

Pinus Envy
Messages
14,402
Reaction score
34,885
Location
NEGeorgia
USDA Zone
7a
If, after you've repotted this into a better container, you're still worried that it's not going to retain water, you can cover the surface with a little chopped spaghnum moss. It helps to retain water.
 

evmibo

Shohin
Messages
474
Reaction score
134
Location
Fort Myers, FL
USDA Zone
10a
Touche!
So, would you recommend I wait until next repot or transfer it into a cedar pot?
 

Adair M

Pinus Envy
Messages
14,402
Reaction score
34,885
Location
NEGeorgia
USDA Zone
7a
Do it now.

Obviously, I wasnt there when you trimmed the roots. But, I expect that while you may have removed the circling roots, you didn't get up under the trunk and cut off the downward growing roots.

You should.

Ideally, you want to cut up under the trunk so that it looks like the bottom of an airlayer!

Put your forearms together, inside wrists touching. Now spread your fingers apart as wide as they will go. That's What a good nebari looks like, upside down. Try to put your palms down on a table. That is the way you want the roots to look. Nothing going down. Over time, the nebari will grow out like the back of your hand, building a great plate of wood.

I have, in fact, sometimes screwed the trunk down onto a piece of wood to prevent downward roots, forcing all roots to grow out.

And, bury the roots under an inch of soil. They will fatten and fuse better than if they are exposed.

There. You just received $300 of bonsai instruction.
 

evmibo

Shohin
Messages
474
Reaction score
134
Location
Fort Myers, FL
USDA Zone
10a
Not the best, but here's a pic of the bottom of the tree during the repot. I cut off more downward facing roots after this though. Thanks for the instruction, everyone is richer now!

photo 2 (5).JPG
 

sorce

Nonsense Rascal
Messages
32,912
Reaction score
45,593
Location
Berwyn, Il
USDA Zone
6.2
Hell yeah Cannonballs!

Crazy better!

Sorce
 
Top Bottom