LittleDingus
Omono
This thread will track my efforts at quercus imbricaria over the next 5 years...
 en.wikipedia.org
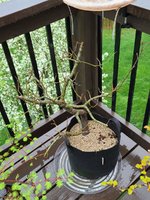
I don't usually collect material. It's more about journey than destination for me so usually I prefer to grow from seed or young nursery stock. I've been wanting a larger oak to play with for a while now, though, and the local oak species are prolific in local wooded areas. Case in point, I recently happened across a couple of shingle oak in an area I could harvest from:


The second one with the sharply curved trunk in particular caught my eye as something I could possibly work with for this challenge.

It's not a super think trunk, but then I'm not that into sumos anyway. I liked the trunk line though")
These trees were growing in a layer of a paper thin and flexibly shale/slate like material (Sorry! I'm not a geologist!) I'll try and research into how the layer originated, but this location is the only place I'm aware of it being exposed. The layer where it is exposed is ~6'-8' thick. Most of the exposed bits are broken down and very sandy. There are a few freshly exposed sections that look like stone face until you poke at them, then they peel and flake. The individual layers are very thin and slightly flexible. Next time I'm walking that section, I'll try and get some decent pictures.
Anyway, a lot of words to say that the trees are growing in something sandy yet claylike and layered and are growing out the side of an exposed ridge. It looked like they would be easy to dig out and keep a largish root ball.
That turned out to only be partly true! I've only harvested one tree so far, and it was easy to dig out. BUT, my expectations that the tap root would either grow down through the exposed sandy region or would grow along the layers INTO the ridge were only partly correct. Instead of an easily identifiable tap root, there were several thick radial roots that ran in all direction and sometimes doubled back! They were clearly following the layers in the soft stone...but they occasionally broke through into a neighboring layer or hit a more solid section and changed direction. I thought about trying to take pictures of this part but the shale broke down so easily that there wasn't much to see in a picture.
In the end, once I cut through 8-10 or so thick radial roots down to depth of about 6", the tree lifted right out! I didn't have to under-cut it at all! Had I realized the root zone was THAT shallow, I would have trenched much further out! I was expecting to be able to trench down more like a 12"-18" and then have to undercut that ball to snip the tap root. I planned my trench accordingly. I didn't start so far out that I couldn't get under the ball the snip the tap root without digging up half the state...except there wound up not being a tap root as I expected! I ended up with less than half the root volume I was expecting Had I know how shallow the main roots were, I could have trenched much further out and still gotten the tree out easily.
I did end up with a decent amount of feeders, but only about half the root volume I was hoping for I did keep as much of the native soil attached to the remaining roots as I could. One thing I've read often about oaks is that they are obligately mycorrhizal...they need mycorrhiza to be able to absorb nutrients and water properly. They are the only deciduous species that I am careful not to fully bare root. I always try to carry decent amounts of existing soil...especially soil attached to root...into the new pot to keep that relationship healthy!
Once I got the tree home, I potted it into a 5 gal grow bag. I filled up the bottom of the grow bag with a mix of NAPA 8822 and some of the loose soil that fell off getting the tree home. On top of that I set the root ball I saved...complete with native soil still attached.

Then I filled the rest with pure 8822.

There is some nebari under there, but I was reluctant to pull any more soil off to see it. Because of how it was growing into a layered soil in the side of a ridge, the nebari is probably not useful anyway...it certainly is not useful at this current potting angle!
About half of the top was trimmed off to bring the tree home. Shingle oak hold their leaves tight deep into the winter. I don't think that is to protect next year's buds, but I left the remaining leave for now anyway. Come February/March before these guys start to wake but after the weather starts to warm, I'll defoliate what's left and make some decisions on some further cuts. I have no intention to trunk chop. I'd rather deal with a thinner trunk with a line I enjoy that have to heal an ugly scar and rebuild. Also, I'd rather the tree invest in some of the buds it's already set than have to start new buds from scratch. I think the remaining top mass is still to large for the amount of roots I saved, though, so some further cutback is likely before spring.
There were numerous other smaller trees on the same ridge. The other picture above is the only other sizable but not TOO sizable one on this ridge, though. It has some long straight trunk sections I wasn't happy with that would probably need a chop to rectify so I left it there for now. There are one or two other places where I know these grow that I think I can harvest from that I want to scout out before making a final decision on what to do with the second one.
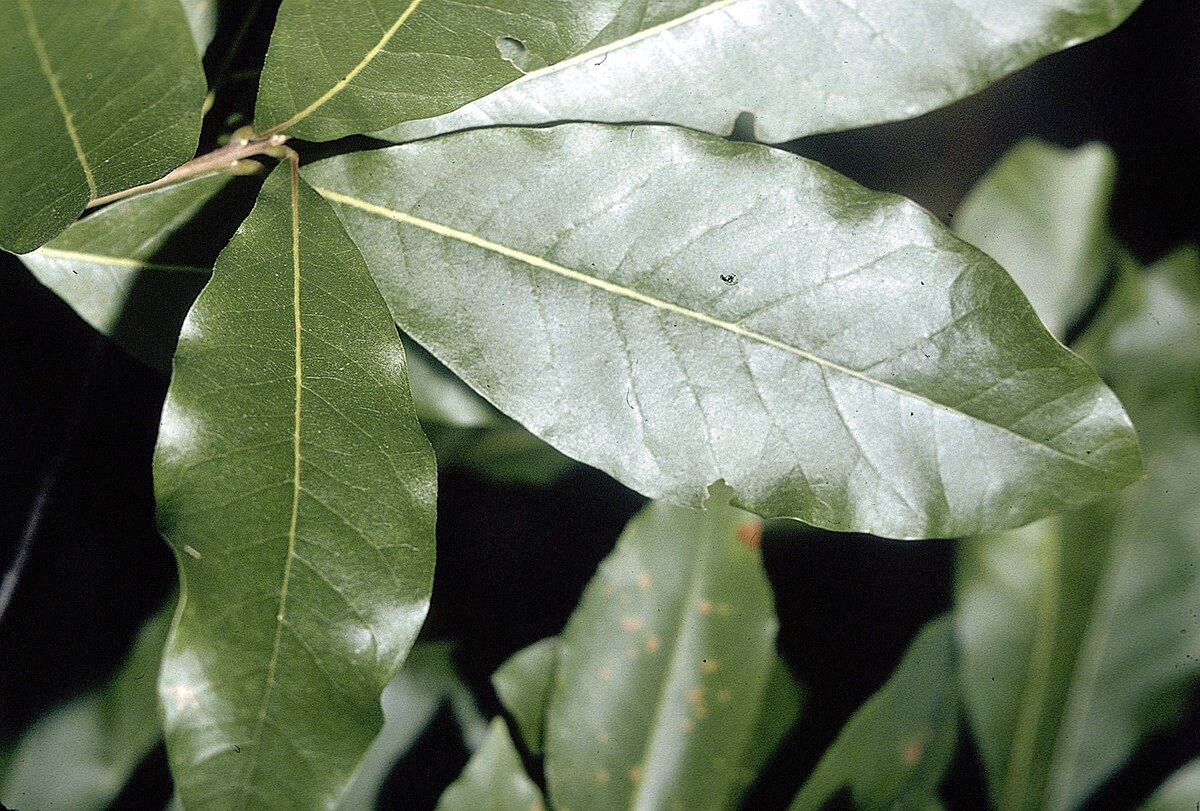
I'll end this overly long blather with a picture of the foliage on the tree I harvested...the worst of all states: too late for its fall color, too early for its winter (well, early spring!) silhouette!

Quercus imbricaria - Wikipedia
I don't usually collect material. It's more about journey than destination for me so usually I prefer to grow from seed or young nursery stock. I've been wanting a larger oak to play with for a while now, though, and the local oak species are prolific in local wooded areas. Case in point, I recently happened across a couple of shingle oak in an area I could harvest from:
The second one with the sharply curved trunk in particular caught my eye as something I could possibly work with for this challenge.
It's not a super think trunk, but then I'm not that into sumos anyway. I liked the trunk line though
These trees were growing in a layer of a paper thin and flexibly shale/slate like material (Sorry! I'm not a geologist!) I'll try and research into how the layer originated, but this location is the only place I'm aware of it being exposed. The layer where it is exposed is ~6'-8' thick. Most of the exposed bits are broken down and very sandy. There are a few freshly exposed sections that look like stone face until you poke at them, then they peel and flake. The individual layers are very thin and slightly flexible. Next time I'm walking that section, I'll try and get some decent pictures.
Anyway, a lot of words to say that the trees are growing in something sandy yet claylike and layered and are growing out the side of an exposed ridge. It looked like they would be easy to dig out and keep a largish root ball.
That turned out to only be partly true! I've only harvested one tree so far, and it was easy to dig out. BUT, my expectations that the tap root would either grow down through the exposed sandy region or would grow along the layers INTO the ridge were only partly correct. Instead of an easily identifiable tap root, there were several thick radial roots that ran in all direction and sometimes doubled back! They were clearly following the layers in the soft stone...but they occasionally broke through into a neighboring layer or hit a more solid section and changed direction. I thought about trying to take pictures of this part but the shale broke down so easily that there wasn't much to see in a picture.
In the end, once I cut through 8-10 or so thick radial roots down to depth of about 6", the tree lifted right out! I didn't have to under-cut it at all! Had I realized the root zone was THAT shallow, I would have trenched much further out! I was expecting to be able to trench down more like a 12"-18" and then have to undercut that ball to snip the tap root. I planned my trench accordingly. I didn't start so far out that I couldn't get under the ball the snip the tap root without digging up half the state...except there wound up not being a tap root as I expected! I ended up with less than half the root volume I was expecting
Had I know how shallow the main roots were, I could have trenched much further out and still gotten the tree out easily.I did end up with a decent amount of feeders, but only about half the root volume I was hoping for
I did keep as much of the native soil attached to the remaining roots as I could. One thing I've read often about oaks is that they are obligately mycorrhizal...they need mycorrhiza to be able to absorb nutrients and water properly. They are the only deciduous species that I am careful not to fully bare root. I always try to carry decent amounts of existing soil...especially soil attached to root...into the new pot to keep that relationship healthy!Once I got the tree home, I potted it into a 5 gal grow bag. I filled up the bottom of the grow bag with a mix of NAPA 8822 and some of the loose soil that fell off getting the tree home. On top of that I set the root ball I saved...complete with native soil still attached.
Then I filled the rest with pure 8822.
There is some nebari under there, but I was reluctant to pull any more soil off to see it. Because of how it was growing into a layered soil in the side of a ridge, the nebari is probably not useful anyway...it certainly is not useful at this current potting angle!
About half of the top was trimmed off to bring the tree home. Shingle oak hold their leaves tight deep into the winter. I don't think that is to protect next year's buds, but I left the remaining leave for now anyway. Come February/March before these guys start to wake but after the weather starts to warm, I'll defoliate what's left and make some decisions on some further cuts. I have no intention to trunk chop. I'd rather deal with a thinner trunk with a line I enjoy that have to heal an ugly scar and rebuild. Also, I'd rather the tree invest in some of the buds it's already set than have to start new buds from scratch. I think the remaining top mass is still to large for the amount of roots I saved, though, so some further cutback is likely before spring.
There were numerous other smaller trees on the same ridge. The other picture above is the only other sizable but not TOO sizable one on this ridge, though. It has some long straight trunk sections I wasn't happy with that would probably need a chop to rectify so I left it there for now. There are one or two other places where I know these grow that I think I can harvest from that I want to scout out before making a final decision on what to do with the second one.
I'll end this overly long blather with a picture of the foliage on the tree I harvested...the worst of all states: too late for its fall color, too early for its winter (well, early spring!) silhouette!
 ) possibilities...