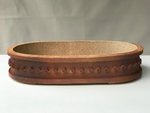
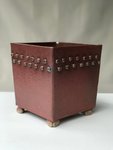
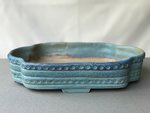
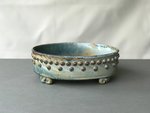
Can anybody help me find this pot?

Japonicus

Masterpiece
Messages
4,940
Reaction score
7,704
Location
Western West Virginia AHS heat zone 6
USDA Zone
6b
You could try Plant City Bonsai. That pot looks like it’s a Lotus pot, and I think Plant City sells some of theirs.
I did and thank you for the recommendation, though they had none,
I think I scored a great nebari for my meager collection, from your friends at PCB.
DSC_3661.JPG
I could have spent my whole pay check there...3 months worth
but that big JWP he trained down (not for sale) would not fit in the car.
 

Adair M

Pinus Envy
Messages
14,402
Reaction score
34,885
Location
NEGeorgia
USDA Zone
7a
I did and thank you for the recommendation, though they had none,
I think I scored a great nebari for my meager collection, from your friends at PCB.
View attachment 266701
I could have spent my whole pay check there...3 months worth
but that big JWP he trained down (not for sale) would not fit in the car.
One time Paul Kellum bought a landscape sized sisigashira maple that would not fit into his Mercedes-Benz. He put it in anyway, and drive 500 miles home with it. He had foliage around his neck!
 
Last edited:

Japonicus

Masterpiece
Messages
4,940
Reaction score
7,704
Location
Western West Virginia AHS heat zone 6
USDA Zone
6b
One time Paul Kelly bought a landscape sized sisigashira maple that would not fit into his Mercedes-Benz. He put it in anyway, and drive 500 miles home with it. He had foliage around his neck!
LOL her Benz suv was loaded and definitely would NOT have fit.
I DID have room for another shimpaku though...superlative #@&%
 

Gsquared

Shohin
Messages
385
Reaction score
1,167
Location
Portland (ish), OR
USDA Zone
8B
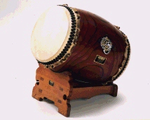
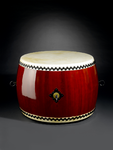
I really like the style of the pot you were wanting and found. Been trying taiko nails on some different shapes. They are a great motif and suit a lot of styles. I’ve not mastered that extremely flared rim. I have a feeling that a press mold would be the only way to do that. Here are some of taiko pots that are a little different.

Now I gotta figure out that flared rim. 43183311-3C1C-4B00-A985-4CE29E613A5C.jpeg88F483CB-56B0-41A3-A775-6BB6A77BF47B.jpeg12C9C7C7-18D5-4DDA-B24E-35F4766DE725.jpeg326C9321-D8AB-47CD-BA64-DD7383B09826.jpeg7A48B4E2-47CF-46DD-B8B0-159DE95B6E96.jpeg
 

Japonicus

Masterpiece
Messages
4,940
Reaction score
7,704
Location
Western West Virginia AHS heat zone 6
USDA Zone
6b
@Gsquared you do really nice pottery, I’ve seen on here.
Taiko nails? The term nail does ring an old bell from way back when in my head.
I’ve been referring to them as rivets since the term eluded me.
When I do a search for Taiko nails, I get mostly fake nail tips and actual drums
which the drums is the idea. How do you do these nails?
I assumed they were pressed into clay to form the shape and individually trimmed, then pressed onto
the pot before firing, or as in one of yours, simply pressed into the pot as indentions.
Your 1st oval in above post with the diamond or square shaped nails, has a unique brown colour. I like it.

I just have no idea what clay and cone mine was fired at, so no idea how frost resistant it is.
It does set squarely with no rock to it. Very even.
 

rockm

Spuds Moyogi
Messages
14,257
Reaction score
22,416
Location
Fairfax Va.
USDA Zone
7
@Gsquared you do really nice pottery, I’ve seen on here.
Taiko nails? The term nail does ring an old bell from way back when in my head.
I’ve been referring to them as rivets since the term eluded me.
When I do a search for Taiko nails, I get mostly fake nail tips and actual drums
which the drums is the idea. How do you do these nails?
I assumed they were pressed into clay to form the shape and individually trimmed, then pressed onto
the pot before firing, or as in one of yours, simply pressed into the pot as indentions.
Your 1st oval in above post with the diamond or square shaped nails, has a unique brown colour. I like it.

I just have no idea what clay and cone mine was fired at, so no idea how frost resistant it is.
It does set squarely with no rock to it. Very even.
Do a search on "Taiko drum" that is what "drum" pots are modeled after-"taiko" means "drum" in Japanese. the nails on the sides of those drums, hold the drum skins on the instrument. There are a variety of drum styles and nail patterns...
 

Japonicus

Masterpiece
Messages
4,940
Reaction score
7,704
Location
Western West Virginia AHS heat zone 6
USDA Zone
6b
Do a search on "Taiko drum" that is what "drum" pots are modeled after-"taiko" means "drum" in Japanese. the nails on the sides of those drums, hold the drum skins on the instrument. There are a variety of drum styles and nail patterns...
Hey Rockm good morning. I saw that in the search, and was always aware of the actual drum idea.
I had recently seen this one I got in a search, and was calling the nails rivets for lack of proper term.
Curious how most potters go about assembling them since Gsquared is making them.
267031
Here are 2 drums I really like the wood grain, or finish on the last 2nd one.
So these are actual nails I know, how do potters do it? Spin a tool in the clay to shape the rivet
remove and press onto pot then fire? Adds a bit of meticulous time to the project.
267032
 

rockm

Spuds Moyogi
Messages
14,257
Reaction score
22,416
Location
Fairfax Va.
USDA Zone
7
Hey Rockm good morning. I saw that in the search, and was always aware of the actual drum idea.
I had recently seen this one I got in a search, and was calling the nails rivets for lack of proper term.
Curious how most potters go about assembling them since Gsquared is making them.
View attachment 267031
Here are 2 drums I really like the wood grain, or finish on the last 2nd one.
So these are actual nails I know, how do potters do it? Spin a tool in the clay to shape the rivet
remove and press onto pot then fire? Adds a bit of meticulous time to the project.
View attachment 267032
They more like tacks on an actual drum, they don't go all the way through the wood.

On pots, I assume there are several ways to make them--but I'd also think the "rivets" on a pot are mostly round clay pieces that are made separately, then "glued" in place on the pot with clay slip and fired along with the pot. I'd also think the rivets could also be made using some type of punch tool (similar to a leather working punch) that can be pressed into the surface of the clay prior to firing.

FWIW, I've got many drum pots, including Japanese and western made. I speak from what I've seen on them and from talking with their makers.
 

Japonicus

Masterpiece
Messages
4,940
Reaction score
7,704
Location
Western West Virginia AHS heat zone 6
USDA Zone
6b
In the years I've been doing bonsai by the seat of the pants with no training
I have very few bonsai pots worth mention. Maybe count on one hand.
It was hard coughing up $100 for this one spent down on vacation on the way back
but the shimpaku it's receiving deserves a better pot than the mica pots I typically use.
The deal I got on the shimpaku at NEB makes up for cost of any pot I choose to put it in :)
It's been in the same nursery can since before I acquired it in 2008. It is ripe to pot up and good vigour.
 

Adair M

Pinus Envy
Messages
14,402
Reaction score
34,885
Location
NEGeorgia
USDA Zone
7a
That pot you hot at the Monastery is likely Chinese. Nice looking pot. That website used to identify pots is managed by Michael Ryan Bell. He and Matt Ouwinga are the foremost pottery experts in the US.

I do not claim to be a pottery expert at all! Lately, I have been leaning towards using antique Chinese pots because of the color of the clay, and the patina the old pots have. Like mature bark on a bonsai, genuine patina adds a richness and depth to the look of a pot.
 

Adair M

Pinus Envy
Messages
14,402
Reaction score
34,885
Location
NEGeorgia
USDA Zone
7a
By the way, NOW is the time to reduce the foliage and wire that juniper. While it’s still in the nursery can. Cut off all the extra plastic lip of the nursery can so you can see the entire lower trunk, and find the nebari. (I think all that green plastic is affecting the way you “see” your tree.)

Styling it now will expose the inner parts of the tree to the sun, so next spring, you’ll get backbudding in the interior. If you wait, you won’t.

Junipers should be styled in the fall. And then you can repot in the spring.
 

Japonicus

Masterpiece
Messages
4,940
Reaction score
7,704
Location
Western West Virginia AHS heat zone 6
USDA Zone
6b
By the way, NOW is the time to reduce the foliage and wire that juniper. While it’s still in the nursery can. Cut off all the extra plastic lip of the nursery can so you can see the entire lower trunk, and find the nebari. (I think all that green plastic is affecting the way you “see” your tree.)

Styling it now will expose the inner parts of the tree to the sun, so next spring, you’ll get backbudding in the interior. If you wait, you won’t.

Junipers should be styled in the fall. And then you can repot in the spring.
@Adair M in no way am I second guessing you, nor discounting that.
I have to inject my experience with my cascade where I lost this entire year to recovery.
In Fall of 2017 I thinned the foliage, in the Spring, though a bit early I repotted it into a larger
grow box I made for cascade. I was scoffed for setting the style up to go wild ruining the current style
giving it more room to grow. Instead, potting up at 1st sign of growth as we do with pines
I repotted. I slowed the growth of that procumbens immensely to the point of concern and worry.
By Summer only concerned, to this day I have not pruned on this juniper.
I wished I had left it more unruly and thinned it after recovery this Fall rather than the Fall prior to potting.

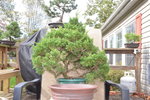
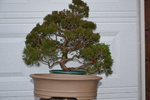
Here is the shimpaku for this pot.
DSC_3669.jpeg
A Fall repotting was considered, but we travelled and a black fungus like growth is atop
the roots of a couple trees on the nebari and even this juniper has some black on the bark.
I can't fix stupid with an unwilling to learn or care family member who has their own ideas
on how to water. Anyway, for the Fall consideration all foliage was left unchecked.
I will remove more lower growing foliage, and do you think I should remove all the new growth tips too
considering that I like to keep it unruly prior to a Spring repot this Fall and rely on the new growth tips
come Spring to aid in recovery? These current growth tips (where energy is derived from) will be replaced
come Spring with new ones I know, but I still have to ask if these ones today, can help increase vigour
after repotting next May late April maybe? Having never potted this one up, and the amount of expected
root reduction, I want all props I can get for this fella.
267071
Here's the cascade, and the only plump growth tips are on the lower apex.
The rest is active, but to a much lesser degree, to the point that it is stymied.
 

Adair M

Pinus Envy
Messages
14,402
Reaction score
34,885
Location
NEGeorgia
USDA Zone
7a
@Adair M in no way am I second guessing you, nor discounting that.
I have to inject my experience with my cascade where I lost this entire year to recovery.
In Fall of 2017 I thinned the foliage, in the Spring, though a bit early I repotted it into a larger
grow box I made for cascade. I was scoffed for setting the style up to go wild ruining the current style
giving it more room to grow. Instead, potting up at 1st sign of growth as we do with pines
I repotted. I slowed the growth of that procumbens immensely to the point of concern and worry.
By Summer only concerned, to this day I have not pruned on this juniper.
I wished I had left it more unruly and thinned it after recovery this Fall rather than the Fall prior to potting.

Here is the shimpaku for this pot.
View attachment 267070
A Fall repotting was considered, but we travelled and a black fungus like growth is atop
the roots of a couple trees on the nebari and even this juniper has some black on the bark.
I can't fix stupid with an unwilling to learn or care family member who has their own ideas
on how to water. Anyway, for the Fall consideration all foliage was left unchecked.
I will remove more lower growing foliage, and do you think I should remove all the new growth tips too
considering that I like to keep it unruly prior to a Spring repot this Fall and rely on the new growth tips
come Spring to aid in recovery? These current growth tips (where energy is derived from) will be replaced
come Spring with new ones I know, but I still have to ask if these ones today, can help increase vigour
after repotting next May late April maybe? Having never potted this one up, and the amount of expected
root reduction, I want all props I can get for this fella.
View attachment 267071
Here's the cascade, and the only plump growth tips are on the lower apex.
The rest is active, but to a much lesser degree, to the point that it is stymied.
No, NEVER, EVER, remove the “growth tips” on a juniper. (The only exception to this is Tosho juniper, which hardly anyone outside of Japan has). Cutting back, or pruning, does not remove the growth tips. You can thin, and still leave the growth tips. Removing the growth tips WILL set your juniper back!

Yes, you should remove all hanging and downward growing foliage. Yes, you should remove weak, dead, and dying foliage. Yes, you should prune to thin the foliage and develop proper structure of alternating branches. The time to do that is in the fall. Yes, you should wire it out in the fall. The fall is the proper time to do this kind of work on juniper.

It doesn’t matter what you’ve done in the past. I’m telling you what the proper timing is for juniper. You may have gotten lucky, or unlucky in the past. But, the timing I’m suggesting to you is how they do them in Japan, and it’s how my teacher does them, and how I do them.
 

Japonicus

Masterpiece
Messages
4,940
Reaction score
7,704
Location
Western West Virginia AHS heat zone 6
USDA Zone
6b
No, NEVER, EVER, remove the “growth tips” on a juniper. (The only exception to this is Tosho juniper, which hardly anyone outside of Japan has). Cutting back, or pruning, does not remove the growth tips. You can thin, and still leave the growth tips. Removing the growth tips WILL set your juniper back!

Yes, you should prune to thin the foliage and develop proper structure of alternating branches. The time to do that is in the fall.
Ok thanks for your helps. I will see what I can muster up :)
 

Gsquared

Shohin
Messages
385
Reaction score
1,167
Location
Portland (ish), OR
USDA Zone
8B
So these are actual nails I know, how do potters do it? Spin a tool in the clay to shape the rivet
remove and press onto pot then fire? Adds a bit of meticulous time to the project.
You're close, I roll out a coils clay and cut it into small pieces roughly the size of a pea. Roll them into little pea size balls, measure out your pot and put a mark in the clay, add a drop of slip and press on. I’ve used dowels, a socket wrench, a bamboo stick etc to press on for different looks and shapes. You can never believe the number of little clay balls you have to make. Count the nails on one of your taiko pots and you’ll be surprised at the number.
 

Japonicus

Masterpiece
Messages
4,940
Reaction score
7,704
Location
Western West Virginia AHS heat zone 6
USDA Zone
6b
You're close, I roll out a coils clay and cut it into small pieces roughly the size of a pea. Roll them into little pea size balls, measure out your pot and put a mark in the clay, add a drop of slip and press on. I’ve used dowels, a socket wrench, a bamboo stick etc to press on for different looks and shapes. You can never believe the number of little clay balls you have to make. Count the nails on one of your taiko pots and you’ll be surprised at the number.
Meticulous alright! I’d rather do that than the bud selection on my Congesta Mugo.
One terminal I cut off yesterday has, well my eyes get confused by the time I count to 30
and there’s still more to go. Looks like 3 dozen buds on one terminal.
 

Japonicus

Masterpiece
Messages
4,940
Reaction score
7,704
Location
Western West Virginia AHS heat zone 6
USDA Zone
6b
No, NEVER, EVER, remove the “growth tips” on a juniper.
Wrong thread for this but I haven't started a dedicated thread for this shimpaku yet...

...Getting my elbows in there and doing some research including BVF blog, I recalled your reply.
I hope you understand I meant the long runners, and areas where thinning and pruning dictate certain specific growth tips connected.
I hope you know I did not mean, like all the growth tips. That would be silly.
I've been reluctant to remove any growth proceeding a repot, so removing all the growth tips was not anywhere near the intention
when thinning and pruning. Those runners are what I was talking about where the maximum strength is gained, (on steroids I would think)
in comparison to the growth tips that are more in line with the overall silhouette of each intended pad.
Then as I shorten a pad, pruning for shape and so on, more growth tips associated with these specific prunings are removed.
I'm still leaving growth tips on the remaining foliage...
 

Tieball

Masterpiece
Messages
3,133
Reaction score
3,207
Location
Michigan. 6a
USDA Zone
6a
I think your pot choice is to massive for the tree. To big. To heavy looking. The pot will overweight the tree...it looks to heavy and to light of a color for me. I’d look further. I do think a tree of your species could look good in that pot but to me it would need a tree with a massive trunk that occupied almost half the pot. There’s a grey-brown clay finish (not sure how to describe other than a dusty grey tone..very dry earthy) I see in searches...appears more toward the grey side. In my mind a color like that would be a better choice. But then I’m a long ways away from actually seeing the tree.

Hmmmmm...lots of trunk moss growing. Any plan to eliminate it?
 

Japonicus

Masterpiece
Messages
4,940
Reaction score
7,704
Location
Western West Virginia AHS heat zone 6
USDA Zone
6b
I think your pot choice is to massive for the tree. To big. To heavy looking. The pot will overweight the tree...it looks to heavy and to light of a color for me. I’d look further. I do think a tree of your species could look good in that pot but to me it would need a tree with a massive trunk that occupied almost half the pot. There’s a grey-brown clay finish (not sure how to describe other than a dusty grey tone..very dry earthy) I see in searches...appears more toward the grey side. In my mind a color like that would be a better choice. But then I’m a long ways away from actually seeing the tree.

Hmmmmm...lots of trunk moss growing. Any plan to eliminate it?
Hi Tieball. Thanks for the input. Are you referring to the red/brown one I got at the monastery this weekend
or one of the others earlier like this one...post #37
So I got a pot in today...

View attachment 224567View attachment 224568
View attachment 224569

It's obvious that this pot does indeed dwarf the trunk. Especially in the photo of tree 10" behind the pots centre.
267335
...^this one I chocked up to, just being displayed on a shelf till needed, and may be more like the one you referred to
from a search you did.
267334

This was the colour I was shooting for. Cannot find it anywhere on the web,
so when I saw the reddish/brown 2 tone one in unglazed, and the style perfectly matched
the bottom rests squarely...no brainer. So there's really 3 main pots in this thread now.

Interior at the widest point of the flair is (the 3rd or the last pot post #38)
9x7x2-1/4"
I think it's in a 2g can now.

You would say the same about all my bonsai projects. I compensate with what I've learned
over the years that accommodates my watering capabilities/schedule.
The shimpaku in this thread is in the same nursery can I got it in, in 2008.
No telling how long it had been in there. It has never been repotted per se only inverted
and cleaned around the edges as deep as I could.
I do not plan on a finished root reduction this Spring when I pot it up, but even if it were at that
point in time, I'm sure this pot would still be a swell 1st pot for it.
BTW at 2-1/4" deep, it is my 2nd most shallow pot I think.

For the moss, yes, I've a thread in the juniper forum
I cleaned that up one point last year, but now for the 1st time I'm removing more of the bark
than just the lower porting with the moss. I've gotten a bit closer to the apex but so many fibres to
tediously get at. No updates for a couple days...I'm working on it :)
 
Top Bottom