BonsaiMatt

Shohin
Messages
255
Reaction score
880
Location
Maryland
USDA Zone
7a
This Trident has been growing in my yard for around 10 years, I think it was probably around 5 years old when I planted it. I had a bunch of earlier pictures of the trunk development, but naturally I lost them. I've allowed it to grow to 15-20 feet and chopped it back to the ground around 5 times, trying to develop some taper and size. I probably should have dug it up to do root work several times too, but unfortunately I didn't...

It has aquired some decent size, and is finally starting to exfoliate its bark. I cut back the leader and branches in late winter and now that it's pushing buds, I'm ready to dig it up.

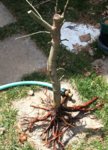
The left side in the first pic faced the sun all those years, very evident in the branch development. This will have to be rectified in the coming years. The current branches were selected last summer, so they're around a year old. The below pics are from mid March when I cut the leader back.
20180317_115810.jpg
20180317_120020.jpg20180317_115844.jpg20180317_115831.jpg
Up next: the digging.
 

BonsaiMatt

Shohin
Messages
255
Reaction score
880
Location
Maryland
USDA Zone
7a
Today I pulled my boots on and dug this sucker up. Sorry about the pics, apparently the soil in my yard and Trident bark are the exact same color. You guys know the drill, started by digging a trench around the tree.
20180408_110430.jpg
Keep digging..
20180408_115928.jpg
Start cutting under the root ball.
20180408_131642.jpg
Worm-eye-view of undercut. Note the Rocky soil under the fine roots. These rocks stopped any significant downward tap root development, whoop!
20180408_131633_HDR.jpg
Keep chipping away at the undercut until...
20180408_133642_HDR.jpg
It weighed at least 100lbs with all that soil attached, so I used this to get it to the back yard.
20180408_133941.jpg
Up next: cleaning the field soil away and cutting the roots back.
 

BonsaiMatt

Shohin
Messages
255
Reaction score
880
Location
Maryland
USDA Zone
7a
With all the heavy lifting done, I pulled up a chair and used a chop stick to work all the old soil away. As the nebari was revealed I found myself wishing I had done root work years ago. Not terrible, but it's very one-sided. Maybe I will try some root grafts down the road.

Sprayed the roots every few minutes to keep them from drying out while I worked.
20180408_141144_HDR.jpg
20180408_141153_HDR.jpg
20180408_141201_HDR.jpg
This continued till last the clay and rocks were removed. Because of the rocky soil, there were only a couple small downward-growing roots to trim off.
20180408_144902.jpg
In the below pic there are two large roots stacked on top of each other. The bottom one was removed, along with it's mirror image to the right. We want all the roots coming from one level. The cuts you see are a couple crossing roots I removed, they're no bueno either.
20180408_145358_HDR.jpg
Up next: finishing the root work and potting it up.
 

BonsaiMatt

Shohin
Messages
255
Reaction score
880
Location
Maryland
USDA Zone
7a
The large roots were cut back, while trying to keep as many fine roots as possible. I was careful to keep the fine roots that emerged from the gaps in the nebari, they are very valuable roots. Probably could have been more aggressive, but there's always next time. Cutting back to get it to fit in a pot and then rebuilding vigor is the name of the game at this stage.
20180408_150427.jpg
20180408_150437.jpg
20180408_150445.jpg
A large colander will serve as a pot while it's in development. Started with a drainage layer of geolite, commonly used in hydroponics.
20180408_151301_HDR.jpg
Followed by around 1.5 inches of soil (Boon's mix) and then the tree.
20180408_151704.jpg
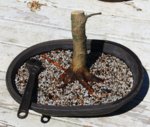
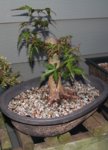
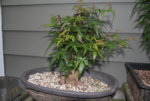
Top off the soil, working it in with a chopstick, and we're done. I'll put it in the sun for now to keep it warm, roots enjoy the warmth...20180408_153112_HDR.jpg20180408_153147.jpg20180408_153134_HDR.jpg
That's about all for now. It will be protected from any late frost, and watched carefully during the growing season. It will be allowed to grow freely this year to rebuild vigor. The smaller (North facing) branches will be allowed to thicken to catch up to the fatter (sunny South facing) branches.
Any comments are welcome, from styling advice to critiques if my work! :D
Cheers,
-Matt
 

BonsaiMatt

Shohin
Messages
255
Reaction score
880
Location
Maryland
USDA Zone
7a
Dude! Impressive!!! Ground growing if one has the space...does it right...can have such cool material when ready to collect. This just goes to show it.
Thanks! I wish I had planted ten of them way back then...
Now I have a huge hole in my yard just begging for something to fill it :cool:
 

mcpesq817

Omono
Messages
1,810
Reaction score
499
Location
VA
USDA Zone
7
Nice! Stick another trident in the hole? ;)

I have one very similar to yours that I dug last year. I put it back in the ground after working the roots to heal some chop scars and will probably dig it next year for training.

One thing I did was put mine on a big ceramic tile. That helped ensure roots didn’t grow straight downward, and made digging it up much easier. I think it also helped with the basal flare.
 

BonsaiMatt

Shohin
Messages
255
Reaction score
880
Location
Maryland
USDA Zone
7a
Nice! Stick another trident in the hole? ;)

I have one very similar to yours that I dug last year. I put it back in the ground after working the roots to heal some chop scars and will probably dig it next year for training.

One thing I did was put mine on a big ceramic tile. That helped ensure roots didn’t grow straight downward, and made digging it up much easier. I think it also helped with the basal flare.
Great point, I'm thinking of putting it back in the ground to heal the scars after a couple years of root work. We'll see how the development goes, if the scars bother me in a year or two that will be the way to go.
 

BonsaiMatt

Shohin
Messages
255
Reaction score
880
Location
Maryland
USDA Zone
7a
I probably should have planted it on a tile, but I lucked out with the rocky layer of soil. Definitely the first time I've been happy about all these dang rocks, it makes my landscape and hardscape projects much more difficult.
 

CovertNeo

Sapling
Messages
39
Reaction score
70
Location
Southwest VA
USDA Zone
6b
Started Bonsai three years ago and planted my first tree (Acer Palmatum) into the ground this spring. This post is very inspirational! Thanks for the photos and commentary on them.

Curious were the buds open when you dug up and potted? I have leaves on my trident maple in training and wanted to pull up the colander and trim the roots.
 

River's Edge

Masterpiece
Messages
4,752
Reaction score
12,770
Location
Vancouver Island, British Columbia
USDA Zone
8b
The large roots were cut back, while trying to keep as many fine roots as possible. I was careful to keep the fine roots that emerged from the gaps in the nebari, they are very valuable roots. Probably could have been more aggressive, but there's always next time. Cutting back to get it to fit in a pot and then rebuilding vigor is the name of the game at this stage.
View attachment 185897
View attachment 185898
View attachment 185899
A large colander will serve as a pot while it's in development. Started with a drainage layer of geolite, commonly used in hydroponics.
View attachment 185900
Followed by around 1.5 inches of soil (Boon's mix) and then the tree.
View attachment 185901
Top off the soil, working it in with a chopstick, and we're done. I'll put it in the sun for now to keep it warm, roots enjoy the warmth...View attachment 185902View attachment 185903View attachment 185904
That's about all for now. It will be protected from any late frost, and watched carefully during the growing season. It will be allowed to grow freely this year to rebuild vigor. The smaller (North facing) branches will be allowed to thicken to catch up to the fatter (sunny South facing) branches.
Any comments are welcome, from styling advice to critiques if my work! :D
Cheers,
-Matt
Well explained and executed. The staging appears correct and you have plenty of time to work on refining top and bottom. I do not think it would have been wise to attempt anything further at this stage. Well done, with promising material. Choose your next direction and apex carefully to maximize the best view for front. Perhaps you may wish to develop a different leader for apex.
 

BonsaiMatt

Shohin
Messages
255
Reaction score
880
Location
Maryland
USDA Zone
7a
Started Bonsai three years ago and planted my first tree (Acer Palmatum) into the ground this spring. This post is very inspirational! Thanks for the photos and commentary on them.

Curious were the buds open when you dug up and potted? I have leaves on my trident maple in training and wanted to pull up the colander and trim the roots.
The buds are just starting to extend:
20180408_212349.jpg
This is a good time to collect (cut roots) because it means the tree is moving sugars and starches up the trunk, so we minimize the energy lost by removing large roots. Also, and maybe more important in your case, the tree is not transpiring so it does not have large water demands that would require a large root system.
 

BonsaiMatt

Shohin
Messages
255
Reaction score
880
Location
Maryland
USDA Zone
7a
Well explained and executed. The staging appears correct and you have plenty of time to work on refining top and bottom. I do not think it would have been wise to attempt anything further at this stage. Well done, with promising material. Choose your next direction and apex carefully to maximize the best view for front. Perhaps you may wish to develop a different leader for apex.
Thanks! Posts with lots of pics are my favorite, so I figured I'd start contributing :)
Definitely going to be getting a new leader going to continue the taper into the future crown. I think the choices for a front are very limited due to the large scar on the back (I didn't post many pics of this cause it's fugly :oops:, check the first post).
 

BonsaiMatt

Shohin
Messages
255
Reaction score
880
Location
Maryland
USDA Zone
7a
Top Bottom