Guy_wires Collection

Wires_Guy_wires

Imperial Masterpiece
Messages
6,462
Reaction score
10,735
Location
Netherlands
IMG_20210425_170053.jpgIMG_20210425_170024.jpg
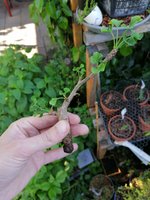
Chop 'em young. A cute angels. Wait.. Acute angles!

IMG_20210425_165912.jpg
E-toy gawa
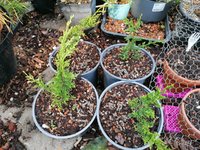
The E stands for Juniper.

IMG_20210425_165811.jpg
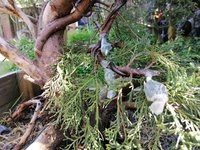
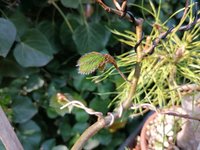
Zombie pfizer received 13 or so grafts. With some kind of nice chinensis foliage.

IMG_20210425_165833.jpg
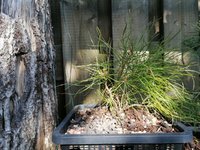
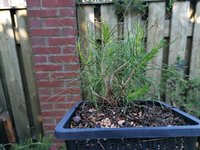
Clump to be. Sylvestris, year 3?

IMG_20210425_165712.jpg
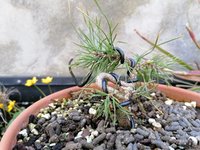
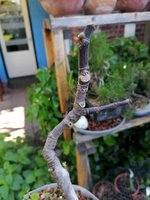
Wire goes on the outside of the bend. Or doesn't it?

IMG_20210425_165743.jpg
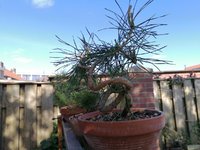
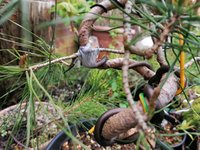
Snake 'em if you got 'em. Norwegian type Sylvestris.
 

Wires_Guy_wires

Imperial Masterpiece
Messages
6,462
Reaction score
10,735
Location
Netherlands
what is the aftercare like/ Do you keep the plant in the shade for 2 years for the grafts to start doing someting? Do you open the foil up? Any hints?
I keep the plant in partial shade, but that's just because that's where it's situated in summer. I haven't found much difference, but I graft in the end of spring as opposed to the start of summer. This year is an awesome grafting year; low temperatures, daily rain, a little sun every now and then, high humidity. Frost and high temperatures seem to be a major factor.
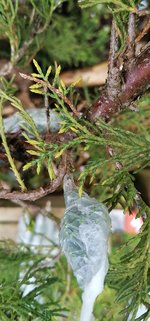
I wait for the graft to start growing, it'll produce bumps in the film wrap because the foliage wants to push through it. Should happen around june/july. Then when the first bump pops open or when the growth tears the wrap, I poke a couple holes every week for roughly 5 weeks with a toothpick. If the wrap is damaged before that time, I just add another layer of pre-stretched parafilm to cover it. If there's no more moisture on the inside of the scion wrap, it's either dead because it had holes, or it's dead because it's baked in the sun. The difference is in the color; if evaporation killed it, it'll likely stay green and turn crispy. If it's brown, then it's baked.

At the second half of summer, most of them should have taken and I can take off the wrap in phases: open it up a little more every week starting from the tip. I keep the connection-wrap (on the trunk, covering the wound) on until winter or longer, just for security reasons. Birds can and will pluck them off. Some 15% of the grafts never take, another 15% will die during the unwrapping process (either by being baked, or by being desiccated) and the rest should grow a little this year, and produce some OK growth next year. Two years sounds like a stretch to me; the connection is made in year one, and after that, the foliage should receive a lot of light to start making a stronger connection with the rest of the plant. If it's not demanding water, it could be rejected. The scion connection to the trunk or branch usually isn't that strong, so I prefer my trees to heal that connection rather sooner than later. To do this effectively you'd want as much growth as possible.

Sometimes I hose the receiving plant down a little longer, just to keep things damp but since the parafilm is covering the scion, nothing really should get in the scion wrap. I just want the outer tissue and bark to stay a bit on the softer side to aid in healing; if the wound dries out, it's game over because the callus tissue will not bridge the gap between scion and receiver before next year if that happens.. And the scion will be dead before fall.
High nutrient dosage for the soil, but no foliar sprays containing a lot of salts because that might damage the parafilm.

I'm skipping my callus inducing experiments this year, save those for next year when I have more itoigawa to play with.

Also: Screw grafting knives. I spent six hours grafting with a Japanese-made grafting knife and I couldn't really make clean cuts even though the knife came straight from the box. Then I took a cheap box cutter and boom! Like a knife through butter, way better control (no accidental slips that cut off entire branches), much cleaner cuts, less damage and no need for sharpening.
 

0soyoung

Imperial Masterpiece
Messages
7,500
Reaction score
12,874
Location
Anacortes, WA (AHS heat zone 1)
USDA Zone
8b
Also: Screw grafting knives. I spent six hours grafting with a Japanese-made grafting knife and I couldn't really make clean cuts even though the knife came straight from the box. Then I took a cheap box cutter and boom! Like a knife through butter, way better control (no accidental slips that cut off entire branches), much cleaner cuts, less damage and no need for sharpening.
ditto (as in amen)
 

River's Edge

Masterpiece
Messages
4,755
Reaction score
12,780
Location
Vancouver Island, British Columbia
USDA Zone
8b
even though the knife came straight from the box. T
The knives are not usually intended to be used straight from the box actually, so that is not surprising. It does make a difference if sharpened properly first. Not saying anything against other forms or types of grafting tools. Further they often have a protective coating applied to the blade such as light camellia oil or mineral oil for preservation during shipping, packaging, storage until sold. Another good reason to clean and sharpen before use.
One of the first things mentioned in grafting instruction is to ensure your blade is clean and sharpened before use!
I have had good success with single edged razor blades for some grafting and propagating purposes. They are basically single use disposable options.
Some grafting techniques require chisels and the same sharpening requirements exist for their use as well! Neither the standard grafting knife, box cutters or razor blades will suit for those techniques.
 

leatherback

The Treedeemer
Messages
14,054
Reaction score
27,395
Location
Northern Germany
USDA Zone
7
I keep the plant in partial shade, but that's just because that's where it's situated in summer. I haven't found much difference, but I graft in the end of spring as opposed to the start of summer. This year is an awesome grafting year; low temperatures, daily rain, a little sun every now and then, high humidity. Frost and high temperatures seem to be a major factor.
I wait for the graft to start growing, it'll produce bumps in the film wrap because the foliage wants to push through it. Should happen around june/july. Then when the first bump pops open or when the growth tears the wrap, I poke a couple holes every week for roughly 5 weeks with a toothpick. If the wrap is damaged before that time, I just add another layer of pre-stretched parafilm to cover it. If there's no more moisture on the inside of the scion wrap, it's either dead because it had holes, or it's dead because it's baked in the sun. The difference is in the color; if evaporation killed it, it'll likely stay green and turn crispy. If it's brown, then it's baked.

At the second half of summer, most of them should have taken and I can take off the wrap in phases: open it up a little more every week starting from the tip. I keep the connection-wrap (on the trunk, covering the wound) on until winter or longer, just for security reasons. Birds can and will pluck them off. Some 15% of the grafts never take, another 15% will die during the unwrapping process (either by being baked, or by being desiccated) and the rest should grow a little this year, and produce some OK growth next year. Two years sounds like a stretch to me; the connection is made in year one, and after that, the foliage should receive a lot of light to start making a stronger connection with the rest of the plant. If it's not demanding water, it could be rejected. The scion connection to the trunk or branch usually isn't that strong, so I prefer my trees to heal that connection rather sooner than later. To do this effectively you'd want as much growth as possible.

Sometimes I hose the receiving plant down a little longer, just to keep things damp but since the parafilm is covering the scion, nothing really should get in the scion wrap. I just want the outer tissue and bark to stay a bit on the softer side to aid in healing; if the wound dries out, it's game over because the callus tissue will not bridge the gap between scion and receiver before next year if that happens.. And the scion will be dead before fall.
High nutrient dosage for the soil, but no foliar sprays containing a lot of salts because that might damage the parafilm.

I'm skipping my callus inducing experiments this year, save those for next year when I have more itoigawa to play with.

Also: Screw grafting knives. I spent six hours grafting with a Japanese-made grafting knife and I couldn't really make clean cuts even though the knife came straight from the box. Then I took a cheap box cutter and boom! Like a knife through butter, way better control (no accidental slips that cut off entire branches), much cleaner cuts, less damage and no need for sharpening.
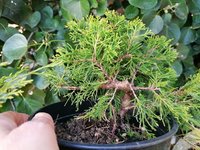
Thx. I hope to have some success here. I guess I will leave it in morning-sun-only here for the time being. Lets see when the scions start pushing the film!


20210513-R14A5443.jpg
 

0soyoung

Imperial Masterpiece
Messages
7,500
Reaction score
12,874
Location
Anacortes, WA (AHS heat zone 1)
USDA Zone
8b
Some grafting techniques require chisels
True.

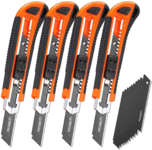
But for everything else, these

1621216182646.png

for example, are inexpensive and superbly suited to the task. No more endless hours honing the traditional grafting steel. Just break off the used/dulled end of the razor sharp insert with pliers and one is good to go.

btw, I find it far easier to sharpen a chisel than a grafting knife. But why spend the time sharpening a grafting knife? It is unnecessary. I don't attempt to sharpen saw blades either, for analogous reasons.

I'm with @Wires_Guy_wires
 

River's Edge

Masterpiece
Messages
4,755
Reaction score
12,780
Location
Vancouver Island, British Columbia
USDA Zone
8b
traditional grafting steel
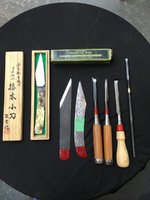
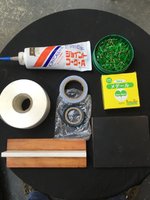
Must be that I am behind the times. I do have to sharpen and maintain the rest of my Bonsai tools, might as well keep up the grafting knives and chisels. But mine are special they only take a few minutes to maintain. I can see why you switched if your grafting knife was taking endless hours of effort. I include the grafting wax for historical purposes, along with four generations of grafting tapes. Cellophane wrap is the larger white roll! Bottom left cut block is adapted from one used by Brent at Evergreen and the black rubber block for scion prep as well adapted from one of my teachers. The grafting wax is replaced by the modern latex caulk in the top left of the second picture.
 

Attachments

  • IMG_0571.JPG
    IMG_0571.JPG
    142.1 KB · Views: 15
  • IMG_0572.JPG
    IMG_0572.JPG
    151.2 KB · Views: 15

Wires_Guy_wires

Imperial Masterpiece
Messages
6,462
Reaction score
10,735
Location
Netherlands
The knives are not usually intended to be used straight from the box actually, so that is not surprising. It does make a difference if sharpened properly first. Not saying anything against other forms or types of grafting tools. Further they often have a protective coating applied to the blade such as light camellia oil or mineral oil for preservation during shipping, packaging, storage until sold. Another good reason to clean and sharpen before use.
One of the first things mentioned in grafting instruction is to ensure your blade is clean and sharpened before use!
I have had good success with single edged razor blades for some grafting and propagating purposes. They are basically single use disposable options.
Some grafting techniques require chisels and the same sharpening requirements exist for their use as well! Neither the standard grafting knife, box cutters or razor blades will suit for those techniques.
My grafting knife could cut a standing piece of paper with ease, shaved a patch of my arm hair with it just as a test; that thing is sharp.
I always clean my tools.

The key difference between the grafting knife and the box cutter is the incline of thickness of the blade. I don't know if that makes sense, hard to explain for me in English for some reason. The grafting knife is rather blunt (2mm from the edge the blade is 2mm thick), producing a more wedged cut and it needed more force to do a proper cut. The box cutter is thinner, and this made all the difference I believe.

Don't get me wrong, people should use whatever works for them. I'm just a bit disappointed by the design, price and handling of some specialized tools. Maybe it's just a matter of experience.. I've spent over a thousand hours working with scalpels and other precision laboratory tools. It could very well be that this is why I feel these thinner blades work better for me.
 

River's Edge

Masterpiece
Messages
4,755
Reaction score
12,780
Location
Vancouver Island, British Columbia
USDA Zone
8b
My grafting knife could cut a standing piece of paper with ease, shaved a patch of my arm hair with it just as a test; that thing is sharp.
I always clean my tools.

The key difference between the grafting knife and the box cutter is the incline of thickness of the blade. I don't know if that makes sense, hard to explain for me in English for some reason. The grafting knife is rather blunt (2mm from the edge the blade is 2mm thick), producing a more wedged cut and it needed more force to do a proper cut. The box cutter is thinner, and this made all the difference I believe.

Don't get me wrong, people should use whatever works for them. I'm just a bit disappointed by the design, price and handling of some specialized tools. Maybe it's just a matter of experience.. I've spent over a thousand hours working with scalpels and other precision laboratory tools. It could very well be that this is why I feel these thinner blades work better for me.
The key is what works for the individual and the material being grafted. Sometimes grafting is very repetitive for commercial propagation purposes! The effort required to use the tool makes a big difference if you are completing hundreds of grafts per day in nursery propagation.

For my Bonsai purposes completing each one as carefully as possible is the goal. Production time and effort involved is not the priority. Except that timing for making the cut and placing the scion can affect the final result for certain aspects of the graft.

For most of my grafting the thicker wedge is required and makes it easier to place for the scion size and thickness. Improving Yamadori or older established trees with thicker bark does require a wedge cut at greater depth to be effective. Thus the use of chisels in certain circumstances, with the chisel left in place until the scion is prepared and can be placed.

Perhaps we are not involved in the same grafting processes and or the same species of Bonsai trees. My grafting is for improvement purposes in primarily older mature conifer Bonsai. JBP, JRP, Juniper, Shore Pine. I am not involved in any grafting for propagation.
I can see thinner, lighter blades useful for grafting smaller, younger stock. Thinner scions or joining desired cultivars to root stock with both parts being juvenile material. Species with thinner bark and cambium in particular as well.
I have tried box cutters, single edged razor blades and propagators grafting knives from the landscape nursery trade. I prefer what works for me and the type of grafting I am involved with. I do not think there is one single best tool for a variety of grafting methods and materials.
 

Wires_Guy_wires

Imperial Masterpiece
Messages
6,462
Reaction score
10,735
Location
Netherlands
IMG_20210530_174108.jpg
Green fig survived the winter. Cheerio!

IMG_20210530_174150.jpg
Ginkgo cutting from last year. Should(?) make roots any time in the next two months.

IMG_20210530_174548.jpg
Rebalance on the scots clump. Had some long ass candles.

IMG_20210530_174733.jpg
IMG_20210530_174843.jpg
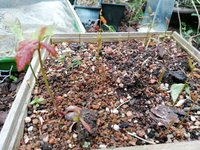
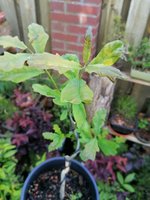
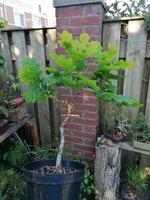
Oaks in development, two or three years since I dug those up.

IMG_20210530_175111.jpg
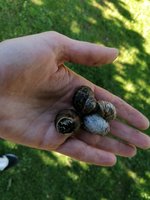
When seeds cost you 4 USD a piece, and these things munch 'em down before they have the chance to even become plants.. You yeet 'em. You yeet 'em good, you yeet 'em far. That's why they have armour.
 

Wires_Guy_wires

Imperial Masterpiece
Messages
6,462
Reaction score
10,735
Location
Netherlands
After reading about that Australian kid getting rat worms from eating a slug and lying in a coma for 8 years, I'm thinking escar-nope!

IMG_20210531_193406.jpg
One of my instant bonsai (wired branch, airlayered the bottom) junipers seems to be rooting. It only took 400 days! Blaauw is a notoriously bad rooter. The one on the left is taking a little longer. But that's alright.
 

Wires_Guy_wires

Imperial Masterpiece
Messages
6,462
Reaction score
10,735
Location
Netherlands
ohw.. I just cut a 2cm thick branch and plopped it in substrate as a cutting a week ago. You think I am too optimistic?
Not at all! Eventually someone has to find their sweet spot. I've given it a couple dozen tries and none of them took before either being yanked out of the pot by birds or dying from a lack of roots after 2-15 months. A couple did produce roots, but they didn't suffice to keep the branches alive. On top of that, I'm dealing with a lot of wood lice that eat the callus tissue.
I dug around in literature a lot about the blaauw, and it seems it's one of the most difficult junipers to propagate through cuttings. I've cleaned and sown a couple hundred seeds last year and none of them have germinated either.

From observation I think I can tell they like to produce roots just once a year, just before they start flowering (which is roughly the last half of May until June 15th or so). I'm experimenting with girdling some branches for a year so that the base of the cutting already has some callus-like growth before I cut them off the tree. I think I'll cut them today and see how they do.
 
Top Bottom