Jesse's Ponderosa Pine #1

JesseKane

Yamadori
Messages
74
Reaction score
202
Location
Denver, Co
USDA Zone
6a
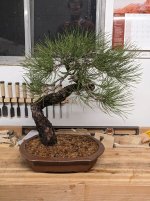
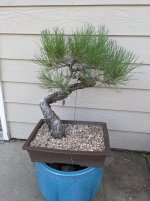
Thread to document this Ponderosa I acquired in August of 2024. It was collected in the Rockies in 1989 by Bert Rhodes. This is the tree on the day I picked it up:
PXL_20240803_210723991.jpg

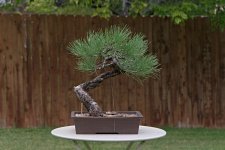
After some minor wiring to start getting it back into shape:
PondyWiredSmall.jpg

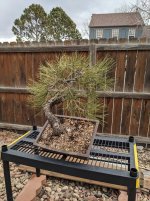
This spring I plan on repotting and changing the angle. It's hard to tell in the pictures, but the tree is currently leaning heavily away from the viewer. This is hiding quite a bit of beautiful movement in the trunk and results in a very angular and straight trunk line. Here's a pic I snapped a few days ago when starting to plan the repot:
PXL_20250214_210938639.jpg
It's a little hard to see between all the needles, but by simply planting more upright and rotating the front slightly this tree has a completely different feel. Also allows the primary branch structure to been seen better, showcasing Bert's work over the last 30 years. The new angle also puts the lower branches in a much better place, allowing for separation and good definition of the first branch.

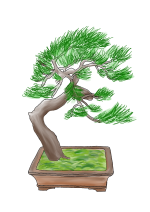
This sketch shows my long term goal for the tree:
Goal.png

This should be fairly straightforward to accomplish by simply compressing the left side a bit and continued work on ramification.
 
Yesterday was repot day! The tree managed to hold off on extending shoots until the day after Nao Tokutake visited our club and help a pot sale after his presentation. I picked up a nice pot that I feel fits the tree better than the vintage Japanese pot I had originally picked out and wouldn't need quite as severe of a root reduction. Glad to be able to remove the old soil, turns out it was just pea gravel and a fine dense soil that reminds me of the rich black mud you find in the bottom of wetlands.

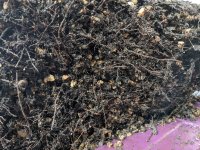
First I removed the gravel that was used as a top dressing and a fair amount of the soil on top of the root ball.
PXL_20250330_014123085.jpg
Close up of the larger surface roots. The Nebari is weak on this tree, so I'm going to make sure these are covered to try and encourage developement. Not expecting miracles, but what else can you do?
PXL_20250330_014128627.jpg

The tree lifted out of the pot pretty easily and I was able to get a look at the bottom matted roots. Lots of little growing tips but no sign of mycorrhiza. Roots could definatly be happier.

PXL_20250330_020123269.jpg

The bottom layer was very thin and was easy to loosen with a chop stick. Underneath I discovered even more pea gravel, thicker pieces that I assume was used as a drainage layer. Combed it out gently but didn't go very deep.

PXL_20250330_020903916.jpg

Next I got to work loosening the edges. I was able to get a lot of the old soil and gravel out without much reduction in the actual root mass. Roots were pretty tangled but teased apart with some gentle persuasion. Highest density of root is in and around the large structural roots, but there are fine roots growing to some degree around the full circumference of the trunk. Hoping to encourage developement of the fine feeders close to the trunk over the next few years.

PXL_20250330_025712342.jpg

There was a lot of what I can only imagine is 36 year old field soil in the major structural roots that I left alone, the only difference with the rest of the soil is that it didn't contain any gravel. At this point I'm happy with the amount of old soil removed while leaving a decent portion of the root ball untouched. Time to anchor into the pot!

PXL_20250330_034113486.jpg

I was able to get to about 80% of the angle change that I wanted during this repot and will take it the rest of the way in a few years. Could have fit it into a pot about an inch smaller, but probably not all the way to the original pot I had picked out. Glad I waited until I had another option! I used the typical APL mix with >1/8inch particles and about 10% pine bark added to help with moisture retention in our hot, dry, and windy climate. Top dressed with some sphagnum and we're done!

PXL_20250330_041753110.jpg

Took some glamor shots today to get a comparison to the pics I took last summer. The improvement from the angle change and rotation aren't as apparent in the pics as they are in person, but I'm pretty happy with the results.

NewPotReduced.jpg

And a closeup of the new pot, what a beauty!

Shoes.jpg
 
The tree has had a good summer. I'm see a lot more budding in the needles and a few backbuds pushing on older wood. I've been fertilizing the entire season with miracle grow but have switched to Raw NPK since August. This year's needles aren't all that much longer than last year, even with the extra fertilization.

Needles started to push in April
PXL_20250420_172553846.jpg

And needles were well under way by June
PXL_20250607_014325092.jpg

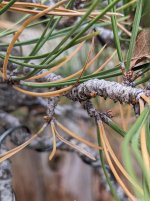
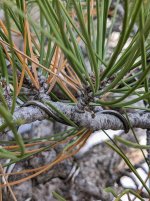
With backbuds forming over the last couple weeks. This is how they sit today
PXL_20251004_204343123.jpg
PXL_20251004_204607188.jpg
 
The biggest thing to happen this summer is that I've decided to radically change the front of the tree. Too bad I didn't discover the new angle until after the repot, but it just means this guy will get a new pot in a couple years before settling into refinement.

I discovered the new angle while tending my veggie garden on the other side of the lawn. I looked up from pulling weeds and was struck by how much interesting the trunk line was!

Here's the tree on some blocks when I was searching for the perfect new angle:
PXL_20250710_014538424.jpg
PXL_20250710_014548367.jpg

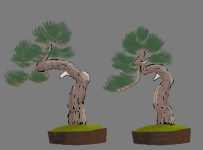
I traced the trunk outlines in an illustration software and created a sketch comparing style options. I like the one on the right and will be moving forward with that as the new goal. I think this can be achieved with minimal branch relocation next spring and won't impact by plan of building ramification with the new backbudding I've seen this year. The new style will need a new smaller pot to fit the proportions. I'll probably go with a square with rounded corners of some sort. Luckily there aren't many roots on the right side so accommodating the angle change should be straight forward. Nothing will be sticking up in the air that would have to be combed out and down or pruned.

AngleTests.png
 
Noice! I like your new design. I’ve had a few of those “aha” moments myself, where you’re looking at the tree from a different angle in the garden than you normally do and see a totally new design. Those are fun 😊

Personally, I think a slightly deeper round might be a better option for the new design, rather than a shallow square (like in your virt). Just personal preference though. It’s also much easier to keep them healthy in a slightly deeper pot.

Great work!
 
Thanks for the feedback! The new angle does remove a lot of the hard angles and replaces them with nice gentle curves, so a round might work out well. I honestly haven't put a lot of thought into the pot pairing yet, other than not really being happy with the match to the Nao pot it's currently in. I think container pairing is just something that I'll have to work on over the next couple year.
 
I too like the new angle.

Inspired by tomorrows project of fixing my Christmas tree planting angle, here’s a tip on getting radical angle changes correct: prop the tree at the new angle you want, then hang a plumb bob or two (in my teachers’ garden it’s fishing sinks) and align them how you like. This allows you to set the angle in advance and keep a reference at repotting time. Helps avoid the pain of looking at a tree that’s juuuust off for a year or two.
 
Back
Top Bottom