Making an oval pot - A potters tale

pjkatich

Chumono
Messages
826
Reaction score
38
Location
Northeast Florida
USDA Zone
9
Paul, great construction sequence you are posting. I look foreward to following along and seeing the end results. Very interesting. Thanks for sharing your work

Hey bonsaibiker,

Thanks for the positive feedback.

Make sure you get your two cents worth in when it comes time to pick the glazes.

Regards,
Paul
 

darrellw

Mame
Messages
244
Reaction score
1
Location
Vancouver, WA, USA
USDA Zone
8
Hi Paul,

Thanks for posting this, as an aspiring potter it is great to see.

So you don't shape the ring into an oval until after it gets leather hard?

-Darrell
 

Boondock

Shohin
Messages
253
Reaction score
1
Location
Puyallup WA USA (zone 8)
Once the oval slab in roughed out I will continue to work the slab using the flop method. Basically, I pick up the slab and flop it back down on the table. The slab is turned and flopped in a different direction each time until we get the approximate size we need. This is shown in the first three photos below. This is repeated for each of the three slabe we will need.

Here's a video that demonstrates the "flop method"

http://www.youtube.com/watch?v=FVY58K00cao
 

darrellw

Mame
Messages
244
Reaction score
1
Location
Vancouver, WA, USA
USDA Zone
8
Now it's time to throw the rim of the first pot.

After the clay is centered, we need of drop a hole in the middle of the lump of clay and pull the clay out to the edge of the bat as shown in photo #3. What we have now is a bottomless ring of clay which is ready to form into the wall of our pot.

Any questions?

Paul

Hi Paul,

Some questions on your technique between the centered lump and getting the ring out to the edge of the bat. Do you immediately open the centered lump to the bat as shown in the photo? Then do you just continue to pull out (radially) until you have a ring the size you want? When I've tried that, even with a closed-bottom, it always seems that I end up rolling the wall onto the bat, where either it doesn't stick very well, or even ends up with voids under it. Do you use both hands to force the top and outside back against the outward pull? In throwing closed-bottom forms, I'm had the best luck in creating a centered disk of about the finished diameter, them moving clay from the center (when I open) out to create the wall. But after a certain point that has problems as well with the clay folding over as I pull it out.

Any tips would be appreciated!

Thanks,
Darrell
 

pjkatich

Chumono
Messages
826
Reaction score
38
Location
Northeast Florida
USDA Zone
9
boondock,

Thanks for the link, I think it adds to the experience.

Darrell,

To anwer your first question. I haven't got to that part yet.

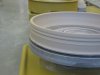
In regards to your second question, as you have noted, pulling out a bottomless ring is not easy. After centering the clay you drop your center hole all the way to the wheel head and pull out, across the wheel head a few inches at a time. I normally use two sponges to accompllish this task. I have one hand with a sponge inside pulling the ring out and one on the outside pushing the ring down. The main thing is not to lose contact with the wheelhead. I get some roll-over, but not enough to cause any problems.

As I pull the ring out, I will stop periodically and compress the ring to insure that I am not pulling the ring off center. Sometimes you will get a big smudge of clay on the inside of the ring when your inside hand comes of the wheel. This can be cleaned off with a rib or pushed back into the ring before you start pulling again. Another thing to keep in mind, clean the area of the bat out in front of the ring as you go along.

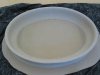
Once I get the ring of clay to the proper diameter, I compress it again and let it rest for a bit before I pull up the wall.

I hope this helps.

Paul
 

ketoi

Mame
Messages
220
Reaction score
2
Location
Northern California
USDA Zone
9b
Paul,
How long will the pieces need to stay under wraps till you can start assembly? How dry do you want them to be?
 

pjkatich

Chumono
Messages
826
Reaction score
38
Location
Northeast Florida
USDA Zone
9
Paul,
How long will the pieces need to stay under wraps till you can start assembly? How dry do you want them to be?

Ketio,

Patience, you are getting ahead of me here.

Stay tuned, all your questions will be answered.

Paul
 

pjkatich

Chumono
Messages
826
Reaction score
38
Location
Northeast Florida
USDA Zone
9
Fourth day

Now it's time to check on our oval pots.

I normally leave the pieces bagged up for three or four days. At that point, I take them down off the shelf and remove the plastic and the newspaper. The newpaper has absorbed the excess moisture and the clay has firmed up but is still workable. I put the rims back on the wheel head and give them another turn on the wheel.

This allows me to further refine the profile of the rim ring, tweek the width, adjust the height, or repair any dings from bagging the pieces up earlier. When I am satified with the rim profile I will cut it from the bat and set it aside. I will then repeat this procedure with the foot ring.

This is illustrated in the three photos below.
 

Attachments

  • IMG_0020a.jpg
    IMG_0020a.jpg
    69.8 KB · Views: 51
  • IMG_0021a.jpg
    IMG_0021a.jpg
    72.3 KB · Views: 49
  • IMG_0022a.jpg
    IMG_0022a.jpg
    76.1 KB · Views: 46

pjkatich

Chumono
Messages
826
Reaction score
38
Location
Northeast Florida
USDA Zone
9
Day four

The above described procedure is repeated with each of the other two rim and foot rings.

Below are the profiles of the other two pots at this point.

Once this portion of the operation is complete, I bag the pieces back up with fresh newspaper, cover them with plastic and put them back on the self.

Photo three shows the three ovals tagged, bagged, and back on the shelf for another rest.

Any questions?

Stay tuned for the next installment.

Cheers,
Paul
 

Attachments

  • IMG_0026a.jpg
    IMG_0026a.jpg
    67.9 KB · Views: 39
  • IMG_0033a.jpg
    IMG_0033a.jpg
    60.7 KB · Views: 33
  • IMG_0035a.jpg
    IMG_0035a.jpg
    91.4 KB · Views: 34

ketoi

Mame
Messages
220
Reaction score
2
Location
Northern California
USDA Zone
9b
Paul,
Those your shoes?

So once you cut the pieces from the bat it stays on the bat for further drying?
 

pjkatich

Chumono
Messages
826
Reaction score
38
Location
Northeast Florida
USDA Zone
9
Paul,
Those your shoes?

So once you cut the pieces from the bat it stays on the bat for further drying?


Yea, those are my throwing shoes. Made of rubber and easier to clean up after I have made a mess.

Yes, at this point, the clay is still on the soft side and the clay rings could not support there own weight yet. If you try to remove them from the bat at this point they would collapse.

Paul
 
Messages
130
Reaction score
9
Location
florida
USDA Zone
9
Yea, those are my throwing shoes. Made of rubber and easier to clean up after I have made a mess.

Yes, at this point, the clay is still on the soft side and the clay rings could not support there own weight yet. If you try to remove them from the bat at this point they would collapse.

Paul

Good boy Paul. Ya know they say cleanliness is next to godliness:rolleyes:
 
Last edited:

pjkatich

Chumono
Messages
826
Reaction score
38
Location
Northeast Florida
USDA Zone
9
Day 11

During the week that has gone by, I have checked on the three pots several times.

Each time removing the now wet newspaper and replacing it with fresh dry newspaper. I would check the firmness of the clay each time to determine if the rings had dried to the right consistency.

It has taken seven days and three newspaper changes to get to this point. The amount of time may vary depending on your location. Keep in mind, we are trying to reduce the moisture content of the clay pieces as evenly as possible and maintain a uniform moisture content between the individual pieces of clay.

When I refer to the right consistency, I want the clay to be not quite leather hard. There is no technical term for this, it's more of a touchy-feely thing. If it is to dry the ring will split when it is pulled into an oval shape. If it is to wet, it will collapse when you try to pick up the ring.

If I can pick up the rim ring without it bending under its own weight then its time to move on to the next stage.

At this point, I place the ring on an even flat surface and gently pull the ring into an oval shape. I will use a tape measure or ruler during this phase to get the ring of clay to the proper dimensions. Keeping in mind that the final pot will be approx. 12% smaller when it is complete.

After I have pulled the oval, I place it on top of the slab as shown in photo 1.

I will then cut the foot ring into four equal pieces and place them inside the oval on top of the slab as shown in photo 2

Photos 3 & 4 show the other two pots at this stage of production.

I will then bag them up again with some fresh newspaper and put them back on the shelf to rest and firm up a bit more.

Any questions?

Stay tuned for the next installment.

Regards,
Paul
 

Attachments

  • IMG_0001a.jpg
    IMG_0001a.jpg
    74.9 KB · Views: 46
  • IMG_0003a.jpg
    IMG_0003a.jpg
    79.9 KB · Views: 40
  • IMG_0004a.jpg
    IMG_0004a.jpg
    76.8 KB · Views: 36
  • IMG_0005a.jpg
    IMG_0005a.jpg
    77.4 KB · Views: 39

pjkatich

Chumono
Messages
826
Reaction score
38
Location
Northeast Florida
USDA Zone
9
Have you tried other shapes other than oval?

Great series!!

Yes, I've used this same method to make soft sided rectangles and squares.

Thanks for participating.

I appreciate the positive feedback.

Stay tuned, it only gets better.

Regards,
Paul
 

pjkatich

Chumono
Messages
826
Reaction score
38
Location
Northeast Florida
USDA Zone
9
Do you shape the foot ring into an oval before you cut it up?

-Darrell

No, I don't. At this point, I haven't established the final oval shape so, I just cut the ring into four equal parts.

The foot pieces are the last parts to be attached and are normally easy to manipulate.

Paul
 

bretts

Shohin
Messages
273
Reaction score
7
Thanks for the great thread Paul. I have been making slab,coil and mold pots for a while and I was just thinking of moving onto the wheel for a try. This will be a great help.
I am a big fan of soft sided rectangles and would like to know how you get that shape from this technique if I can.
 

pjkatich

Chumono
Messages
826
Reaction score
38
Location
Northeast Florida
USDA Zone
9
Thanks for the great thread Paul. I have been making slab,coil and mold pots for a while and I was just thinking of moving onto the wheel for a try. This will be a great help.
I am a big fan of soft sided rectangles and would like to know how you get that shape from this technique if I can.

bretts,

I am glad that you are enjoying the tutorial.

How about showing us a few of you pots sometime.

In regards to pulling a rectangle, what specifically would you like to know?

The rectangular form is a bit harder to pull but is accomplished in the same way at the oval. It just takes a bit more manipulation of the rim wall and a few more measurements to get it right.

Attached are photos of two soft sided rectangles made in this fashion.

Cheers,
Paul
 

Attachments

  • IMG_0051b.jpg
    IMG_0051b.jpg
    92.1 KB · Views: 49
  • IMG_0057b.jpg
    IMG_0057b.jpg
    90.7 KB · Views: 41
Top Bottom