pjkatich
Chumono
I liked what boondock had to say over in his thread on posting greenware and I liked the responses that he received. It's good to see the interest shown in making domestic bonsai containers.
I had decided last week to start a photo documentary covering the process (how I do it) of making a bonsai container from start to finish. Since I have been working on oval pots as of late, I decided to demonstrate an oval. So, in the spirit education and entertainment, I would like to share this process with the fine folks here at BonsaiNut.
At any given point, if you have a question, please feel free to ask.
At any given point, if you have something constructive to add, please feel free to do so.
I encourage active participation. In fact, I will be looking for input from the peanut gallery on how to finish the pots.
That's right, pots. Rule one in making ceramic bonsai containers. If you want one great pot, you should make at least three. There are a great many variables in this proccess and complete or partial failure is never that far away.
So, here we go.
I decided that I would show you how to make a 14" oval bonsai container. This project was started on 02/26/09 and will probably take another 4 to 6 weeks before we have a finished product.
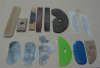
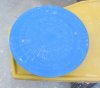
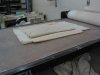
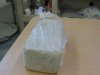
The process begins with the selection of the clay body. I have chosen a commercially available high fired, clay body made of 50% porcelain an 50% buff grey stoneware which comes in 25 pound blocks as shown in photo #1. I like this particular clay body when using blue and green glazes, it really makes them pop. However, the final colors have yet to be determined.
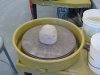
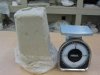
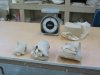
The next thing you need is a good scale as shown in photo #2. I weigh all my clay before I start any project, that way I stand a better chance of maintaining a high level of consistancy in the finished products.
Next, you weigh out the correct amount of clay for the parts and pieces needed to construct the oval.
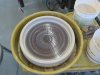
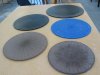
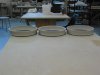
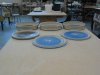
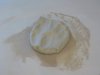
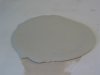
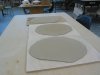
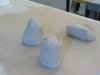
We will need three lumps of clay for each pot. One for the rim, one for the foot, and one for the bottom of the container. I have determined through trial on error that it takes 1.5 pounds of clay for the foot ring, 3.5 pounds of clay for the rim ring, and 5 pounds for the bottom as shown in photo #3.
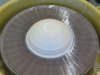
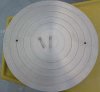
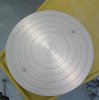
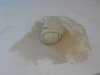
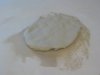
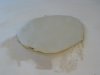
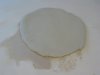
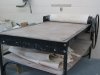
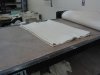
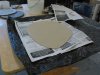
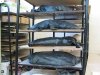
Next it's off to the wedging table (photo #4). Here the lumps of clay are worked in a wedging motion to homoginize the clay and help release any trapped air bubbles. At this point, we are ready to get messy.
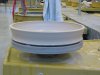
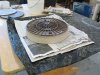
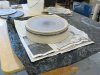
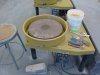
In photo #5 are a few tools of the trade: an electric potters wheel, a stool, a bucket of water, a couple of bats, a couple of bat pins, a few sponges, and an assortment of throwing tools.
Stay tunes for the next installment it only gets better.
Cheers,
Paul
I had decided last week to start a photo documentary covering the process (how I do it) of making a bonsai container from start to finish. Since I have been working on oval pots as of late, I decided to demonstrate an oval. So, in the spirit education and entertainment, I would like to share this process with the fine folks here at BonsaiNut.
At any given point, if you have a question, please feel free to ask.
At any given point, if you have something constructive to add, please feel free to do so.
I encourage active participation. In fact, I will be looking for input from the peanut gallery on how to finish the pots.
That's right, pots. Rule one in making ceramic bonsai containers. If you want one great pot, you should make at least three. There are a great many variables in this proccess and complete or partial failure is never that far away.
So, here we go.
I decided that I would show you how to make a 14" oval bonsai container. This project was started on 02/26/09 and will probably take another 4 to 6 weeks before we have a finished product.
The process begins with the selection of the clay body. I have chosen a commercially available high fired, clay body made of 50% porcelain an 50% buff grey stoneware which comes in 25 pound blocks as shown in photo #1. I like this particular clay body when using blue and green glazes, it really makes them pop. However, the final colors have yet to be determined.
The next thing you need is a good scale as shown in photo #2. I weigh all my clay before I start any project, that way I stand a better chance of maintaining a high level of consistancy in the finished products.
Next, you weigh out the correct amount of clay for the parts and pieces needed to construct the oval.
We will need three lumps of clay for each pot. One for the rim, one for the foot, and one for the bottom of the container. I have determined through trial on error that it takes 1.5 pounds of clay for the foot ring, 3.5 pounds of clay for the rim ring, and 5 pounds for the bottom as shown in photo #3.
Next it's off to the wedging table (photo #4). Here the lumps of clay are worked in a wedging motion to homoginize the clay and help release any trapped air bubbles. At this point, we are ready to get messy.
In photo #5 are a few tools of the trade: an electric potters wheel, a stool, a bucket of water, a couple of bats, a couple of bat pins, a few sponges, and an assortment of throwing tools.
Stay tunes for the next installment it only gets better.
Cheers,
Paul
Attachments
Last edited: