MACH5
Imperial Masterpiece
I have a maple (many of you are familiar with it) that I am slowly adding root grafts in an effort to improve its nebari. I decided to chronicle as best as I could my process for completing one. There are a couple of ways to do root grafts. One is by thread grafting and the other by way of approach grafting which is the one I am using for this tree.
Doing root grafts is an easy concept to grasp, just needs precise work, patience... and a little practice. Definitely a great way to improve the nebari on any given deciduous tree.
Here is the tree enjoying a sunny day outside just before it gets pulled into the operating room.

Here the tree is brought inside to get the root graft. Besides it lies the 2 year old maple seedling that I'll be using.

I had to sift through a few maple seedlings in order to find a suitable one for the job. The side root on this one was perfect as many had mainly one tap root growing straight down.

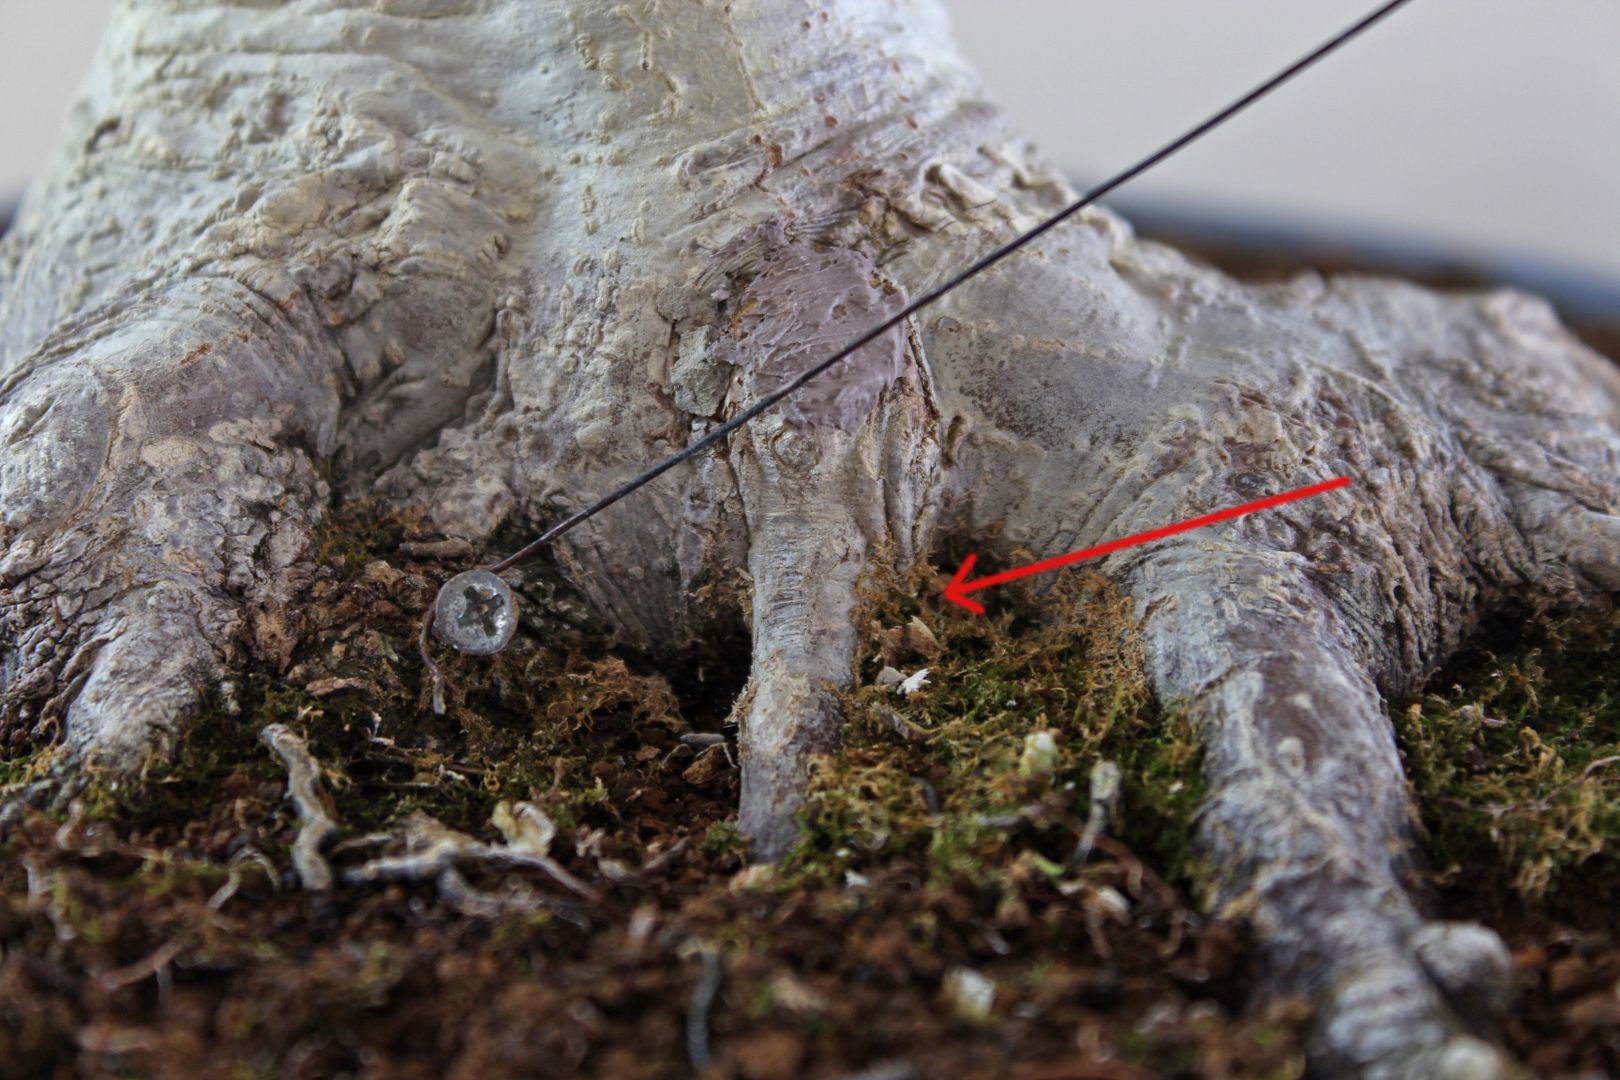
The groove indicated by the red arrow is what remains of a failed graft. Last year when the graft was made, the seedling did not get enough light and air to survive. This year I will take measures so that this doesn't happen again. As you can see there is a gap right at the front of the nebari where roots are needed. Looking closely there is a tiny root growing at the bottom of the groove but this will take years to catch up with the rest if ever.

As a next step, I carefully re-injured with a dremel the edges of the old groove to expose the cambium and ensure good contact with the seedling.
The tree is then taken out of its pot.

It would have been ideal if I could have done the grafting while repotting the tree, but the maple was not yet due for one. Instead, I cut out a pie shaped wedge of soil in order to make room for the roots of the new seedling.

The seedling's bark was lightly scraped to expose its cambium layer and then checked for fit and precise position within the groove.

The seedling was then secured into position with a pushpin.

The seedling was also wired loosely and secured to a branch so that it is held in place. In addition, the wire allowed me to bend it forwards where it would receive the maximum amount of light and air. It is extremely important that the seedling does not move around at any point while the graft is in progress.

Then the graft union was covered with cut paste to retain moisture until the two cambium layers fuse together hopefully by end of season.

The maple was then placed back into the pot. To complete the job, the surface of the soil was cleaned up and finely sieved akadama was spread evenly around the tree.

Finally the tree is thoroughly watered and placed outside in light shade for a couple of weeks.

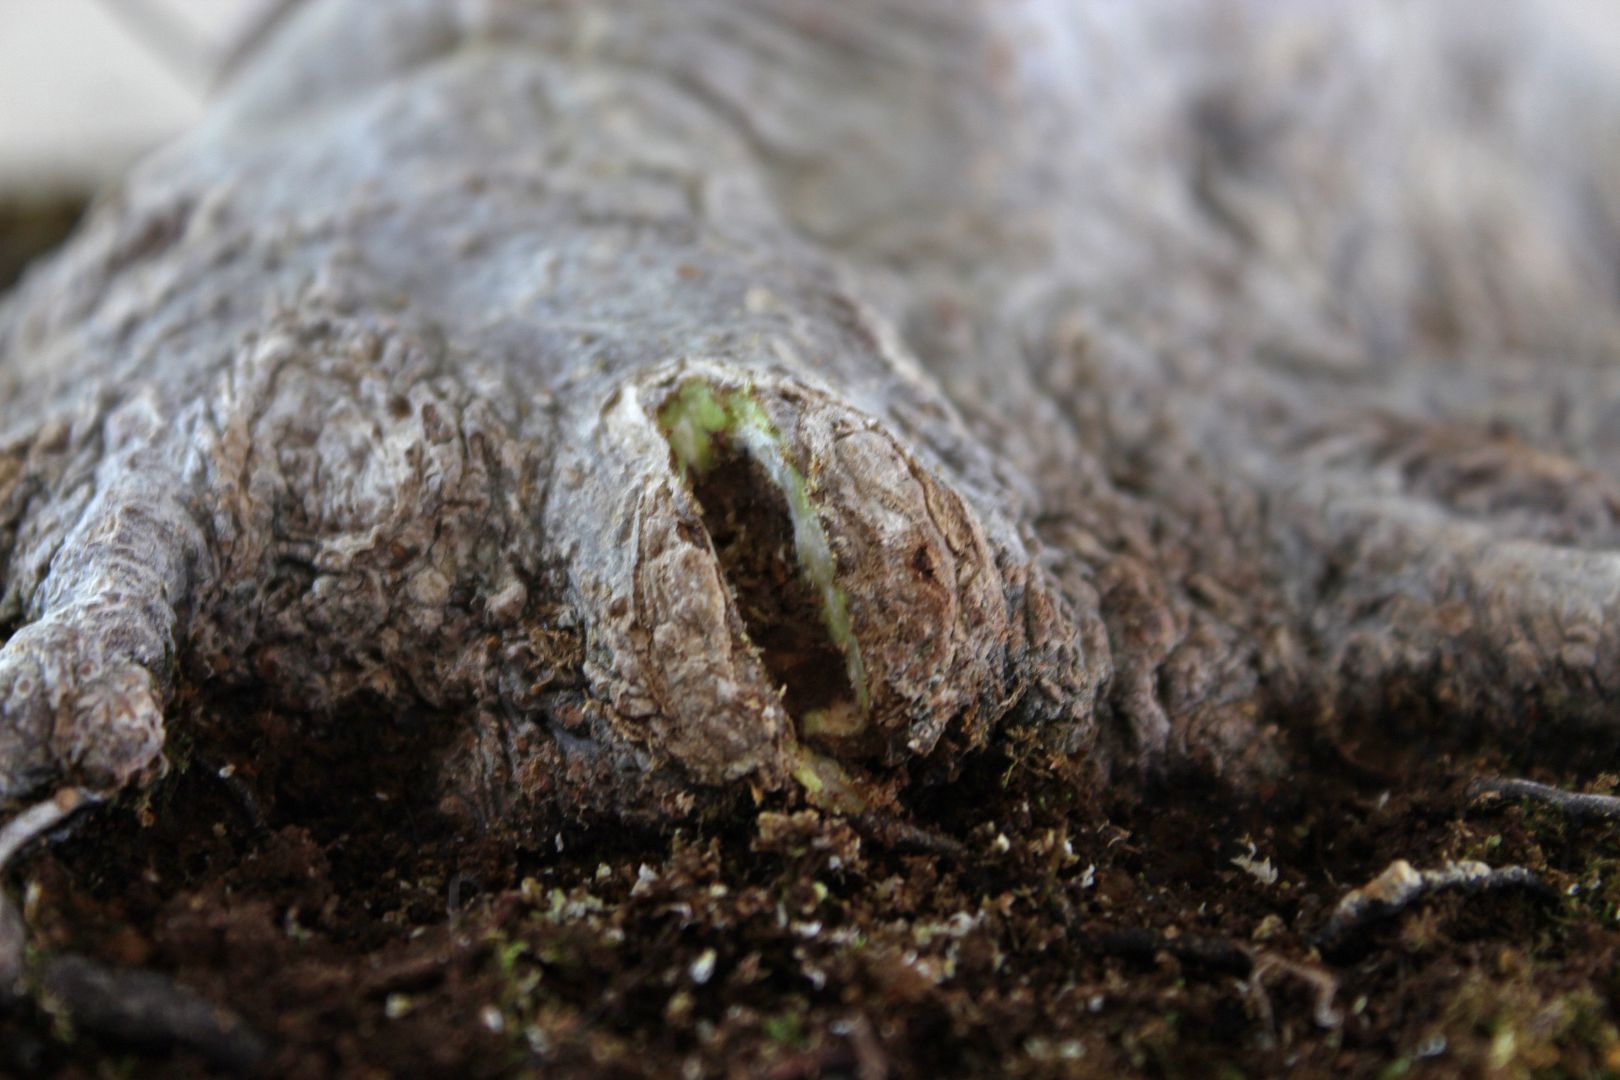
A quick flashback. Below is another root graft I made two years ago at the back of the tree.

And here it is as it looks now [red arrow].
I don't generally document in detail step by step processes, but being inspired by members here like BVF and Smoke I thought I'd give it a go and at least share some things that have worked for me.
Doing root grafts is an easy concept to grasp, just needs precise work, patience... and a little practice. Definitely a great way to improve the nebari on any given deciduous tree.
Here is the tree enjoying a sunny day outside just before it gets pulled into the operating room.

Here the tree is brought inside to get the root graft. Besides it lies the 2 year old maple seedling that I'll be using.

I had to sift through a few maple seedlings in order to find a suitable one for the job. The side root on this one was perfect as many had mainly one tap root growing straight down.

The groove indicated by the red arrow is what remains of a failed graft. Last year when the graft was made, the seedling did not get enough light and air to survive. This year I will take measures so that this doesn't happen again. As you can see there is a gap right at the front of the nebari where roots are needed. Looking closely there is a tiny root growing at the bottom of the groove but this will take years to catch up with the rest if ever.

As a next step, I carefully re-injured with a dremel the edges of the old groove to expose the cambium and ensure good contact with the seedling.

The tree is then taken out of its pot.

It would have been ideal if I could have done the grafting while repotting the tree, but the maple was not yet due for one. Instead, I cut out a pie shaped wedge of soil in order to make room for the roots of the new seedling.

The seedling's bark was lightly scraped to expose its cambium layer and then checked for fit and precise position within the groove.

The seedling was then secured into position with a pushpin.

The seedling was also wired loosely and secured to a branch so that it is held in place. In addition, the wire allowed me to bend it forwards where it would receive the maximum amount of light and air. It is extremely important that the seedling does not move around at any point while the graft is in progress.

Then the graft union was covered with cut paste to retain moisture until the two cambium layers fuse together hopefully by end of season.

The maple was then placed back into the pot. To complete the job, the surface of the soil was cleaned up and finely sieved akadama was spread evenly around the tree.

Finally the tree is thoroughly watered and placed outside in light shade for a couple of weeks.

A quick flashback. Below is another root graft I made two years ago at the back of the tree.

And here it is as it looks now [red arrow].

I don't generally document in detail step by step processes, but being inspired by members here like BVF and Smoke I thought I'd give it a go and at least share some things that have worked for me.
