Shohin Maple Trunk

Saddler

Chumono
Messages
697
Reaction score
909
Location
Vancouver, British Columbia
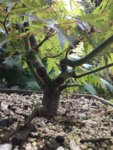
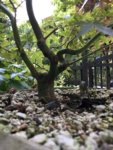
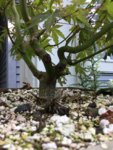
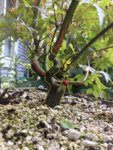
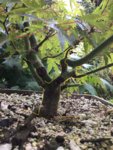
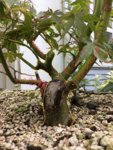
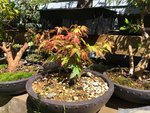
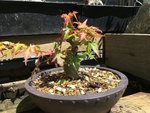
I wired this trunk while still on the parent tree and removed it about three years ago. I’ve had it at a friends the whole time and missed repotting it every year. I’ll repot it next spring. This fall I want to cut it back to the primary branches and grow the leader out to thicken the top section and grow an apex. Seeing as I have pictured this tree since before I airlayered it, I have my intended direction. On the other hand, this tree hasn’t had the attention I planned and I think there are other options I am not seeing or just unable to see the potential in them. I really feel like I have tunnel vision and have tried looking at pics in different angles and light, not looking at the tree for a month and trying again. If anyone sees something worth exploring, please point it out, or even if I should just adjust my current plan.

C1B6947C-F570-4D41-A3ED-C9F5985F1DAD.jpeg4AF5FC79-2230-405E-BEF0-274EDC0B8F20.jpeg6F1C5F19-032C-42FD-A8B4-D12734348213.jpeg7AFCF1B7-56CC-4E9D-8380-392A634A8DB5.jpegE935D454-B1DA-49F4-9E54-E9D1E8E6960C.jpeg99613D82-D677-4C74-B25C-E9CA21756752.jpeg7832BCF2-8785-4C3C-8202-F26A55766A2A.jpeg
 

Attachments

  • 97089D99-9386-482C-8CF3-7AB851A1B178.jpeg
    97089D99-9386-482C-8CF3-7AB851A1B178.jpeg
    383.2 KB · Views: 0

Saddler

Chumono
Messages
697
Reaction score
909
Location
Vancouver, British Columbia
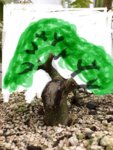
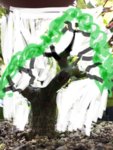
Here is my plan. 37256C8E-B77C-474F-9F4E-398EBF93DF80.jpegF7FC2E4B-B9E5-4754-97B8-77401E52DB88.jpeg795FD75E-7F2F-42B6-91B3-F23666343084.jpeg40983149-4387-4935-81BD-65A17024DA30.jpeg5DA0F3A8-07E8-45BF-967E-4CC5E9E56CC7.jpeg
I’m starting to think it might be time to get a better drawing app.

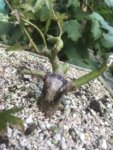
That wound is from a previous airlayer and it barely healed in three years. I put on plumbers putty and it has grown over more this season then the four years previous. My plan is to cut all the branches off where I have scribbled red on them.
The top two pics are my general idea of the finished tree.
 

Saddler

Chumono
Messages
697
Reaction score
909
Location
Vancouver, British Columbia
When the last flush started, I wanted to try something that I had done by ignorance a couple years ago. I cut the tree back as far as possible only leaving a pair leaves on each branch as a precaution. Fortunately this left me with only 2-3 internodes per branch. 12B25A71-0EDA-4E63-AA22-DD9774AB87D7.jpeg0323BF87-D6BC-49E7-B70D-699908C30456.jpegFirst pic will be my front until that scar heals or I carve it out.

Now my risk doing these cuts at this time of year was the constant flood of sap. And boy did it flood. I put cyanoacrilate on the cuts and it worked. Almost. My cuts were too smooth and the sap was pushing it off. So I took my pair of dull root pruners and cut it back a centimetre. It was an ugly cut, so rough and jagged it hurt my eyes to look at it. It worked though. I applied the CA again and it held everywhere but the bottom of the cut at first. By the time I got some paper towel and came back the CA had run down the tree but the sap had stopped flowing. 3763D88D-6B68-4073-978B-D832FEB26828.jpegEB826CF6-14EC-4219-81A5-C176C9D1731D.jpeg

I am happy that I have buds everywhere I wanted. If what happened last time I did this, I should get very tight internodes near the branches so when do this again next year I’ll get my tertiary branches very close in as well.
 

Toshi

Mame
Messages
125
Reaction score
89
Location
NYC
USDA Zone
7b
Gnarly, looking forward to seeing this develop.
 

Saddler

Chumono
Messages
697
Reaction score
909
Location
Vancouver, British Columbia
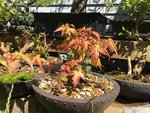
After taking the advice of @Smoke I cut all the new growth back about once a week and I have to say, I am rather impressed with the short internodes I have. Most are a 1/4” apart and the longest are a 1/2” in the areas I will cut to next year. That along with the movement it creates tells me this technique really is a winner for branch development. I tried this on four maples and it has had excellent results on all of them. One other plus to doing this is it gives me something to do other then watering and fertilizing.

9023C107-F28A-4353-8C88-0877FF9EC35E.jpeg07ABE644-B7B1-4B58-8960-5753A7C37437.jpeg

After the last trim of the season I did today.

5764A6EA-9C29-4DD6-B5F7-2449BB465C76.jpegB74D137A-09F3-4B82-8C14-0138DD32FC15.jpegE05C06DA-5F7A-4AB5-833C-C2108BC4993F.jpeg

I have branches everywhere I want them. The branch I needed the most has been a struggle. That single leaf at the scissor tip is the branch I have been fighting to get a short internode on. I am hoping this trim will give it the resources to help it grow so I can cut the older, longer internode branch off soon. I am leaving the older branch as a sap sucker for now. Being the lowest branch (and the most important one) on the tree has really made me want to get it right.

638B462F-7D28-4467-AC63-C175D0A45F92.jpeg
 

Saddler

Chumono
Messages
697
Reaction score
909
Location
Vancouver, British Columbia
About a month or so ago I went to inspect the the big wound on this tree and noticed the putty wasn’t coming off like it usually does. I left it as is and went on my way. Something was bugging me about it, why is it not coming off? Then it dawned on me. It was rotting. So I got a plaque scraper and and removed the putty and sure enough. It went another 1/2”+ down. Oh well, there goes my afternoon. Out comes the dremel and about 7 different tips later I had it all cleansed of the rot. I’m happy with my results. No slip ups that resulted in more places to put putty. After making a batch of JB Weld that was about three times too much, I filled the hole. I used some plastic I had on hand to try and keep it in place along with wedging my pot at about a 60° angle, and it worked for the most part. After it hardened, out came the dremel again and I smoothed the surface down and removed the JB Weld that went a little further then I wanted. With a very small carbide ball bit, I rewounded the callous. I was surprised at the quality of the job I was able to get.

Here it is with the JB Weld

6E0ABF89-74EE-4D20-A8E1-335BBC9361B9.jpeg

And with putty back on.

B1819BDE-1369-4607-B8F8-D4627CEAD97C.jpeg

Here is to hoping it seals over completely or I won’t know what to do then.
 

thumblessprimate1

Masterpiece
Messages
4,232
Reaction score
8,542
Location
DALLAS
Hope it closes up. I'd then consider air layering again. That first section of the trunk lacks taper, bothers me.
 

Saddler

Chumono
Messages
697
Reaction score
909
Location
Vancouver, British Columbia
Hope it closes up. I'd then consider air layering again. That first section of the trunk lacks taper, bothers me.
The final angle and front that I think I’m going to use will minimize that and with a few good seasons of letting it grow and thicken will help round out the straightness as well working on the nebari, which, when I repotted, was coming along better then I could have hoped.
 

Saddler

Chumono
Messages
697
Reaction score
909
Location
Vancouver, British Columbia
So it doesn't seem that the putty was doing anything beneficial if the wood it was 'protecting' rotted beneath it.
I had the Japanese paste on it after I cut the top off, but I don’t think I reapplied it for the the 3-4 years it just grew out. I think I may have trapped moisture in when I put the putty on. I’m not sure, but this is the only tree that I have had rot under the putty. Putty does lift up as the callous forms and I usually smooth it back down tight, maybe I missed this one? It’s something I am paying closer attention to at the very least.
 
Top Bottom