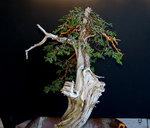
THAT Juniper

Hartinez

Masterpiece
Messages
4,162
Reaction score
13,071
Location
Albuquerque, NM
USDA Zone
7
@cheap_walmart_art . This quote right here is huge and something that I’ve really been working on over the last few years. I feel like I see it more and more on here each day. Either the tree has no wire and the foliage and tree is all over the place and untidy, or they have a few wires on and the branches are either not moved or placed in completely random locations. It’s the UNDER WIRING OF a tree that I see that people are lacking. Wiring out an entire trees fine branches takes a long time, 3 plus hours at least, even on small trees. Sometimes I feel like when your new to the art, which includes myself, you don’t realize that you’ve got to invest significant time in the initial wiring to gain the appearance and shape you seek. I just finished wiring a thuja nursery stock tree that was nothing spectacular. Creating the deadwood, cleaning out branches and wiring everything took me 4 or 5 hrs. I had to break it up in to several sessions. But I think it looks really great now and is setup for future development. And from a tree that’s just MEH. I’ll work on getting a good pic and posting it in another thread so I don’t hijack als thread. But really, it was a post I read from @Smoke last year that talked about the importance of complete wiring on Junipers that makes it breaks the final composition. From what I remember, He’ll take trees inside and wire each little branch with tiny copper wiring while watching a fave show, because it takes so long. But it’s essential to the initial styling and final design!!

People don't wire trees, I have said hundreds of times that wire goes a long ways into turning a so so tree into a gorgeous tree. People don't bend branches, they put the wire on, and then never do anything with the branch. If your going to put the wire on, and the branch will not do the thing you wired it for, then its useless and you need to start over with a better tree or cut the big branches off and start with smaller branches. Either way, your not moving forward by putting on wire and not making significant changes in the material with the wire.
 

Hartinez

Masterpiece
Messages
4,162
Reaction score
13,071
Location
Albuquerque, NM
USDA Zone
7
@cheap_walmart_art . I think what’s awesome about this tree Al did, and really with a lot of the senior members trees (Adair, BVF, mach5, Dav4 and many others), is that the wiring is executed so well that you don’t really notice it or see it in the image, even though most of the tree has wire on it! I’ve got to assume that’s from years of practice. It certainly doesn’t come over night.
 
Messages
1,113
Reaction score
2,209
Location
Tennessee
USDA Zone
7a
@cheap_walmart_art . I think what’s awesome about this tree Al did, and really with a lot of the senior members trees (Adair, BVF, mach5, Dav4 and many others), is that the wiring is executed so well that you don’t really notice it or see it in the image, even though most of the tree has wire on it! I’ve got to assume that’s from years of practice. It certainly doesn’t come over night.

I agree, its always great to see well executed wiring. I imagine its like music, where slow and intentional eventually becomes fast and smooth.
 

Smoke

Ignore-Amus
Messages
11,668
Reaction score
20,727
Location
Fresno, CA
USDA Zone
9
Sorry, I was watching a couple good Hallmark romance movies and got all caught up. You know, crying, the whole thing. Christmas in July always gets me.....

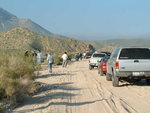
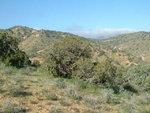
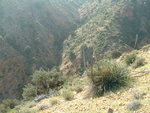
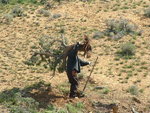
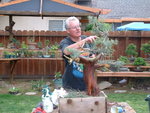
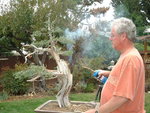
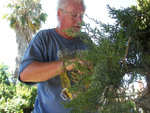
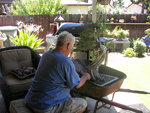
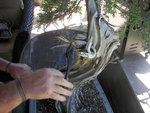
This juniper was dug on a trip with Harry Hirao to Jawbone Canyon in 2004. It was in rocks, hard pan and gravel which makes up most of the foot hills in the Tehachapi's where the trees grow. Not really high desert like where the Sierra's grow. Like most of the junipers dug there, finding one is not hard. They are everywhere. What is hard is finding one that will be of a good size for bonsai, and has attributes good for bonsai.
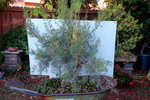
DSCF0220.JPG

DSCF0221.JPG

DSCF0226.JPG

DSCF0228.JPG

DSCF0235.JPG

DSCF0237.JPG

A very good friend, Peter Macasieb (Maria Kapra)

DSCF0240.JPG
 

Smoke

Ignore-Amus
Messages
11,668
Reaction score
20,727
Location
Fresno, CA
USDA Zone
9
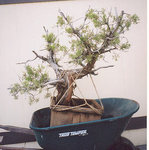
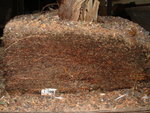
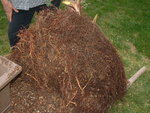
I dug the juniper and balled and bagged the tree. I would later learn to improve the dig by bare rooting, wrapping with wet sphagnum and shrink wrap. Much lighter to carry out. Up to a mile sometimes, or more.

I quickly built a box when I got home and planted it the next day

001.jpg002 (2).jpg

002.jpg003.jpg

2005
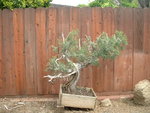
Later that year I started to think about what I would keep and what I would cut off. Tree is about five feet tall.

004.JPG005.JPG006.JPG007.JPG


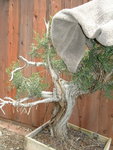
This shot shows the eye poker very well. It is the upper branch of the two sticking out to the left bottom. The lower one was reduced back straight away.
008.JPG

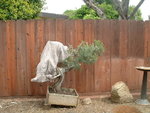
So now you have seen the tree with right side covered and the left side covered. Which decision would you have chosen?
 

Smoke

Ignore-Amus
Messages
11,668
Reaction score
20,727
Location
Fresno, CA
USDA Zone
9
In this sequence we see the rudimentary beginnings of trying to find a tree in this. Not much to work with but it still needs some kind of training. My decision was to cut off the large portion moving off to the right. It may have made a great tree if I decided the other way but I'll never know. The branch was hollow from ants and borers. In the background one can see a bag of akadama in a new pot. This is not the pot it went in, but I bought a bunch of cheap Chinese big pots to put it in when I found the one it would fit in. The base of the trunk at this point was in the shape of a "C" in the way it came out of the ground. Even though the roots are lots better now, it's still hard to get a good planting angle on this trunk.

011.JPG

012.JPG

This view shows that eye poker again. It's behind the vertical portion of the branch in front. The portion of the vertical part was saved but every thing to the left of it was removed. That portion now looks like a pig tail and is still there.

013.JPG

Just putting on some wire and making big wacky fans!!
018.JPG

Cleaning up some live veins

020.JPG

Wow! Shohin feature only had two shelves back then.

021.JPG

Done for a season. The old patio!

022.JPG
 

Smoke

Ignore-Amus
Messages
11,668
Reaction score
20,727
Location
Fresno, CA
USDA Zone
9
The tree was all cleaned up and so I put it into this pot to continue its training. The tree had grow a lot of roots. I was really impressed with its growth.

023.JPG024.JPG


In this picture all of that branch on the lower left is the eye poker. In this photo it is fulfilling the duty of first branch.
025.jpg


2006
I was having a problem with all the wood I left on the trunk when I removed the entire right side. I felt it needed to be reduced so I employed every carving tool I owned to reduce it. Then I burned the shit out of it.

026.jpg

In this picture the grove of Foemina junipers can be seen in the position it was in when the infamous pink thong picture was taken the same year

028.JPG

031.JPG

032.JPG

Done for the season.
033.JPG
 

Smoke

Ignore-Amus
Messages
11,668
Reaction score
20,727
Location
Fresno, CA
USDA Zone
9
2009
This year the tree would be planted at a different angle and front. It was rotated about 90 degrees to the right. Now we have the eye poker front and center. No more first branch on the left at all. All the foliage is now in the upper part of the tree, except the eye poker.

036.JPG

2011
Repotted into the current training pot. Another cheap Chinese pot. Keep in mind that a cheap Chinese pot like this still costs $250.00. On can see the beginnings of lengthening the foliage on the right side. The eyepoker is styled and forced to blend in. A side view would look silly at this point.
039.JPG

2012
The left side is starting to gain its strength and my moving towards the heavy left side styling is starting to show. The eye poker can be seen here with the leaning forward view. The apex is dead and the canopy is small enough that it sticks out quite far here.
038.JPG

2012
If you squint your eyes and remove the eye poker, you can see a smaller version of the current shape.

040.JPG

2017
After 2012 my wife was diagnosed with cancer and I didn't work my trees very much for the next four years. Just didn't have time and I really didn't feel like it. Taking care of bonsai is time consuming and things like cancer take over. The trees don't seem so important anymore....

Well anyway by 2017 it was a real bush. Same wheelbarrow!

DSC_0041.JPG

I have no idea what I was thinking here. The eyepoker wood can be see very well and the only foliage on it is off to the lower right. The only REAL branch on the tree is in the middle of the left portion. It is about 1.25 in diameter and split off into two parts. Both bad.

DSC_0007.JPG
 

Smoke

Ignore-Amus
Messages
11,668
Reaction score
20,727
Location
Fresno, CA
USDA Zone
9
2019

The tree just sat quietly in the backyard in full sun 24/7 for the last two years.
This is what it looked like after the two years.

DSC_0001.JPG

I began by taking off all the wire I could get to and began pruning back or off what I wouldn't use. I removed about 25% of the whips that had grown on the tree.

DSC_0003.JPG

The eye poker is still here in this view.
DSC_0005.JPG

Now the eye poker is gone. Just sawed that bitch right off.
DSC_0010.JPG

DSC_0011.JPG
 

Smoke

Ignore-Amus
Messages
11,668
Reaction score
20,727
Location
Fresno, CA
USDA Zone
9
In the last picture the tree is down to what I looked like more in 2012. Of course a lot of personal stuff has happened in that time span. Now it's time to get back to work.


100_3588.JPG

100_3589.JPG

100_3602.JPG

100_3613.JPG

This view shows just how unruly this foliage is. Just look at that and try and figure out how you would wire that and place it to look even remotely attractive.

100_3636.JPG

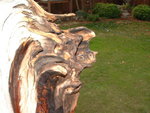
In this shot one can see the pig tail that I left. This is the stub from the eye poker, and my old carving and burning scars.

100_3637.JPG
 

Smoke

Ignore-Amus
Messages
11,668
Reaction score
20,727
Location
Fresno, CA
USDA Zone
9
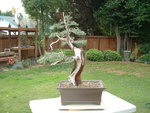
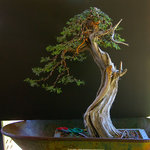
After the wire and branch placement this is what I have now.
DSC_00121.JPG

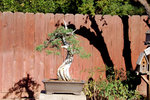
The back
The yellow dot in the middle is where I cut that branch off of the only branch on the tree. It wyed into two branches as I mentioned and the one I cut off stuck out of the back of the canopy. When I tightened up the canopy it was not going to work there so I cut it off.

DSC_0019.JPG

The right side
DSC_0021.JPG

The left side. @Brian Van Fleet In this shot you can see the only live vein on the trunk. It runs up the back left side of the trunk and "wyed" half way up. The left wye goes up to where all these branches come from and the right wye went to the eye poker.
DSC_0022.JPG
 
Last edited:

Adair M

Pinus Envy
Messages
14,402
Reaction score
34,898
Location
NEGeorgia
USDA Zone
7a
Al, you do a great job of documenting your trees, and the progress they make over the years.

Your wheel barrow has developed a lot of patina!
 

River's Edge

Masterpiece
Messages
4,754
Reaction score
12,774
Location
Vancouver Island, British Columbia
USDA Zone
8b
After the wire and branch placement this is what I have now.
View attachment 253263

The back
The yellow dot in the middle is where I cut that branch off of the only branch on the tree. It wyed into two branches as I mentioned and the one I cut off stuck out of the back of the canopy. When I tightened up the canopy it was not going to work there so I cut it off.

View attachment 253260

The right side
View attachment 253261

The left side. @Brian Van Fleet In this shot you can see the only live vein on the trunk. It runs up the back left side of the trunk and "wyed" half way up. The left wye goes up to where all these branches come from and the right wye went to the eye poker.
View attachment 253262
I like what you have done so far. When i look at the back i envision an interesting front with the remaining live vein adding to the composition. Will be interesting to see how much of the live vein remains after carving in the front you have chosen so far! Thanks for posting! The new jin part way up in the top third of the back also adds nice interest to the overall!
 

Adair M

Pinus Envy
Messages
14,402
Reaction score
34,898
Location
NEGeorgia
USDA Zone
7a
Hmm...

I, too, like seeing the live vein.
 

Hartinez

Masterpiece
Messages
4,162
Reaction score
13,071
Location
Albuquerque, NM
USDA Zone
7
Great documentation for sure. Thanks for taking the time to share all of this Al. I know how difficult it can be to stop what your doing to snap a photo over and over. But this series is clear indication of why it’s worth the time!!
 

Brian Van Fleet

Pretty Fly for a Bonsai Guy
Messages
13,997
Reaction score
46,181
Location
B’ham, AL
USDA Zone
8A
I like the back better as a front in that last group of photos. The trunk movement is more dynamic, the deadwood is wilder, and you can see the live vein. The foliage also interacts better with the full composition.

Good progression series.
 

LanceMac10

Imperial Masterpiece
Messages
6,798
Reaction score
17,176
Location
Nashua, NH U.S.A.
USDA Zone
5
Awesome development on an incredible tree. Looks pretty damn good, front or back....


…..low 100's while you work?o_Oo_Oo_Oo_O
 

PaulH

Omono
Messages
1,809
Reaction score
4,454
Location
Rescue, CA
I like the back better as a front in that last group of photos.
Some time ago our study group worked with Peter Adams a few times. One of his comments that sticks with me is that he didn't like the "F" word.(Front). He said that in nature you can walk around a tree and enjoy it from all ides and that bonsai should be the same. I don't know if this was Al's intention but I think its the result. Very nice work!
 

Smoke

Ignore-Amus
Messages
11,668
Reaction score
20,727
Location
Fresno, CA
USDA Zone
9
I like the back better as a front in that last group of photos. The trunk movement is more dynamic, the deadwood is wilder, and you can see the live vein. The foliage also interacts better with the full composition.

Good progression series.
Interesting...I can't get past the fact that it looks like a guy bent over running....just ruins it for me!
 
Top Bottom