A Random User
Guest
- Messages
- 3,554
- Reaction score
- 4,274
I picked up two Juniper Parsoni trees to keep busy with this weekend and thought I would post the first one up, and see which direction folks thought would be the best path forward with this tree. Also, thought this might be a killer experience for some newer to bonsai and learning how to style a tree, to be able to see what can be done with so so material. This tree is not a Big Box Store tree... however, it is not far from it! Nothing really special, no amazing yamadori... but sometimes one has to put the special into the tree!
I will run through what I have already done, and one can see the work on the tree progress to a point of beginning to fine wire... and everyone can determine which tree they like and see out of the final stages. I know which one I like... But, would love to hear what others think!
So here goes...
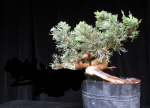
This is the tree as I first go it. Only thing that has been done, is that I cut down the container, for better visibility.

First step... Large branch coming off the left needed to be removed. To heavy for any bending, and foliage and branching was weak. Branch on the right has the most movement already.
Want to touch on something at this stage, for some of those wondering, or having a hard time wondering where to start creating a bonsai from a piece of new material. First step is examine nebari and see what's there... However, with junipers you will often fine a whole lot of nothing worth showing off. So then one looks for interest in the trunk, like deadwood, or nice movement. Often, with junipers you end up with multiple trunks and there might several ways one can go with designing the tree... In this case, always go with the one that has the most healthiest foliage, the most foliage, the least amount of very heavy branching off of the trunk ( no scabby branching, though) and the foliage closest to the intended trunk.
You will save yourself alot of time and effort! The material is doing the work for you here... the foliage and branching is nicer in this area because the this portion of the tree is healthier. Which will mean you will have more to work with, and be able to design a nicer tree from the get go... not to mention the tree will take less time to develop into a show worthy tree.
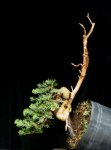
With that, the left branch was jined and for the moment left long... can always be removed, or shortened at a later time.

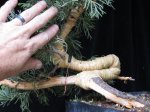
So, now we are left with a branch that looks like this.... This will now be the continuation of the trunk. It has a really nice bend right at the base of the branch, which will give a nice bit of interest to our trunk. However, from there, it stovepipes straight up does a 90 degree turn to the right and then goes straight. So, these areas will need to be corrected. One could remove this, seeing that there is a smaller branch coming off of the back. However, doing so would not only make the tree very small, but would in essence risk the life of the tree itself, removing so much material off of it, in such a short time.
Trunk has some girth to it... but is of a size that can be bent.

So, raffia is applied... I am not going to go into how one puts on raffia, there is plenty of info out there on the subject. I do want to say, that really if one is planning on doing some bending of and size... it is a must. Not to mention if one is going to do it, one might as well do it right.

Close up of raffia applied. I carried it up the trunk seeing that I will be doing further bends above this area as well. If one was just bending in a spot... you could start and end a little before and after the area intended to be bent.

Have more images and process coming so, I would ask that one doesn't post until I have finished listing in it's entirety, Thanks!
I will run through what I have already done, and one can see the work on the tree progress to a point of beginning to fine wire... and everyone can determine which tree they like and see out of the final stages. I know which one I like... But, would love to hear what others think!
So here goes...
This is the tree as I first go it. Only thing that has been done, is that I cut down the container, for better visibility.

First step... Large branch coming off the left needed to be removed. To heavy for any bending, and foliage and branching was weak. Branch on the right has the most movement already.
Want to touch on something at this stage, for some of those wondering, or having a hard time wondering where to start creating a bonsai from a piece of new material. First step is examine nebari and see what's there... However, with junipers you will often fine a whole lot of nothing worth showing off. So then one looks for interest in the trunk, like deadwood, or nice movement. Often, with junipers you end up with multiple trunks and there might several ways one can go with designing the tree... In this case, always go with the one that has the most healthiest foliage, the most foliage, the least amount of very heavy branching off of the trunk ( no scabby branching, though) and the foliage closest to the intended trunk.
You will save yourself alot of time and effort! The material is doing the work for you here... the foliage and branching is nicer in this area because the this portion of the tree is healthier. Which will mean you will have more to work with, and be able to design a nicer tree from the get go... not to mention the tree will take less time to develop into a show worthy tree.
With that, the left branch was jined and for the moment left long... can always be removed, or shortened at a later time.

So, now we are left with a branch that looks like this.... This will now be the continuation of the trunk. It has a really nice bend right at the base of the branch, which will give a nice bit of interest to our trunk. However, from there, it stovepipes straight up does a 90 degree turn to the right and then goes straight. So, these areas will need to be corrected. One could remove this, seeing that there is a smaller branch coming off of the back. However, doing so would not only make the tree very small, but would in essence risk the life of the tree itself, removing so much material off of it, in such a short time.
Trunk has some girth to it... but is of a size that can be bent.

So, raffia is applied... I am not going to go into how one puts on raffia, there is plenty of info out there on the subject. I do want to say, that really if one is planning on doing some bending of and size... it is a must. Not to mention if one is going to do it, one might as well do it right.

Close up of raffia applied. I carried it up the trunk seeing that I will be doing further bends above this area as well. If one was just bending in a spot... you could start and end a little before and after the area intended to be bent.

Have more images and process coming so, I would ask that one doesn't post until I have finished listing in it's entirety, Thanks!


