Choose your own Adeventure!

Messages
3,554
Reaction score
4,268
I picked up two Juniper Parsoni trees to keep busy with this weekend and thought I would post the first one up, and see which direction folks thought would be the best path forward with this tree. Also, thought this might be a killer experience for some newer to bonsai and learning how to style a tree, to be able to see what can be done with so so material. This tree is not a Big Box Store tree... however, it is not far from it! Nothing really special, no amazing yamadori... but sometimes one has to put the special into the tree!

I will run through what I have already done, and one can see the work on the tree progress to a point of beginning to fine wire... and everyone can determine which tree they like and see out of the final stages. I know which one I like... But, would love to hear what others think!

So here goes...

This is the tree as I first go it. Only thing that has been done, is that I cut down the container, for better visibility.

jun1a.jpg

First step... Large branch coming off the left needed to be removed. To heavy for any bending, and foliage and branching was weak. Branch on the right has the most movement already.

Want to touch on something at this stage, for some of those wondering, or having a hard time wondering where to start creating a bonsai from a piece of new material. First step is examine nebari and see what's there... However, with junipers you will often fine a whole lot of nothing worth showing off. So then one looks for interest in the trunk, like deadwood, or nice movement. Often, with junipers you end up with multiple trunks and there might several ways one can go with designing the tree... In this case, always go with the one that has the most healthiest foliage, the most foliage, the least amount of very heavy branching off of the trunk ( no scabby branching, though) and the foliage closest to the intended trunk.

You will save yourself alot of time and effort! The material is doing the work for you here... the foliage and branching is nicer in this area because the this portion of the tree is healthier. Which will mean you will have more to work with, and be able to design a nicer tree from the get go... not to mention the tree will take less time to develop into a show worthy tree.

With that, the left branch was jined and for the moment left long... can always be removed, or shortened at a later time.

jun1b.jpg

So, now we are left with a branch that looks like this.... This will now be the continuation of the trunk. It has a really nice bend right at the base of the branch, which will give a nice bit of interest to our trunk. However, from there, it stovepipes straight up does a 90 degree turn to the right and then goes straight. So, these areas will need to be corrected. One could remove this, seeing that there is a smaller branch coming off of the back. However, doing so would not only make the tree very small, but would in essence risk the life of the tree itself, removing so much material off of it, in such a short time.

Trunk has some girth to it... but is of a size that can be bent.

jun1c.jpg

So, raffia is applied... I am not going to go into how one puts on raffia, there is plenty of info out there on the subject. I do want to say, that really if one is planning on doing some bending of and size... it is a must. Not to mention if one is going to do it, one might as well do it right.

jun1d.jpg

Close up of raffia applied. I carried it up the trunk seeing that I will be doing further bends above this area as well. If one was just bending in a spot... you could start and end a little before and after the area intended to be bent.

jun1e.jpg

Have more images and process coming so, I would ask that one doesn't post until I have finished listing in it's entirety, Thanks!
 
Messages
3,554
Reaction score
4,268
Now that the raffia is in place, time to begin to bend...
For me... I am a big believer that to get the most powerful image out of a piece of material, it is best to try and create the most compact image and tree as possible!

So, often even if a piece of material has nice bends to it already, I will often try and accentuate these bends further, making them more extreme, and more tight... So one will see, that in the next image, the first bend has been brought in even tighter. This bend has been done only with a guy wire.

jun1f.jpg


Close up of the bend...

jun1g.jpg

Next up... the next bend. Which as one can tell from the next photo, has been brought in tighter as well.
Again, using only a guy wire to do.

jun1i.jpg


And here is a close up of the bend. A piece of block has been placed in between for the moment to keep the two separate.

jun1h.jpg

Final images coming... please hold of posting until finished, Thanks!
 
Messages
3,554
Reaction score
4,268
Now that the heavy bending is done and the whole tree and it's trunk have been tightened up nicely, it is now time to try and determined what the tree should be...

Often I will do these heavy bends first before even trying to determine what type of tree I would like to make... seeing that for me, they need to be done regardless to make a nice compact tree. So, from here on out... all that is needed is to begin to wire and place smaller branching, and develop and place foliage to make the complete package.

So, two options to choose, as a way forward. The first would be this image.
jun1i.jpg

Making the tree's apex and direction of the tree face towards the forward right. In this image, more than likely the jin would have to be shortened due to the fact that it pulls the viewers eye to the left, away from the tree.

The second image, or approach would be the following...
jun1j.jpg

In this image the long jin would work, and would allowed to be left long due to the fact that it compliments the movement.

Which would you choose and why? As mentioned before... I know which one I would pick, curious to see what others think and like! Either one would make a cool tree... so no right or wrong answers! Just personal preference!
Thanks!
 
Last edited:

qwade

Shohin
Messages
445
Reaction score
184
Location
New Jersey
USDA Zone
6b
I'm liking the first. I have a great view of the trunk. You have trunk movement to the left. Balanced by foliage/canopy movement to the right. However some how I'm thinking you are choosing the second. #2 is probably too far outside the box for me. Doesn't appear natural. Hard to visualize without being potted. Also the jin still appears to me to be too long . Just my 2 cents. I, however really like the exercise. thanks for sharing.
 
Messages
129
Reaction score
90
Location
Orange County, CA (Zone 10a)
First off, I wanted to thank you for this thread in general. It's a great exercise for those of us still trying to develop that eye for bonsai.

I'm personally more drawn to the second image as I like the way the straight jin compliments the added curves. However, this would only work if enough foliage could be removed to really show it off, which I'm having a hard time visualizing. My untrained eye keeps wanting to see a semi-cascade here along these lines:

Untitled.png

However, as I draw it out, I see that the jin starts taking away from any cascade attempts by competing for attention. There's also nothing on the left to give balance.

The first image seems too squat and wide for me. The initial slant of the trunk almost make the added curves too compact? There's almost an inverse taper illusion, as we have a long skinny trunk leading up to a thick bulky part. You would, however, get a chance to show off some nice shari work.

upload_2015-7-27_16-12-44.png upload_2015-7-27_16-14-53.png
 

Robertji

Sapling
Messages
43
Reaction score
30
Location
Ontario Canada
USDA Zone
5a
Ok, so considering that I can't always see the tree in the tree...how about position #3 which would be at a 45 degree angle instead of vertical or horizontal. I like #2 but I can't see how you would manage the root system. I must say I never saw the second extreme bend coming but I too enjoy the exercise.

Jim
 

CWTurner

Omono
Messages
1,266
Reaction score
1,732
Location
Philadelphia PA
USDA Zone
7a
Sawgrass, Great post. Very interesting and informative.
Can you explain how you decided which portion of the bark to leave on as a live vein. To my eye it looks like some of the top will die back as you stripped the bark off of half(?) of the trunk. It would be nice to see the back side of the trunk.

CW
 
Messages
3,554
Reaction score
4,268
I'm liking the first. I have a great view of the trunk. You have trunk movement to the left. Balanced by foliage/canopy movement to the right. However some how I'm thinking you are choosing the second. #2 is probably too far outside the box for me. Doesn't appear natural. Hard to visualize without being potted. Also the jin still appears to me to be too long . Just my 2 cents. I, however really like the exercise. thanks for sharing.
Thanks for the comments! I will more than likely be finished with it tomorrow. Just took the photos this evening, and so far since then got about 90 percent of it fine wired.
A little more to do, and I will be finished... will post up pictures when finished!
 
Messages
3,554
Reaction score
4,268
First off, I wanted to thank you for this thread in general. It's a great exercise for those of us still trying to develop that eye for bonsai.

I'm personally more drawn to the second image as I like the way the straight jin compliments the added curves. However, this would only work if enough foliage could be removed to really show it off, which I'm having a hard time visualizing. My untrained eye keeps wanting to see a semi-cascade here along these lines:

View attachment 78737

However, as I draw it out, I see that the jin starts taking away from any cascade attempts by competing for attention. There's also nothing on the left to give balance.

The first image seems too squat and wide for me. The initial slant of the trunk almost make the added curves too compact? There's almost an inverse taper illusion, as we have a long skinny trunk leading up to a thick bulky part. You would, however, get a chance to show off some nice shari work.

View attachment 78738 View attachment 78739
Thanks for the reply! If one was to use the first, one could do something like this quick virt...
What would you think of this?

jun1idea.jpg
 
Last edited:
Messages
3,554
Reaction score
4,268
Ok, so considering that I can't always see the tree in the tree...how about position #3 which would be at a 45 degree angle instead of vertical or horizontal. I like #2 but I can't see how you would manage the root system. I must say I never saw the second extreme bend coming but I too enjoy the exercise.

Jim

Thanks for the reply! So, you are thinking something more like this?
It has possibilities! How would one design the rest of the fine branching, and foliage?
Where would you put the apex ? From the apex, how would the foliage descend in shape?
No right or wrong answers here... Just the problem solving one must do when designing and styling a tree!
jun1idea2.jpg
 
Messages
3,554
Reaction score
4,268
Sawgrass, Great post. Very interesting and informative.
Can you explain how you decided which portion of the bark to leave on as a live vein. To my eye it looks like some of the top will die back as you stripped the bark off of half(?) of the trunk. It would be nice to see the back side of the trunk.

CW
Thanks for the reply! I will see if I can get some photos of the back for you.
As far as the removing the bark and creating deadwood... I apologize, I should of taken close up photos of the tree before, and pointed out how I was able to remove the bark with out killing off the tree. The tree had the two branches coming off of the one main trunk. Often as junipers age they will have different veins that feed different branches... These veins as they grow will begin to swell, and it will be come quite apparent where the division between the two are, and which one's feed what portions...
So when creating the jin of the lower branch, I just followed and removed the vein that fed it. The tree should be fine!
 
Messages
129
Reaction score
90
Location
Orange County, CA (Zone 10a)
Thanks for the reply! If one was to use the first, one could do something like this quick virt...
What would you think of this?

View attachment 78751

I actually like it more than I thought I would. The pad work distracts from that inverse taper-like issue I had with the first layout. It also flows nicely into the Jin.

How do you do virts like that? Do you just copy-paste bits of the foliage?
 
Messages
3,554
Reaction score
4,268
I actually like it more than I thought I would. The pad work distracts from that inverse taper-like issue I had with the first layout. It also flows nicely into the Jin.

How do you do virts like that? Do you just copy-paste bits of the foliage?
I use Photoshop. There is a tool called rubberstamp, that basically copies and pastes.

The whole idea of the thread was just to try and show different ways one could quite literally take a piece of material. There is no right or wrong way, and definitely not only a single way to design trees. Just because it may seem that a piece of material has only one clear way forward, does not mean it should be the only way? Sometimes one just has to think outside the box!

This is why often, as I did with this tree, I will do the bends that I feel need to be done, and then design the tree around what has been done. For me I know I wanted to compact the tree, to make the strongest image possible. If I done this... I have done 90 percent of styling the tree. The rest just falls in line.
 

Coach

Mame
Messages
146
Reaction score
223
Location
Kyle, Texas
USDA Zone
8B
Awesome post...thank you for all the detail...loving that vert (and photo shop tip)...great attitude to boot...you make a great teacher, looking forward to the rest!
 
Messages
3,554
Reaction score
4,268
Awesome post...thank you for all the detail...loving that vert (and photo shop tip)...great attitude to boot...you make a great teacher, looking forward to the rest!
Thanks, I appreciate it!
 
Messages
3,554
Reaction score
4,268
Juniper first wiring1.jpg

Here is the final image... and the angle that I chose for the tree! I did take out the pot in Photoshop, cause I felt it was distracting and without it one can get a better sense of what the tree looks like. It obviously needs growing in, in some areas and chasing back in others... But for the first style, the tree is for the most part there!

If one carefully considers the path forward with a piece of material, and makes decisions of what they choose to keep and use to form the tree, based on what was previously mentioned regarding foliage and branching at the beginning of this thread... one should be able to achieve almost a finished image just with the first styling.
As has been done here.

The following are the sides and back of the tree.

Juniper first wiring1side.jpg Juniper first wiring1back.jpg

Lastly, I wanted to say that for me the reason for deciding to go with this angle was two fold... The first being that I felt this design held more interest visually. It also for me told a more interesting story. Secondly, when examining the branching, at this angle, what would turn out to be the lower branch, was thicker in diameter. Which gave a more realistic, feel of the lower branching being thicker, and as one went up the tree, the gradually got thinner.

However... again, no really right or wrong answers! There are many ways to style a tree, and it was great to hear some other views!
I have a second Juniper, that I bought at the same time... That I will be starting on tonight. So, will post it up. I am thinking I will post it here, and just begin a running thread on trees of this nature! Thanks!
 
Messages
3,554
Reaction score
4,268
Juniper first wiring1top.jpg

Sorry, forgot to add top photo, and now it's to late to edit previous post. Anyhow, thought it would be nice to add to the rest.
 
Messages
3,554
Reaction score
4,268
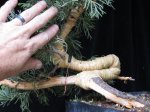
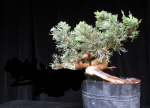
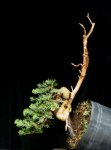
Next up, will be this Juniper Parsoni... This piece of material has some major issues that need to be worked out and a path forward decided on. I will post up some close ups of the inner branching of the tree. It has some nice movement, and multiple paths forward... A lot of very heavy branching, with foliage way out, which is not so good!
Other than the bottom left branch, the tree is almost entirely adult foliage. Seeing that the bottom branch is really to low, has very bad branching, and a ton of juvenile foliage, I have decided to go ahead and remove it, before discussing the tree further.


Juniper2a.jpg Juniper2b.jpg
 
Last edited:
Top Bottom