Pineus Negra Styling

Londog

Seedling
Messages
5
Reaction score
0
Location
Napa, CA
Hello Fellow Bonsai Enthusiast,

This is my first post to the boards as I just found this site a few days ago. I really like what I have been reading and figured I could post what I have been up to with one of my projects. First I would like to introduce myself. My name is Lonnie and I live in Napa, Ca and have been very involved in our local club for the last 3 years. I think that it has taken me this long just to learn to keep trees alive and find where my interest are in this broad art. About a year ago a friend of my gave me a JBP and there has been no looking back. I really love the challenge they present and have been absorbing as much as I can. I would like to share my notes about the tree I have been working on this fall. Please note that I’m very new at this and will be sure to make many mistake, but if there is one thing I have learned about bonsai is that I learn the most by working on trees and doing what I have read about. I will make a series of post about what I have done with the tree so far. I believe this tree is a european black pine, but can be treated the same as JBP when it comes to care and styling.

Pineus Negra

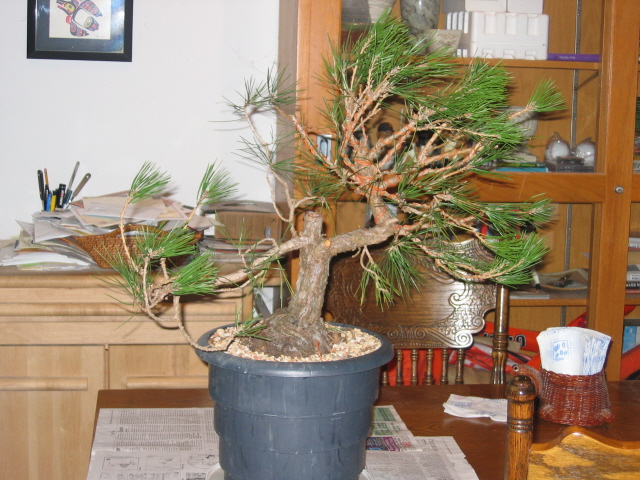
2007 - July: Purchased tree from the Sumagawa growing grounds on a club field trip for $50.00. I like the age of the tree (thick trunk and bark) and nebari. Could not pass it up for the price. It will be a learning tree for me in how to style and develop branches.

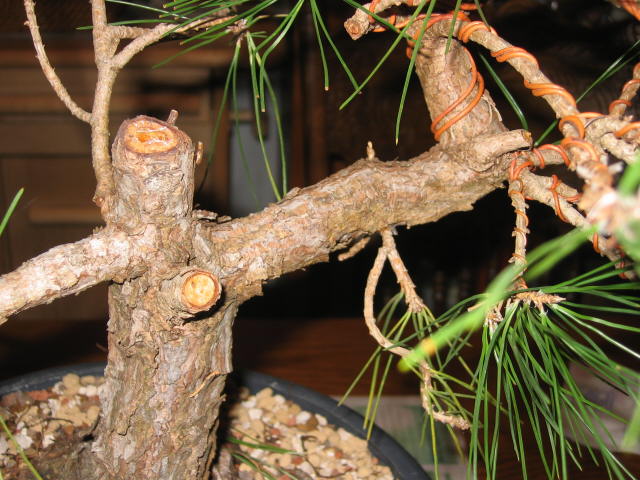
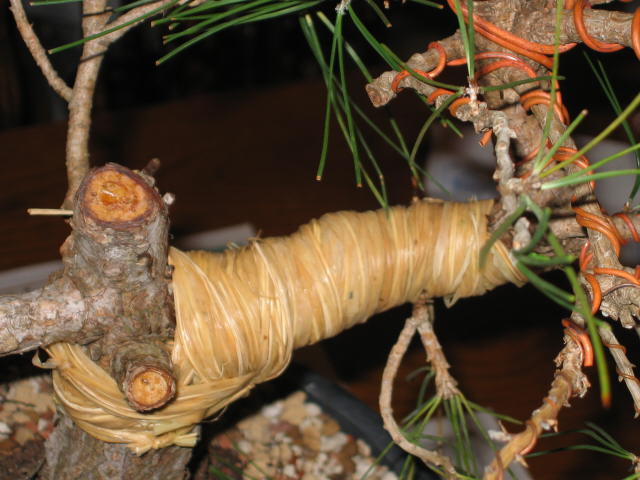
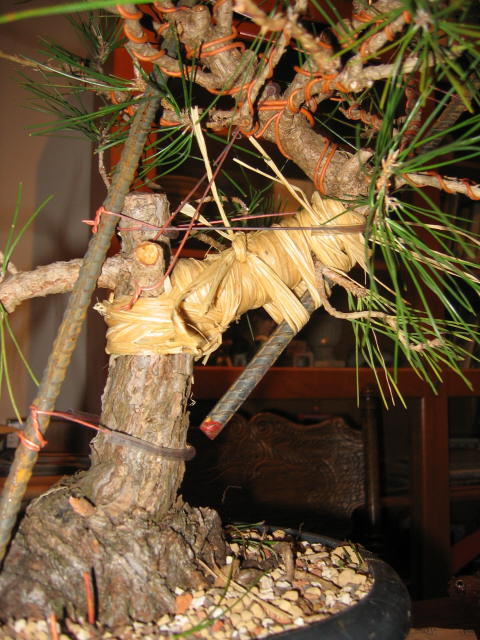
2007 - November 11th - Took the tree to an all day workshop with Marco Invernizzi. He made some comments on what could be done with the tree and we did some major pruning, including cutting the main truck at the first branch. I plan on the tree becoming and informal upright or slanting style.

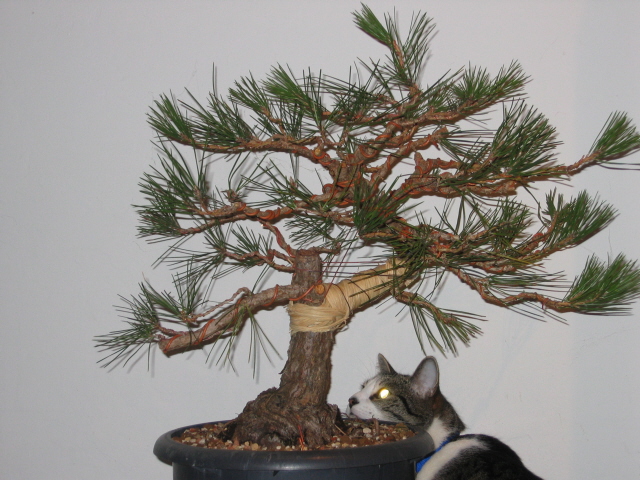
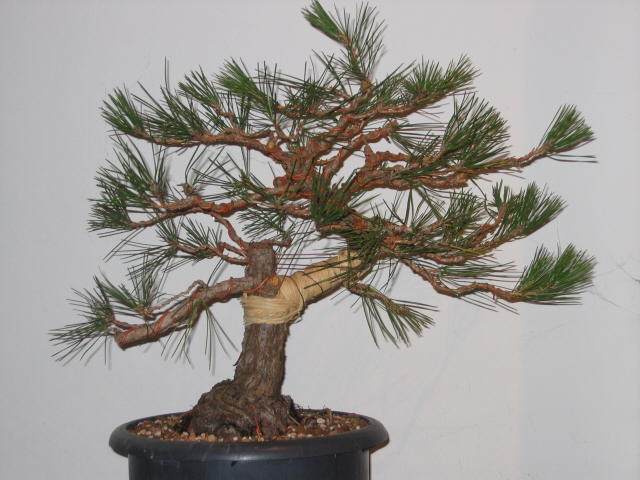
2007 - November 18th - Removed old needles and made two sketches of what I would like to do with the tree. I also put it in a new growing pot with air-layer slots. I did some very light root pruning to get it to fit and change the tree orientation so it leans slightly forward, as it was leaning slightly back when viewed from the front.

Sorry about the background, this is only picture I had:

BP01.jpg


Here are the drawings I made, since then I have changed my mind a little so will need to make a new drawing:

BP03.jpg


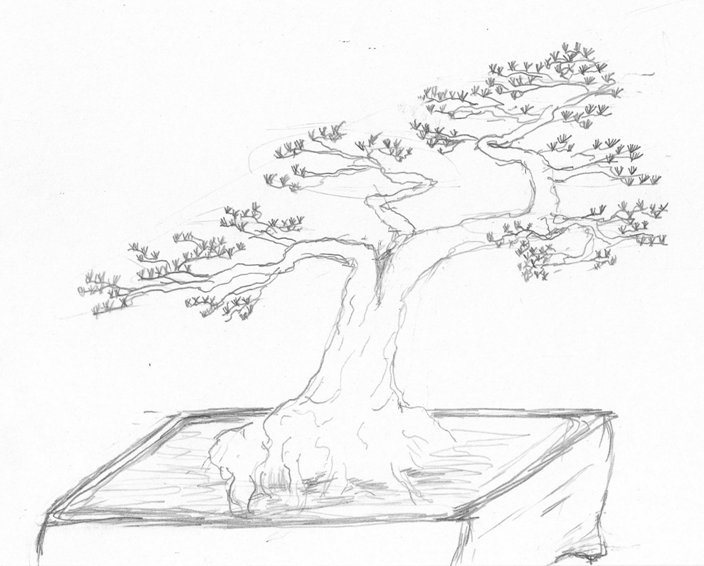
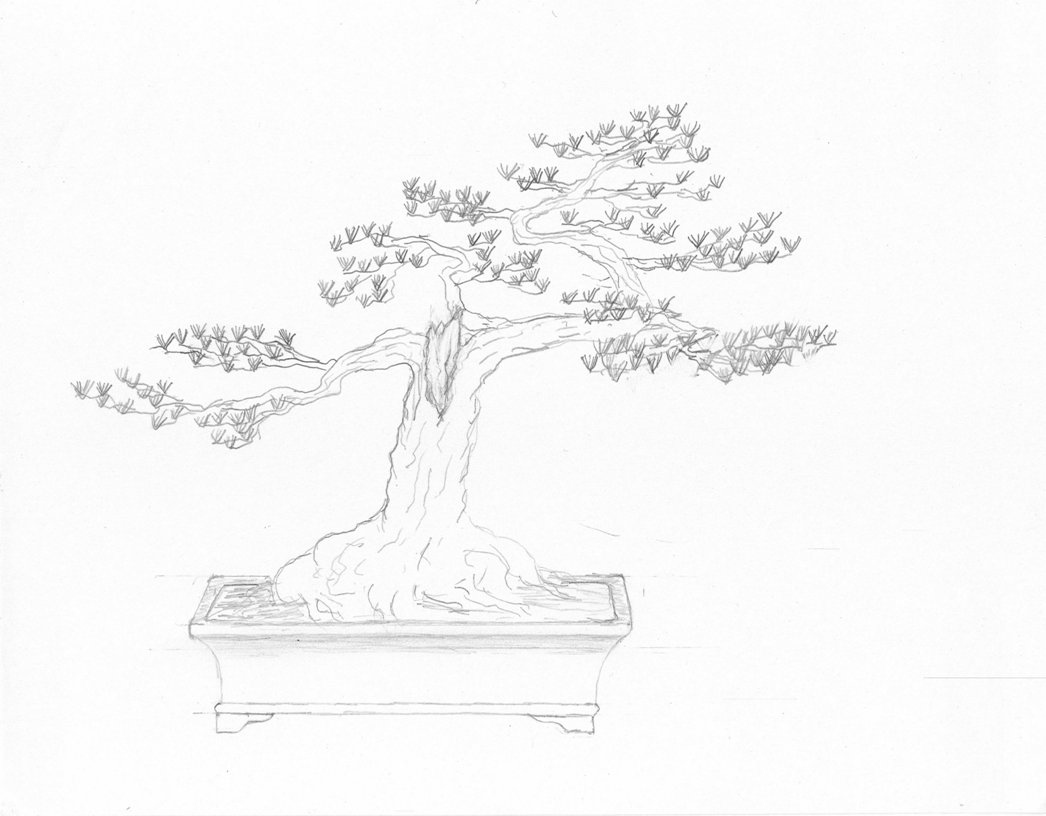
I like this one a little better:

BP05Dwg.jpg
 

grog

Shohin
Messages
385
Reaction score
22
Location
Iowa
USDA Zone
5
Fanfreakingtastic base on your tree. Definitely some curves that need softening but looks like you're addressing those in what you plan on doing down the road. I believe you have a pinus nigra, Austrian pine. To-may-toe vs to-mah-toe probably but that spelling may give you more results to look up info on them. Welcome to the site.
 

Londog

Seedling
Messages
5
Reaction score
0
Location
Napa, CA
Here is a continuation of the work:

2007 - Nov 19th Took the tree to our club workshop with John Thompson lecturing on pines. Wired most of the tree with copper and got John's feedback on the possibilities. He would like to see the large branch on the right to be bent upward a few degrees to get rid of the sharp right angle that exists. He recommended using rebar to do the job and says the branch can be bent I will read up on this and try it in the future either with Gremel or on my own. Otherwise I need to finish wiring and do some rough branch placement and let it grow for the next year.


2007 - Dec 12th and 16th The major styling is underway.

BP04.jpg


This is the before and after shot of the lower branch I wrapped and bent with rebar. I used two guy wires to hold the branch in place. This will now be part of the trunk in a slanting/wind swept style.

BP05.jpg


This is my first attempt at using raffia. I found it fairly easy to use, but was a bit confused about how to tie if off on the end. I let it soak in water and then started left to right and put on two layers.

BP06.jpg


BP08.jpg


Here is the rebar attached and the bend performed. I attached the guy wires and then removed the rebar. I could have bent the branch further, but other branches were starting to interfere (look closely at the left bar attached to the trunk near the top). I learned a good lesson. Next time I need to pay attention the expected final position of the rebar and make sure I can actually make it all the way to where I would like. Also, I was surprised how easy the rebar was to use.
 

Londog

Seedling
Messages
5
Reaction score
0
Location
Napa, CA
Finally the final work. I removed the rebar, and wired all the branches. Here is the photos, one has my cat Quincy, who seems to end up in almost 1/2 my pictures. He just loves to work on the trees with me.

BP02.jpg


BP09.jpg


In reviewing the photos, I don't think I got enough bend in the branch. When I repot the tree. I'm going to tilt the trunk to the right. This will bring the bent branch back to near parallel with the ground. The mistake I made was not bending enough but also not placing the lower guy wire in a good spot. It slipped some and put more pressure on the upper guy wire. This resulted in the upper part of the branch to bend more, which was actually good, as it got rid of a near 90 degree bend, but I lost some of my lower bend in the process. So the goal will be to keep the upper bend as it, while increasing the lower bend a few more degrees.

Overall the tree looks very different from when I first started. I need to find a photo of it before I did any work (just check, and I don't have one, bummer). The branches were mostly just spread out after wiring and I'm hoping for a lot of bud-back this next year. I kept more branches than I need. This will give me more options when I do the next styling.

This tree is a learning tree for me, so I plan on being fairly aggressive in my attempts at styling. But so far I really like the results. I think that this tree shows great potential considering that A) It cost me very little, B) I have never done this before and C) I know just enough to be dangerous!

Doing work like this really has motivated me to learn more. This next year I plan on doing more workshops and taking advantage of some of the great teachers I have near me. I'm getting over the stage of being timid and entering that stage of going for it, and it is a lot of fun.

I hope you enjoy this post as much as I have sharing it.

Lonnie
 
Last edited:

Londog

Seedling
Messages
5
Reaction score
0
Location
Napa, CA
Fanfreakingtastic base on your tree. Definitely some curves that need softening but looks like you're addressing those in what you plan on doing down the road. I believe you have a pinus nigra, Austrian pine. To-may-toe vs to-mah-toe probably but that spelling may give you more results to look up info on them. Welcome to the site.

Thanks for the info on the species, it is amazing at how close all the black pines look. I really pressed the person at the nursery to give me a good name, the needle pattern looks a little different than a JBP, that is about all I can see with my limited knowledge.

Yes, that base was was sold me. I really wanted to get a tree that would inspire me to work on, an this guy has done that by far.

Thanks for the welcome!

Lonnie
 

bonsai barry

Omono
Messages
1,374
Reaction score
58
Location
Cental Coast of California
USDA Zone
9
WoW! I'm impressed. I'm your vision for your tree looks both excellent and attainable. I don't think I would have seen the same tree within a tree. Thanks for sharing.
 

Taylor Brown

Sapling
Messages
47
Reaction score
0
Location
Shady Side, Maryland
USDA Zone
7
Hi Mr.Londog I like your drawings. I have a question. the trunk is very nice. Will you be planting this tree at a different angle in the bonsai pot. I think it would help the long straight branch that is the new trunk. To me it seems to go sideways for a while. Just an idea from a kid :p thankyou for sharing
 

Londog

Seedling
Messages
5
Reaction score
0
Location
Napa, CA
Hi Mr.Londog I like your drawings. I have a question. the trunk is very nice. Will you be planting this tree at a different angle in the bonsai pot. I think it would help the long straight branch that is the new trunk. To me it seems to go sideways for a while. Just an idea from a kid :p thankyou for sharing

Actually Taylor you have pointed out the biggest challenge I think I have with this tree. A few people have made the same comment and most would like to see it tilted to the left to create an informal upright. I'm thinking about doing the exactly the opposite and leaning it to the right some. The reason has to do with the nebari. It is well developed on the left side but not the right, by doing this I can present the best feature of this tree in the best possible manner.

Also, I'm hoping as the tree becomes more compact with back-budding and I get some nice branching developed so I can pull the eye away from some of the hard angles and straightness. On the other hand, this may always be a "problem" and which is okay, my main goal is to lean and get confidence before working on high quality, expensive trees down the road.
 
Last edited:
Top Bottom