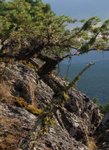
Stub orn Spruce

Wires_Guy_wires

Imperial Masterpiece
Messages
7,291
Reaction score
12,384
Location
Netherlands
I never said I was good at wiring. Cuz I aint. I already know this.
That's not what this is about. I own this spruce with a lot of potential for an OK looking bonsai in between five and fifty years. It's been out of the woods for a year and a bit, maybe even two, I can't remember honestly.. And it's been putting out a lot of buds. It's never going to be a prize winner but I like it.
Right side on the top was reduced a bit more after I took this picture. But also, that's not what this post is about. It's about the damn stub coming from the telephone pole and sticking out. It used to be a piece of dead wood but with the dropping branch it was messing up the look.
I'd like to remove the stub entirely, but I'm not sure how to go at it. I'm thinking about cutting it in a "/" way following the trunk line (from the top downwards). But that would leave a huge open hole, something that I think will be hard to hide on a spruce like this.

Any advice on the stub would be most welcome.

IMG_20200308_185126.jpg
 
I don't think anything will look worse than how it is.

It should could heal if you wanted.

Sorce
 
I never said I was good at wiring. Cuz I aint. I already know this.
That's not what this is about. I own this spruce with a lot of potential for an OK looking bonsai in between five and fifty years. It's been out of the woods for a year and a bit, maybe even two, I can't remember honestly.. And it's been putting out a lot of buds. It's never going to be a prize winner but I like it.
Right side on the top was reduced a bit more after I took this picture. But also, that's not what this post is about. It's about the damn stub coming from the telephone pole and sticking out. It used to be a piece of dead wood but with the dropping branch it was messing up the look.
I'd like to remove the stub entirely, but I'm not sure how to go at it. I'm thinking about cutting it in a "/" way following the trunk line (from the top downwards). But that would leave a huge open hole, something that I think will be hard to hide on a spruce like this.

Any advice on the stub would be most welcome.

View attachment 287527
You have the right idea and have taken the correct first step to leave a stub initially!
I will describe the approach I use, others may differ!
First and foremost, the tree is young and the scar will not be extensive! plenty of time to heal properly while the tree develops.
1. cut at the desired angle as suggested but not flush initially! Leave enough of a stub to shape the edges with a sharp knife and allow for a small concave carving just below the edge and into the center. This allows the bark to close over and maintain a regular contour rather than form a bump.
2. Apply cut paste to the edge first, roll it thin in a string and apply the string to the edge, pressing tightly and rolling in towards the center of the cut. Apply enough cut paste to cover the newly exposed area. Check that the cut paste is well secured around the edges in particular, all air and excess moisture sealed out.
3. I then apply the foil tape over the cut paste, This provides further cover to prevent drying, water coming in or insect issues.
4. Check the scar and recut annually to speed healing! This recut is just to cut a bit of the new cambium and re excite the growth response. At this time I also ensure that there is new cambium all around the scar perimeter, if not I remove enough to ensure that there is live cambium all the way around. For this process is use a small blade or curved chisel. ( very sharp)
5. Replace cut paste and foil cover!

Note: if the scar is larger say in excess of 5 cm diameter than I do the first stage a little differently!
I leave a small stub in the center of the scar for the first year! I still do the edge and slight concave area around the perimeter. Cover and seal the same way. The reason for this is that the stub retains more moisture in the center portion while the edge gets a head start on healing! This helps to prevent too much dieback initially in the center portion.
Second Important Note: The best results are obtained by reworking over time, not trying to get everything done in one fell swoop!

Extra thought! I would introduce some additional movement in the trunk while it is still relatively young and easy to do! Will significantly improve the final result. Hope the above helps.
 
See, the cool old conifers I am used to seeing pretty much always have deadwood stubbs on the outside of trunk bends wherever there is abrupt direction change. It still works with the descending branch because the stub can be seen as old trunk remnant rather than old branch. I don’t see conflict myself anyways...7823E340-6433-4098-A9FE-A6832ECE6422.jpeg1C950C27-50F6-4570-B5E8-A46C37A6391B.jpegDED17C99-F14E-47AA-8EEF-198C6DCEDC4E.jpeg3DB06A1C-442B-4982-B56D-965CFE3680F6.jpeg
 
You have the right idea and have taken the correct first step to leave a stub initially!
I will describe the approach I use, others may differ!
First and foremost, the tree is young and the scar will not be extensive! plenty of time to heal properly while the tree develops.
1. cut at the desired angle as suggested but not flush initially! Leave enough of a stub to shape the edges with a sharp knife and allow for a small concave carving just below the edge and into the center. This allows the bark to close over and maintain a regular contour rather than form a bump.
2. Apply cut paste to the edge first, roll it thin in a string and apply the string to the edge, pressing tightly and rolling in towards the center of the cut. Apply enough cut paste to cover the newly exposed area. Check that the cut paste is well secured around the edges in particular, all air and excess moisture sealed out.
3. I then apply the foil tape over the cut paste, This provides further cover to prevent drying, water coming in or insect issues.
4. Check the scar and recut annually to speed healing! This recut is just to cut a bit of the new cambium and re excite the growth response. At this time I also ensure that there is new cambium all around the scar perimeter, if not I remove enough to ensure that there is live cambium all the way around. For this process is use a small blade or curved chisel. ( very sharp)
5. Replace cut paste and foil cover!

Note: if the scar is larger say in excess of 5 cm diameter than I do the first stage a little differently!
I leave a small stub in the center of the scar for the first year! I still do the edge and slight concave area around the perimeter. Cover and seal the same way. The reason for this is that the stub retains more moisture in the center portion while the edge gets a head start on healing! This helps to prevent too much dieback initially in the center portion.
Second Important Note: The best results are obtained by reworking over time, not trying to get everything done in one fell swoop!

Extra thought! I would introduce some additional movement in the trunk while it is still relatively young and easy to do! Will significantly improve the final result. Hope the above helps.

That was what I was thinking too. But then in a more rigorous approach: damaging the tissue first, peeling the bark and cambium away in vertical strips and forcing it back with a good parafilm wrap. Basically sealing the tree again with its own bark. I know this can be done with spruce, especially this one, since the stuff I peeled from the stub today was still alive and green.
I have an aversion for cut paste since nobody can tell me what's in it and it's pretty expensive around here. I try not to use it.

The lower part of the trunk could use some movement, but the largest gauge wire I can get is rougly 4mm, what I used on the main trunk already. That's not going to help a great deal. I might do a backbone with 4mm wire, then raffia it, then double wire it with the same 4mm. It worked with a juniper twice the thickness, but that one was way more flexible than this rigid piece of spruce.

For now, I'll leave the stub alone, thanks @wireme and @sorce
Maybe I just need some time to embrace it. Before I started working this tree today, it had a nice stub like this. But as you can imagine, it's fighting over visual space with the lowest branch.

IMG_20200308_163759.jpg
 
That was what I was thinking too. But then in a more rigorous approach: damaging the tissue first, peeling the bark and cambium away in vertical strips and forcing it back with a good parafilm wrap. Basically sealing the tree again with its own bark. I know this can be done with spruce, especially this one, since the stuff I peeled from the stub today was still alive and green.
I have an aversion for cut paste since nobody can tell me what's in it and it's pretty expensive around here. I try not to use it.

The lower part of the trunk could use some movement, but the largest gauge wire I can get is rougly 4mm, what I used on the main trunk already. That's not going to help a great deal. I might do a backbone with 4mm wire, then raffia it, then double wire it with the same 4mm. It worked with a juniper twice the thickness, but that one was way more flexible than this rigid piece of spruce.

For now, I'll leave the stub alone, thanks @wireme and @sorce
Maybe I just need some time to embrace it. Before I started working this tree today, it had a nice stub like this. But as you can imagine, it's fighting over visual space with the lowest branch.

View attachment 287557
Hope you try the healing approach you are suggesting! Sounds promising. Would like to see the result. I concur with leaving jins where appropriate and when in proper proportion! Would not recommend that location and size, however. Does not work visually for me! But then it is not my tree.
Look forward to seeing the progress!
 
If this tree were mine I'd leave it as well, spruces look great with little stubs all over. With a bit of peeling fibers it could look great. I'd also get some movement in the lower part, a little bend might be enough. Preferably to the left, that would go great with the upper part and the direction.
 
like this. But as you can imagine, it's fighting

Just as a reference, if the first pic looked like the before pic, I would have said the same thing, and you would have made it true.

I think these simple, "pulling of fibers" will give you the best character for the future.

It's already better, so sitting with it should be way easier than we first imagined. Little at a time!

Sorce
 
Consider taking large set of pliers grip stub and pull down away from main tree. Will leave scar down trunk where bark pulled off for future interest. In addition get 4 guage copper wire(or big enough to bend trunk)and wire trunk down to ground then bend up trunk for more interesting lines. Tree CAN become interesting with little work;).
 
IMG_20200314_170840.jpg
The base trunk is wiggling a bit more, back and forth and a bit to the side. Wiring sucks, but it'll hold. The raffia kind of ruins the picture anyways.
 
Back
Top Bottom