How to make wooden display slab

FrankP999

Shohin
Messages
462
Reaction score
48
Location
Macon, Georgia U.S.A.
USDA Zone
8
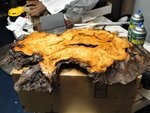
I will soon have access to some scrap & stumps from a small logging operation on a friend's property. I want to make some wooden slabs for display. If anyone has tips or suggestions I would appreciate them, The wood will be mostly pine with an occasional sweetgum or maple.

Thanks folks

Frank
 

Brian Underwood

Chumono
Messages
930
Reaction score
214
Location
Santa Rosa, CA
First, find the most figured pieces of wood, and plane them to a thickness somewhere between 1/4" and 1/2". After they are to thickness, cut into pleasing shapes, and use a rasp, chainsaw, or belt sander, and angle the edges all the way around. Make sure to make your cuts uneven to enhance the illusion of live edge. Burn the edges with a blow-torch, and sandblast. After that, all you have to do is fine sand the tops, and finish with whatever you like best. Hope this helps! -=Brian=-
PS: I will have a new thread on this subject as soon as I get around to working on some of my burl...
 

FrankP999

Shohin
Messages
462
Reaction score
48
Location
Macon, Georgia U.S.A.
USDA Zone
8
I have two round pieces of black walnut about 1.5 inches thick but extremely rough on the surface. I don;t have a power planer. I do have a table saw if you could suggest any safe method utilizing that tool.

Frank
 

Mojosan

Mame
Messages
240
Reaction score
3
Location
Northern Idaho
USDA Zone
6
Frank,

If you're talking about cutting discs from trunks or stumps, they will check severely as they dry. The best thing is to cut slabs with the grain, and then shape as needed.
 

LeonardB

Shohin
Messages
367
Reaction score
316
First, find the most figured pieces of wood, and plane them to a thickness somewhere between 1/4" and 1/2". After they are to thickness, cut into pleasing shapes, and use a rasp, chainsaw, or belt sander, and angle the edges all the way around. Make sure to make your cuts uneven to enhance the illusion of live edge. Burn the edges with a blow-torch, and sandblast. After that, all you have to do is fine sand the tops, and finish with whatever you like best. Hope this helps! -=Brian=-
PS: I will have a new thread on this subject as soon as I get around to working on some of my burl...
I surf ebay for the best figured wood that I can afford. Burl caps are best and can be planed easy to 1/2" and thinner. Best bet and the most successful pieces I have done were kiln dried. If they haven't checked or cracked after that they are your best bet. I am preparing some thin and larger thick pieces for a show this year.
 

Attachments

  • 2020 cherry burlwood slab A.jpg
    2020 cherry burlwood slab A.jpg
    181.3 KB · Views: 42
  • 2020 cherry burlwood slab B.jpg
    2020 cherry burlwood slab B.jpg
    205.1 KB · Views: 44
  • 2020 cherry burlwood slab C.jpg
    2020 cherry burlwood slab C.jpg
    194.9 KB · Views: 42
  • Cherry burl slab-11092019a.jpg
    Cherry burl slab-11092019a.jpg
    202.7 KB · Views: 47

TomB

Omono
Messages
1,139
Reaction score
6,842
Location
S.E. UK
Nice pieces. I like the reddish cherry one. What do you use for finishing - oils or wipe-on poly? Any stains?
 

LeonardB

Shohin
Messages
367
Reaction score
316
Tom,
All my pieces are clear coated to bring out the natural richness of the burl wood ( which is also why I shop so carefully ). I use spar urethane because it is used for wood boats ( weatherproof and uv resistance). I will sometimes use a urethane stain on the sides to enhance the live edge ( and also protect from rot). I personally like the thicker pieces with the knarley bark sometimes still attached. Some customers comment that they look too heavy or overwhelming for most delicate bonsai. I have sold a few of the larger ( thicker) pieces to artists with much larger bonsai trees to compliment each other.
 

TomB

Omono
Messages
1,139
Reaction score
6,842
Location
S.E. UK
Thanks. Always good to know what others are doing. I prefer oils but I often use a varnish on the edge the way you describe.
 

BuckeyeOne

Chumono
Messages
557
Reaction score
522
Location
South Shore of Lake Erie
USDA Zone
6a
I have two round pieces of black walnut about 1.5 inches thick but extremely rough on the surface. I don;t have a power planer. I do have a table saw if you could suggest any safe method utilizing that tool.

Frank
I wouldn't suggest the table saw. No way, no how. If your familiar with its operation, you should know better.
Many have lost fingers and they knew what they were doing!!
 
  • Like
Reactions: n8

LeonardB

Shohin
Messages
367
Reaction score
316
Agreed! But that was a decade ago... He either got stumps or got lucky!
Right, that is why I opened the topic up again. I wasn't making the slabs 10 years ago( but I am now). Maybe someone does have some info to add to the mix.
 

LeonardB

Shohin
Messages
367
Reaction score
316
Thanks. Always good to know what others are doing. I prefer oils but I often use a varnish on the edge the way you describe.
Tom, I have used varnish but find it scratches easier that the urethane. Over time I found the varnish to be spyder cracking and yellowing. Urethane just works better for me all around.
 

LeonardB

Shohin
Messages
367
Reaction score
316
I wouldn't suggest the table saw. No way, no how. If your familiar with its operation, you should know better.
Many have lost fingers and they knew what they were doing!!
Frank, What I have done is to slice thicker pieces in half with my electric chain saw before starting to plane ( less waste and 2 pieces to work instead of one). I hold the slab in my wood vise while scoring with the chain saw. Then I rotate the piece and continue cutting all around until you can't cut any deeper. Leaving the piece in the vise, I finish the cut through with a crosscut saw( very sharp!). I use a planer but have also been successful with a hand held power planer( I found that a hand planer put more stress on the wood and promotes splitting). This method has also revealed better figure inside the slab that was hidden before the cut!
 

LeonardB

Shohin
Messages
367
Reaction score
316
Just finished my thinnest piece to date ( 1/4 " thick). Attached are the progression photos. Anyone making thinner pieces? I would love to learn how.
 

Attachments

  • 4142020 cherry burlwood slabA.jpg
    4142020 cherry burlwood slabA.jpg
    14.7 KB · Views: 23
  • 4142020 cherry burlwood slabB.jpg
    4142020 cherry burlwood slabB.jpg
    35.2 KB · Views: 23
  • 4142020 cherry burlwood slabC.jpg
    4142020 cherry burlwood slabC.jpg
    176.9 KB · Views: 23
  • 4142020 cherry burlwood 12x9 slabD.jpg
    4142020 cherry burlwood 12x9 slabD.jpg
    236.6 KB · Views: 24

TomB

Omono
Messages
1,139
Reaction score
6,842
Location
S.E. UK
Lovely work. I've not seen many thinner than that (even high quality Japanese ones). As you'll know the thinner it gets, the more likely you are to get warping of the wood with temperature changes etc. One method I've used a number of times is to glue a sheet of burl veneer to a planed board (ideally a hard wood like oak, 5-10mm thick depending on the size).
This is my most recent piece - substantially thicker than yours!
IMG_0948.jpeg
 

LeonardB

Shohin
Messages
367
Reaction score
316
Terrific base! Talk about great minds thinking alike I have a manzanita root burl I cut up and it looks like we used the same tree! I have used veneers like you suggested but found luthier 1/4" thick matched sheets much more interesting ( they match them for instrument backs). One set that I received was so full of worm holes that I had to epoxy coat it to keep it in tact. Like you suggested, I glued them to a 1/4" piece of mahogany plywood to finish the back.
 

Attachments

  • 4152020 manzanita burlwood root.jpg
    4152020 manzanita burlwood root.jpg
    133.8 KB · Views: 20
  • spalted wormhole maple 1232018-2.jpg
    spalted wormhole maple 1232018-2.jpg
    254.8 KB · Views: 18
  • spalted wormhole maple 12312018-4.JPG
    spalted wormhole maple 12312018-4.JPG
    172.5 KB · Views: 18
  • spalted wormhole maple 12312018-6.JPG
    spalted wormhole maple 12312018-6.JPG
    146.2 KB · Views: 19

LeonardB

Shohin
Messages
367
Reaction score
316
I tried it again but using a different color epoxy. I sold all those pieces at the next show. Before I sold it I used it under one of my Shimpaku's for a show.
 

Attachments

  • spalted wormhole maple 6222019-3.jpg
    spalted wormhole maple 6222019-3.jpg
    175.7 KB · Views: 20
  • spalted wormhole maple 6222019-5.jpg
    spalted wormhole maple 6222019-5.jpg
    224.9 KB · Views: 17
  • spalted wormhole maple 6212019-4.jpg
    spalted wormhole maple 6212019-4.jpg
    153.3 KB · Views: 15
  • spalted wormhole maple 6212019-6.jpg
    spalted wormhole maple 6212019-6.jpg
    183.3 KB · Views: 19
  • Shimpaku juniper pheonix graft 8112019-bonsai show.jpg
    Shimpaku juniper pheonix graft 8112019-bonsai show.jpg
    138.5 KB · Views: 22

TomB

Omono
Messages
1,139
Reaction score
6,842
Location
S.E. UK
I'll have to look into luthier materials - thanks for the tip. I've made some little jittas from ebony that was intended for mandolin fretboards.
 
Top Bottom