Kintsugi Pot Repair

Lesson Learned - Gilding​

I think I'm going to point out certain things with a header. This go around, I learned a valuable lesson about gilding.

One of the things I learned from posting in the past is when to apply the metal powder. You can always apply it when it's tacky, as I've mentioned before. What I'm realizing now is that the tacky application takes a really accurate observation of when the urushi is starting to become tacky. It can sometimes take minute-to-minute observation to gauge when the surface is turning tacky enough to take on the gilding. I'm now starting to just apply the gilding powder when the surface is wet. I don't really have the patience to do the tacky method, and also, there are actually drawbacks to the tacky method.

DISCLAIMER - THIS IS MY LEARNED EXPERIENCE FROM WAITING FOR THE LACQUER TO CURE TO A POINT WHERE IT IS PAST THE TACKY POINT. CONVENTIONAL SCHOOL OF THOUGHT IS THAT IT PROBABLY SHOULD BE DONE THIS WAY, BUT GAUGING THE CORRECT TIMING IS DIFFICULT.

Here's a visual explanation. This is prepping the surface for gilding.

1747169611420.png

This is an illustration showing the gold as a layer that'll be applied.
1747169656588.png

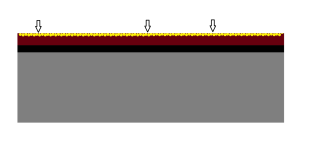
APPLYING WHEN TACKY:
This is when the surface is tacky. The tacky surface is not wet enough to absorb a larger volume of gold powder, but it just sticks to the surface. You'll have to wipe the gold off as you use some material to wipe off the excess.
1747169858835.png

Now we’re wiping away the extra gold. Some of the gold that’s only sitting on the surface might come off too, which can reveal the lacquer underneath. Since the lacquer was still a bit sticky, it didn’t hold much gold, so wiping it shows more of the red base below. That red is important—it adds warmth and depth to the gold, acting as a subtle undertone. If the lacquer had been black instead, the gold would look much darker in comparison. That’s why black is usually used under silver, to create a stronger contrast.
This happens because when the lacquer is over-cured, it loses its tackiness and can no longer hold the gold powder. As a result, when you wipe away the excess powder from these areas, the gold doesn’t stick and is simply removed. This can leave behind patchy spots—or in some cases, entire areas—where the gold hasn’t adhered at all.
1747169740693.png

APPLYING WHEN WET:
It isn't gilded onto freshly painted lacquer. There is a small waiting period of maybe an hour in some preferred environmental condition before you should gild the lacquer. You can see that more of the gold has been absorbed into the lacquer, blending slightly with the layer beneath. The loose gold sitting on the surface will be removed during the polishing process.
1747169763047.png

Once the excess is wiped away, the gold will appear more uniform. The gentle pressure from polishing—such as using a cotton ball—helps compress the gold into the lacquer, allowing the two to bind more effectively and create a smoother, more cohesive finish.
1747169772063.png

TAKE AWAY FROM GILDING "TACKY" OR "WET"
Tacky

The good:
- Less gold is being used.
- Less gilding lacquer is used.
- Less curing time is needed.
- Less gilding time.
- Less curing time AFTER gilding.

The bad:
- Needs extremely optimal conditions to be met to cure the surface.
- Needs minute to minute observation to ensure the surface doesn't over cure.
- Can over cure VERY easily.
- Can wipe off revealing under layer of lacquer if over cured.
- Can easily get wrong.
- Inconsistent lining using more or less lacquer can cause patchy curing of lining/surfaces.
- Takes a long more time to ensure lines are consistent.
- Lining needs to be VERY thin.
- Burnishing needs to be done very delicately, the surface is very thin. Any damage to the surface will reveal the red gilding lacquer layer below.

Wet
The good:
- Still requires a curing stage, but the curing stage can be very short and doesn't need to be tacky.
- Lining can be done quicker, still needs some consistency in the amount of lacquer needed to line but is more forgiving.
- Process in general is more forgiving.
- Burnishing is more forgiving, can take on more punishment.

The bad:
- Uses more metal powder.
- Uses more gilding lacquer.
- More time is required to ensure the lacquer "eats" up all the metal powder to reach equilibrium, meaning the lacquer will no longer take on any more metal powder.
- More curing time AFTER gilding.

In conclusion
The tacky gilding method has always been my go-to because it feels intuitive and straightforward. However, I’ve come to realize that I don’t have enough control over my environment to make it a consistently reliable approach. I tend to over-cure the lacquer quite often, which means I end up redoing large sections of my gilding—sometimes entire projects.

Recently, I had a bit of a breakthrough: wet gilding is far more forgiving and better aligned with the way I work. It allows for more flexibility and reduces the frustration that comes with environmental variables I can’t always manage.

I hope this gives you a better understanding of the differences between these methods—and some insight into the challenges I’ve faced while learning to work with gilding lacquer.
 

Completed Imaoka Machinao Repair

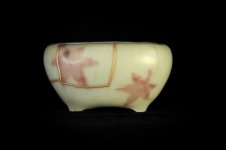
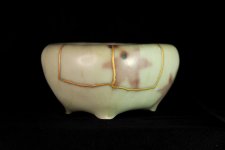
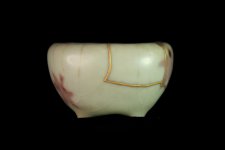
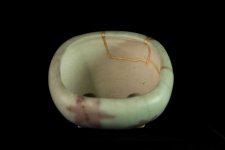
Obligatory glamour shots. This was a really fun project; it was easy, nothing super extensive. The pot was burnished for an extra shine using a glass/stone burnishing tool. Very pleased with this outcome and I have delivered this to my friend; he's definitely happy with the results. Onto the next project.
ezgif-7c28b5906a1574.gif

IMG_1633.JPG

IMG_1632.JPG

IMG_1631.JPG

IMG_1630.JPG
 

Pattern Experiment - Haruyoshi Pot​

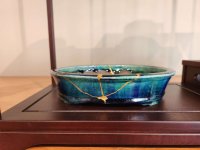
This pot isn't broken. I've been experimenting on pattern creation on top of gilded lacquer. I used this pot to see what the contrast would look like with gold on gold on blue.
Will be experimenting with other designs in the future.

1747589561833.gif

IMG_1668.jpeg

IMG_1665.jpeg

IMG_1666.jpeg

IMG_1667.jpeg
 

PBA - Kintusgi Pots Display​

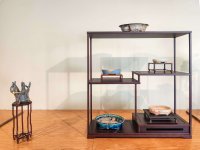
During the PBA (Potomac Bonsai Association) show, I asked if it'd be interesting to put my repaired pots on display, and it was welcomed enthusiastically (mainly because we lacked trees to fill the formal display gallery.) I did have some reservations about displaying these pots, mainly because I repaired a lot of pots and pieces for my clients, and they ultimately went back to them. I sometimes would get a pot from a client who either didn't want their pots anymore, or I'd get them from raffles. That also meant a lot of the pots I have are of low quality/provenance.

But it's a nice practice run for future bonsai shows if I ever show kintsugi pots.
20250510_095814.jpg

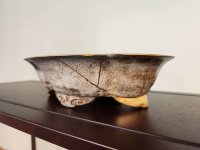
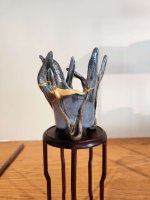
The top piece is probably my most impressive. This is a Minerai pot I've posted previously. It being on top was appropriate, like placing a juniper or pine in that spot.
20250510_100058.jpg

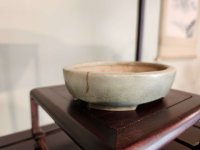
This is a more subtle repair of a small Haruyoshi pot with a crack off to the side. A much earlier repair.
20250510_100033.jpg

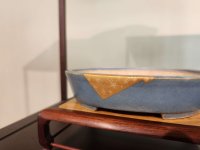
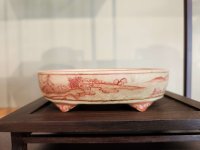
This is the previously posted Haruyoshi pot with a pattern painted onto the test surface.
20250510_100041.jpg

This is a painted Bizan pot. This didn't get posted just yet, but this pot has the entire lower portion of the pot where the entire circumference of the pot was cracked. I have no idea how it happened, but it is uniformly all across the pot. It was also previously repaired once before, but it wasn't really done really well. I went back and addressed the issue. I'll have to post an entry showing what I have done at a later time.
20250510_100049.jpg

The final piece in the box stand was this previously posted Bushuan pot.
20250510_100045.jpg

This piece serves as the Hanedashi outside of the Shoku box. I forget the artist, but this pot was very precious to the client, and it took a very long time to complete. It was also incomplete in many places, which made creating the missing pieces difficult. There was a lot of guesswork involved. I think this piece being used in the Hanedashi was a good choice. The pot ultimately went back to its owner after the show.
20250510_095828.jpg

What I've Learned​

- If I were to submit another display, I would highly consider using pots that are similar in size.
- If I had a chance, I'd have to visit and seek out more broken pots. Either by donation or by paying for them.
- There was a discussion before about whether what I do to these repairs is either restoration or conservation. Either or, how much liberty do I have to do things like add patterns onto of the gilded surface? It may not even be an artistic design; my Minerai pot has an entire missing foot. I've noticed Minerai pots have a unique design with swirls. Should I replicate that, or should I just leave it?
- The placement of these pots can be approached in a similar way trees are placed, nice parallels.
- Pots can indicate movement/directions. It becomes even more apparent with kintsugi joinery.
- Shohin stands seem to be a must. Paralleling the tree approach, stands can make pots larger/smaller with the use of one or without.
- Greater appreciation for the things that are broken. They tell stories, past lives, sadness for the loss, and gratitude for the rebirth.
 

New Pot Acquisition - Shohin Shibakatsu Pot​

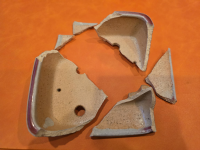
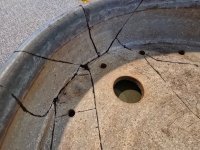
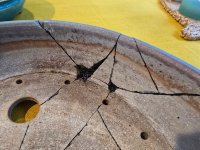
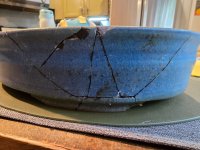
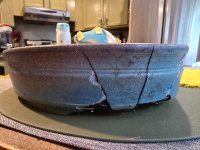
I've received another broken pot that the owner doesn't want to have repaired. Overall repair of the pot far exceeds the cost of the pot. The owner decided to let me keep the pot. It is new and has not yet been used, so it doesn't have a patina, which will mean it'll be easier to repair without much concern for preserving that feature.

1748546194238.png

1748546221154.png

I quite like the red glaze on this pot, it'll be a nice piece to add to the repaired collection.
 

New Pot Repair - Minerai Oval​

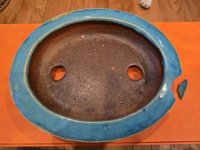
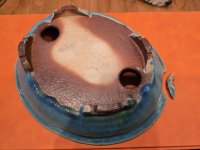
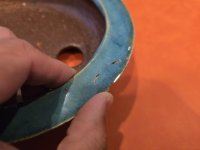
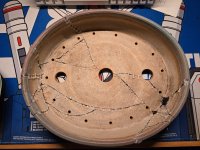
I have a client who has two pots he'd like for me to repair. They were shipped together and were wrapped fairly well; however, one of them arrived MUCH more damaged than before. This Minerai pot came unscathed. This is a pot the owner would like repaired and returned. This is my second Minerai pot and really do love his glazes. I'll post the other pot that was not as lucky.

1.jpg

2.jpg

3.jpg

4.jpg
 

New Pot Acquisition - Mark Issenberg Oval​

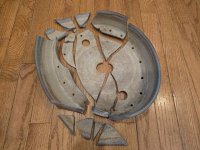
This was the other pot that came with Minerai pot. It unfortunately wasn't packaged well enough and the pot was smashed beyond the original broken state. I've realized that there was a lot of jostling involved because there were some parts where areas of missing pot were broken off and pulverized, likely due to the grinding and violent jostling. I've asked the client if they still wanted to proceed because I had informed him that this pot, if repaired, is destined to be a display pot because, as I've mentioned before, traditional kintsugi is best for shohin-sized pots. Anything over that size, there's a greater risk of failure if put in use. Additionally, the work is now many many times more expensive due to the newly accumulated breaks. The owner said he doesn't want to proceed and I had asked him what he wants me to do with the pot because I can always throw it away, or he can give it to me. He's so generous to let me keep it. This pot repair is worse than the Nick Lenz pot in my previously posted entry.

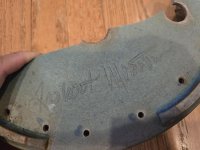
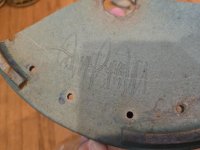
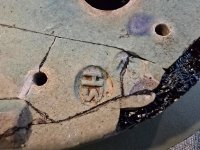
I did a little research and identified the potter to be Mark Issenberg. There are other marks that I'm not familiar with but his signature round stamp was the key indicator.

5.jpg

4dd58e88-56cf-4de6-84b3-8dfb399ec78e.jpeg

f3b71e33-e3f7-49d7-859d-0f43e3974ca5.jpeg

839bac71-f419-422f-8a46-62db2f9ea64d.jpeg
 
Last edited:

Mark Issenberg - Phase I - Assembly​

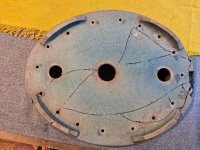
This took about 2 hrs because I wanted to use this project to test my assembly skills with larger pots. I wanted to do it cleanly and accurately. My past assembly on other pots ended up being REALLY messy and I'd track the stains everywhere, leading to me needing to clean up later.
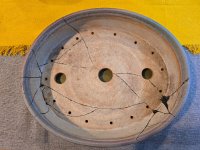
20250528_230953(1).jpg

20250528_231016.jpg

Quite pleased with this assembly process, no track marks and the pieces match very very accurately. Note all the blow out areas. This will sit for a few days and I'll take all the hot glue stitches off.
 

Minerai Oval - Phase I - Assembly​

This was an easy one. This is now back together and it'll cure for a little while. This is going to look pretty nice with a golden core and golden ring around the filled in core.
20250528_231526.jpg20250528_231540.jpg20250528_231551.jpg20250528_231545.jpg
 

Shohin Shibakatsu Pot - Phase I - Assembly​

Standard repair. I'm able to do this without getting anything on my fingers now, so no tracking and staining surfaces.
20250528_231447.jpg20250528_231451.jpg20250528_231455.jpg20250528_231459.jpg20250528_231506.jpg20250528_231514.jpg
Very solid assembly. It's right and it's flush. No tracking = no need to do extra clean up. This will sit and cure for a few weeks.
 

Mark Issenberg - Phase I.1 - Assembly​

The pot is now holding and can stand by itself without the help of the hot glue stitches. I've removed them all and scraped away the excess mugi urushi. Pretty accurate assembly.

There are a ton of areas that's missing because of the pieces being pulverized. Also there's a lot of blow out. This pot is a monster repair.

20250529_190511.jpg20250529_190517.jpg20250529_190528.jpg20250529_190551.jpg20250529_190606.jpg20250529_190626.jpg20250529_190631.jpg20250529_190642.jpg
 
Not bonsai related but this is one of my more labor intensive repairs. Lots of missing bits and pieces on this yixing zisha tea pot. It get's renewed life. Quite proud of this one. It's for my sister's boyfriend. This teapot used to belong to his dad and he's no longer with us. This is a nice sentimental piece.

View attachment 528821

View attachment 528822

View attachment 528823

View attachment 528824

View attachment 528825

View attachment 528826
I can’t believe I haven’t seen your threads until today. As a zisha pot and kyusu collector, I can appreciate this post. I’ve broken several beloved pieces over the years that I wish I could’ve pieced back together with food-grade materials that could also withstand boiling water temperatures. Is kintsugi capable of that? Regardless, beautiful work on this one.
 
I can’t believe I haven’t seen your threads until today. As a zisha pot and kyusu collector, I can appreciate this post. I’ve broken several beloved pieces over the years that I wish I could’ve pieced back together with food-grade materials that could also withstand boiling water temperatures. Is kintsugi capable of that? Regardless, beautiful work on this one.
It depends on how it is broken, but traditional repairs are indeed safe to use with food or water. If you think about it, the Japanese red or black bowls or the black or red bento boxes are all urushi. Once it cures, it is absolutely inert and is food safe. It's when it isn't cured and in its liquid state that the urushi can react with your skin. Once it cures, it does not revert to its liquid state in the presence of water. The only thing I wouldn't suggest you do is to keep it from being submerged for long periods of time. You can definitely use it for tea and bring it up to temperature; however, I'd suggest being quite diligent about emptying the container as soon as you're done.

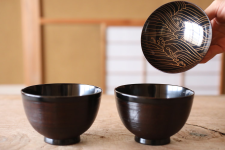
Here's a real-life example of cured urushi you've probably eaten out of. These wooden bowls are lined with many layers of urushi that's cured. They'll serve hot miso soup in these bowls, so this proof of concept that it can take the types of water temperatures needed to make tea.
1755840389187.png

Let me know if you want me to take a look at the item! I've gotten quite good at sculpting very thin walls like zisha pots.
 

Shohin Shibakatsu Pot - Phase II - Filling and Refinement​

It has been a minute since I've updated. There are a lot of projects going on, and I'm trying to complete them in a very short period. In the meantime, the assembly phase for this shohin pot turned out very good. The pieces cooperated and didn't flex or warp due to any pent-up tension. There were a lot of chips in the glazing. Once filled in with sabi urushi, those chipped areas were filled in and sanded down. The surface after sanding is very smooth and very flush.

20250822_013911.jpg20250822_013752.jpg20250822_013813.jpg20250822_013833.jpg20250822_013843.jpg

The next step would be to paint in the polishing urushi to fill in spots where the sabi urushi couldn't fill in. The sanding of these areas was done with a mix of 400-grit sandpaper and a kintsugi-appropriate piece of charcoal I recently acquired.
 
Back
Top Bottom