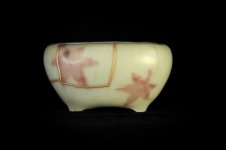
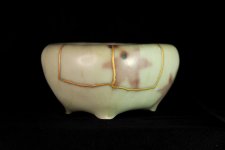
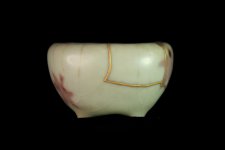
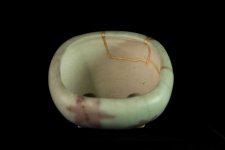
Lesson Learned - Gilding
I think I'm going to point out certain things with a header. This go around, I learned a valuable lesson about gilding.
One of the things I learned from posting in the past is when to apply the metal powder. You can always apply it when it's tacky, as I've mentioned before. What I'm realizing now is that the tacky application takes a really accurate observation of when the urushi is starting to become tacky. It can sometimes take minute-to-minute observation to gauge when the surface is turning tacky enough to take on the gilding. I'm now starting to just apply the gilding powder when the surface is wet. I don't really have the patience to do the tacky method, and also, there are actually drawbacks to the tacky method.
DISCLAIMER - THIS IS MY LEARNED EXPERIENCE FROM WAITING FOR THE LACQUER TO CURE TO A POINT WHERE IT IS PAST THE TACKY POINT. CONVENTIONAL SCHOOL OF THOUGHT IS THAT IT PROBABLY SHOULD BE DONE THIS WAY, BUT GAUGING THE CORRECT TIMING IS DIFFICULT.
Here's a visual explanation. This is prepping the surface for gilding.
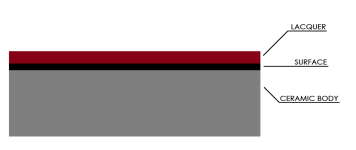
This is an illustration showing the gold as a layer that'll be applied.
 APPLYING WHEN TACKY:
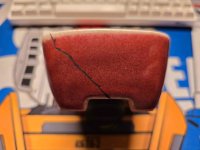
This is when the surface is tacky. The tacky surface is not wet enough to absorb a larger volume of gold powder, but it just sticks to the surface. You'll have to wipe the gold off as you use some material to wipe off the excess.

Now we’re wiping away the extra gold. Some of the gold that’s only sitting on the surface might come off too, which can reveal the lacquer underneath. Since the lacquer was still a bit sticky, it didn’t hold much gold, so wiping it shows more of the red base below. That red is important—it adds warmth and depth to the gold, acting as a subtle undertone. If the lacquer had been black instead, the gold would look much darker in comparison. That’s why black is usually used under silver, to create a stronger contrast.
This happens because when the lacquer is
over-cured, it loses its tackiness and can no longer hold the gold powder. As a result, when you wipe away the excess powder from these areas, the gold doesn’t stick and is simply removed. This can leave behind patchy spots—or in some cases, entire areas—where the gold hasn’t adhered at all.
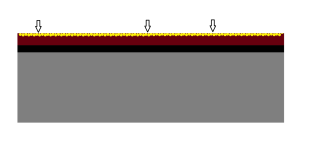 APPLYING WHEN WET:
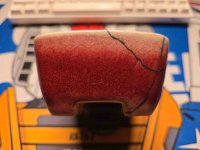
It isn't gilded onto freshly painted lacquer. There is a small waiting period of maybe an hour in some preferred environmental condition before you should gild the lacquer. You can see that more of the gold has been absorbed into the lacquer, blending slightly with the layer beneath. The loose gold sitting on the surface will be removed during the polishing process.

Once the excess is wiped away, the gold will appear more uniform. The gentle pressure from polishing—such as using a cotton ball—helps compress the gold into the lacquer, allowing the two to bind more effectively and create a smoother, more cohesive finish.
 TAKE AWAY FROM GILDING "TACKY" OR "WET"
Tacky
The good:
- Less gold is being used.
- Less gilding lacquer is used.
- Less curing time is needed.
- Less gilding time.
- Less curing time AFTER gilding.
The bad:
- Needs extremely optimal conditions to be met to cure the surface.
- Needs minute to minute observation to ensure the surface doesn't over cure.
- Can over cure VERY easily.
- Can wipe off revealing under layer of lacquer if over cured.
- Can easily get wrong.
- Inconsistent lining using more or less lacquer can cause patchy curing of lining/surfaces.
- Takes a long more time to ensure lines are consistent.
- Lining needs to be VERY thin.
- Burnishing needs to be done very delicately, the surface is very thin. Any damage to the surface will reveal the red gilding lacquer layer below.
Wet
The good:
- Still requires a curing stage, but the curing stage can be very short and doesn't need to be tacky.
- Lining can be done quicker, still needs some consistency in the amount of lacquer needed to line but is more forgiving.
- Process in general is more forgiving.
- Burnishing is more forgiving, can take on more punishment.
The bad:
- Uses more metal powder.
- Uses more gilding lacquer.
- More time is required to ensure the lacquer "eats" up all the metal powder to reach equilibrium, meaning the lacquer will no longer take on any more metal powder.
- More curing time AFTER gilding.
In conclusion
The tacky gilding method has always been my go-to because it feels intuitive and straightforward. However, I’ve come to realize that I don’t have enough control over my environment to make it a consistently reliable approach. I tend to over-cure the lacquer quite often, which means I end up redoing large sections of my gilding—sometimes entire projects.
Recently, I had a bit of a breakthrough: wet gilding is far more forgiving and better aligned with the way I work. It allows for more flexibility and reduces the frustration that comes with environmental variables I can’t always manage.
I hope this gives you a better understanding of the differences between these methods—and some insight into the challenges I’ve faced while learning to work with gilding lacquer.


