Crack pots

ketoi

Mame
Messages
220
Reaction score
2
Location
Northern California
USDA Zone
9b
As I alluded to in another thread. I've been intrigued by "crack" pots, after doing some reading I gave it a try.

1st try, started to show some crackage but not much


2nd attempt, better but pushed to much and it collapsed


3rd, starting to get the hang of it


4th, showing improvement


5th, I'm likin' it


6th, now that's what I'm talkin' about!
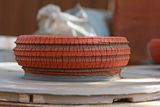
 
Last edited:
I feel so violated :p

Any hints on doing this?
Can you manage an oval or roundcorner rectangular yet?
 
Thanks guys! These pots have yet to be fired so the whole appearance is going to change, hopefully for the better. I'll do a firing on Friday.

This is what was done on the 1st pot
1.Throw the pot as usual
2.leave walls 1/2"-3/4" thick or thicker if you wish
3.Dry the surface with a sponge
4.apply a ball clay slip to the walls and dry with a torch or heat gun
5.push from the inside of the pot while spinning

On the next 5 attempts I added one more step
6. apply sodium silicate to the surface and dry with the torch

bretts,
I haven't tried other shapes yet, but I've seen ovals. In the coming days I going to do some square and rectangular trials.
 
I really like these pots.
 
Thanks for the positive comments.

Made 4 more yesterday, can't wait to get them fired!
 
Nice results you are getting. Looking forward to seeing them after they are fired. Keep up the good work.
 
Made a few more, cracks may be a little excessive but I wanted to so how far I stretch the clay

 
Made a few more, cracks may be a little excessive but I wanted to so how far I stretch the clay

ketoi,

Looks like your getting the hang of it.

Please post a few finished photos.

Regards,
Paul
 
Kool technique, when I saw the name of the thread, I thought I would see a list of poster.

Harry
 
Thanks Ketoi
I have not tried the ball clay yet, have you tried one with just sodium silicate after the slip.
I found the sodium silicate does a great job by itself.
 
I agree on the Ball Clay. It may not be fitted with your clay firing temp. If it has flaked off that could be a sign.

Just food for thought.

I always look forward to your progress and posts!
 
bretts,
The last photo I posted has no ball clay added, just straight sodium and lots of drying.
 
Just thrown

Bone dry with ball clay sample

Fired with slow cool to get more red out of the ball clay slip


I think what impresses me most about some of these pots is the uniformity of the cracking. If you look at it long enough, you can swear that there is a pattern - and yet each crack is uniquely different.
 
ketoi,

Nicely done.

Thanks for posting the finished pots.

It looks like you have a good handle on this process.

Regards,
Paul
 
Same RIO slip as the pots posted above just fired at a different ramp speed. Made this pot for a specific plant, I'll stage and see if if it works and post results.
 
These came out the kiln this morning

Had something else in mind when I was creating this, that approach didn't work but I think I like it better than what I had in mind


Used a slightly different technique on both, can see what I did?
 
Back
Top Bottom